by Mark Nemtsas | Sep 29, 2010 | How To, Tips and Tricks
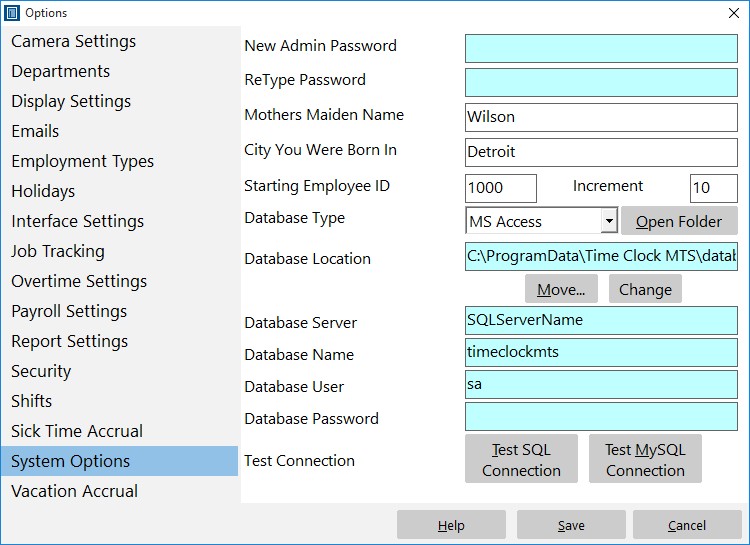
The System Options Screen
It’s a common misconception that the only way to reset your Time Clock MTS password is to use the File->Reset Administrator Password menu. But this menu is for resetting forgotten administrator passwords. If you still know your password and just want to set it to something different here’s what to do.
- Log into the Time Clock MTS Administrator program as the administrator using your password.
- Go to the Tools->Options Menu.
- Go to the System Options Screen (shown in the image above).
- Enter your new password into the Admin Password field.
- Confirm your new password by typing it again into the Re-Type Password field.
- Save the password by clicking the Save button.
Once you’ve done that your Time Clock MTS administrator password will be set to the new value and you’ll have to use the new password to log into Time Clock MTS as the administrator.
by Mark Nemtsas | May 7, 2010 | How To, Tips and Tricks, Using the Software
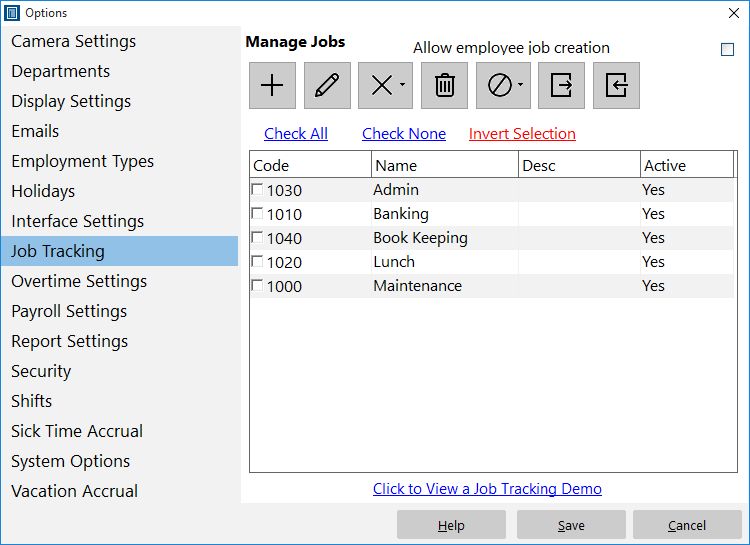
Control and define Time Clock MTS jobs here.
A common question I get asked is “How do I track paid breaks for my employees?”. I’ve never really had a good answer to this question until earlier this week in a flash of inspiration (yes I do have them very occasionally) I realized that anyone could easily make use of the Time Clock MTS Job Tracking features to easily track paid breaks. Here’s how I’d set it up:
- Go to the Job Tracking screen and define a job for each paid break type that you want to track. This might be ‘lunch break’ or ‘coffee break’ or whatever suits your needs.
- Go to the Employee Information screen and set the Job Tracking setting for each employee to “Optional”. When this is set, employees will be shown the “Enter Job Code” screen when they clock in or out but they won’t actually have to enter a code.
- When employees come to work, just have them clock in as normal without entering a job code. When they take a paid break, have them clock out and switch jobs to one of your paid break codes which you defined in step 1 above. When they return from a paid break, have them switch jobs again but not enter a job code (they are back on normal time).
- You can then use Job Time Report to monitor how much time your employees are spending on their paid breaks and ensure there is no time clock fraud occurring.
I hope you find that little tip helpful, it will certainly give employers much tighter monitoring on what their employees are up to with almost no extra administrative overhead being added to the business!
by Mark Nemtsas | Jan 17, 2010 | How To
You may find that you need to move the Time Clock MTS data file manually to a new computer. This could happen because your computer has crashed or because you’ve setup the software temporarily on one PC and then want to move it to a production computer for actual use. This blog entry describes a couple of ways that you can do this.
First some terminology.
Source PC: The computer you want to move the data from.
Destination PC: The computer you want to move the data to.
Method 1 : Using Time Clock MTS to move your Database
- Share a directory on the Destination PC you can access from the Source PC. You will need to allow full read/write permissions on this directory because you’re going to be copying a file there.
- Run Time Clock MTS on the Source PC and log in as the administrator. Go to the Tools->Options-> System Options Menu.
- Move the database to the shared directory on the Destination PC, you can find more information on how to do this in the System Options Help Topic.
- Install Time Clock MTS on the Destination PC.
- On the destination PC open the file timeclock.ini in Windows Notepad. If you’ve got Windows Vista or Windows 7 this file will be in the directory c:\ProgramData\Time Clock MTS\, on Windows XP it will be in the directory C:\Documents and Settings\All Users\Application Data\Time Clock MTS\. Note that you may need to Show Hidden Files and Folders to see this directory whatever version of Windows you happen to be using.
- Once you’ve got the file timeclock.ini open in Windows Notepad look for an entry called DatabaseLoc and enter the path to the timeclock.mdb file you placed in the shared directory you setup in Step 1 above.
- Run Time Clock MTS on the Destination PC, you should now be connected to the database you setup on the source PC.
Method 2 : Manually Moving the Database
- Install Time Clock MTS on the Destination PC.
- Copy the file timeclock.mdb from the Source PC. If you’ve got Windows Vista or Windows 7 this file will be in the directory c:\ProgramData\Time Clock MTS\Database\, on Windows XP it will be in the directory C:\Documents and Settings\All Users\Application Data\Time Clock MTS\Database\. Note that you may need to Show Hidden Files and Folders to see this directory regardless of what version of Windows you happen to be using.
- Paste the file copied above into the appropriate directory on the Destination PC replacing the file that is there. If you’ve got Windows Vista or Windows 7 this directory will be c:\ProgramData\Time Clock MTS\Database\, on Windows XP it will be c:\Documents and Settings\All Users\Application Data\Time Clock MTS\Database\. Note that you may need to Show Hidden Files and Folders to see this directory whatever version of Windows you happen to be using.
- Run Time Clock MTS on the Destination PC, you should now be connected to the database you setup on the source PC.
by Mark Nemtsas | Nov 17, 2009 | How To, New Features, Using the Software
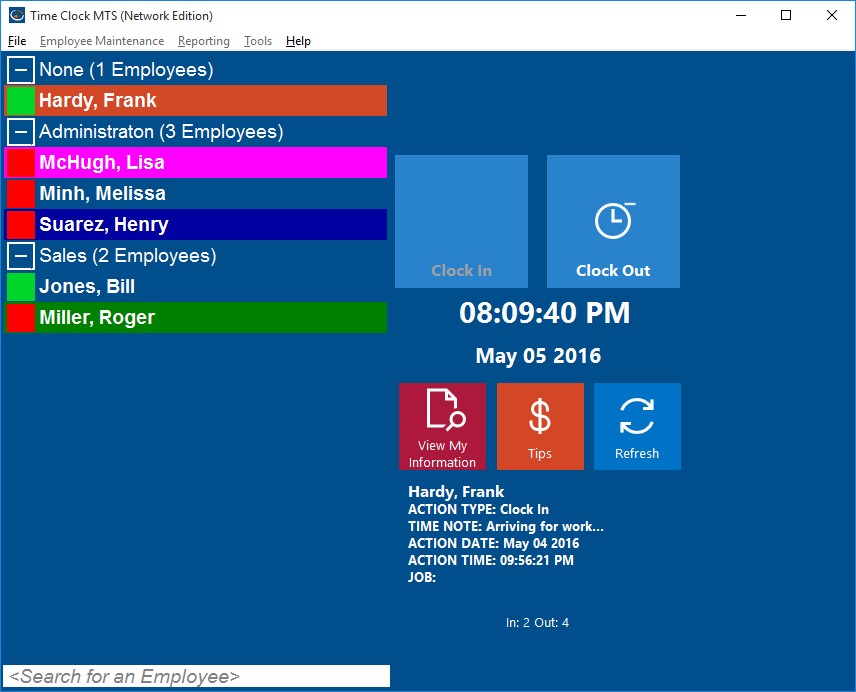
Employee List with Department Folders
Version 2.5.0 of Time Clock MTS included an interesting new feature that allows you to split the Employee List Interface into departmental folders. This can be extremely useful if you have a lot of employees or if you have separate Time Clock MTS client stations located around your business on a department by department basis. In the screenshot above you can see how the employees are split up by department and that the department groups can be expanded or collapsed as required. Time Clock MTS will remember which departments you have expanded or collapsed when you restart the software so you can setup (for example) a single Time Clock MTS Client to just display the employees from a single department.
Turning on the department folder view of Time Clock MTS is very easy. Just login as the Administrator and then go to the Tools->Options->Interface Settings page. When you’re on this screen check the Dept. Folders on Employee List checkbox and then click the Save button to commit the changes. When you return to the employee list you should see that it is now split up by departments. Of course you’ll need to have some departments defined and have assigned your employees to the departments.
by Mark Nemtsas | Oct 14, 2009 | How To
We received an interesting email today that contains a little tip that could be handy to some Time Clock MTS users.
When we print a summary report of all employees it prints each employee on a separate sheet, can it print them all on one sheet (or as many as it can fit)?
My Reply:
Go to the Tools->Options->Report Settings page and uncheck the ‘new employees page break’ setting.
If you’re wondering what page this is you can take a look at the Report Settings Help Topic for more information. Putting a page break in between employees on reports was one of the most requested features for the software, and wouldn’t you know it as soon as it was changed people started asking for it to be changed back! Now Time Clock MTS has the flexibility to print reports either way.
by Mark Nemtsas | Sep 15, 2009 | How To, Using the Software
A lot of businesses either want to track employee costs based on what tasks they’re working on, or perhaps on a customer based project by project basis. In Time Clock MTS we call this ‘job tracking’. This Time Clock MTS How To Article describes how to easily setup Time Clock MTS to track jobs in your employee time clock and then leads you briefly through the process of how an employee would record their time against a job as they use Time Clock MTS.
Creating and Editing Jobs
Step 1 : Defining Jobs
Firstly log into Time Clock MTS as the administrator. How you log in as the administrator was covered in this Time Clock MTS How To Article. Once you’ve done this go to the Tools->Options->Job Tracking screen, where you’ll see the screen above. To create a new job just click the new job button and you’ll be shown the screen below.
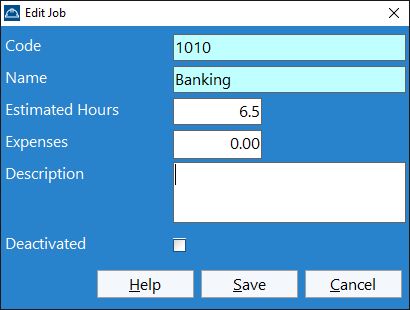
Creating a Job
To create a job give it a unique numerical job code, give the job a name, and if you like a description. If you do not have your own job numbering system Time Clock MTS will automatically assign each new job a unique job code. You can also disable a job to prevent employees booking time to that job. This might be useful if you’re just setting your system up, or your customer isn’t paying you for that job anymore, or perhaps your internal budget for a project has been exceeded.
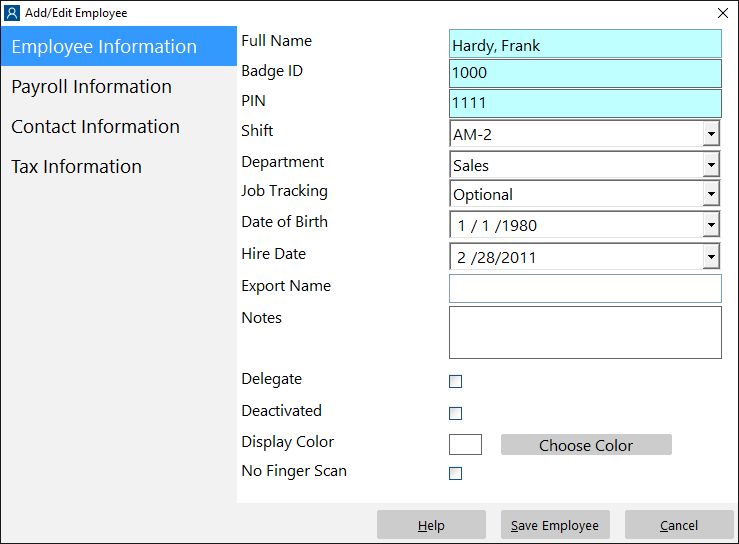
Employee Details
Step 2 : Deciding Which Employees will Use Job Tracking
The next step is to decide which employees will have to use job tracking and how they will use it. Select an employee on the employee list and go to the Employee Maintenance->Edit Selected Employee screen (which you can see above). On the employee information screen use the job tracking drop down box to define how an employee will use job tracking. They can either not use it, use it optionally (they can choose not to enter a job code when they clock in) or must use it (they must enter a job code when they clock in).
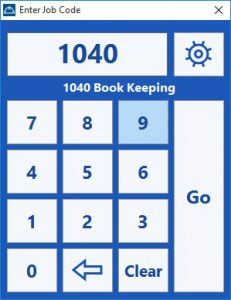
Entering a Job Code
Step 3 : Employees Entering Job Codes
Entering job codes for employees couldn’t be any easier. When employees clock in they’ll be shown the enter job code screen above. Employees need to enter the job code for the job they want to book the time to either via keyboard or via the numeric buttons on the screen (with a mouse click or via a touchscreen). Time Clock MTS will try to auto complete the job code for the employee and show the job details so that the employee is sure he or she is booking their time to the correct job. It would be very useful to have printed out the Active Job Report and have this next to your Time Clock MTS computers so that the employees have a readily available list of the jobs they can book time to.
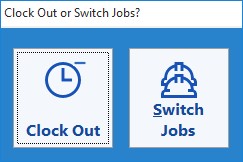
Switching Jobs
Employees can quickly switch jobs by clocking out of Time Clock MTS (via either the employee list or keypad screens of Time Clock MTS). The screen above will be shown to employees where they can either clock out or switch jobs. If they switch jobs the enter job code screen will be shown again and the employee can enter a new job code and switch to a new job.
Step 4 : Reporting on Jobs
The Job Time Report provides the Time Clock Administrator with all the information they’ll need to understand how time is being booked to jobs. It shows a break down of each job defined in Time Clock MTS, and how much time each employee has logged against each job.
