by Mark Nemtsas | Apr 13, 2018 | How To, Using the Software
Heartland, one of the world’s biggest payment processing companies offers a comprehensive and time saving payroll processing service. We’re happy to say that Time Clock MTS can export data easily to Heartland Payroll. Here’s the step’s you’re going to need to take:
First Step – Match Employee Badge Numbers
The export file uses the Badge ID to match the Heartland Employee Number. You’ll need to make sure that your Time Clock MTS employee Badge ID (set on the Employee Information Screen) is identical to the Heartland Employee Number. The Heartland Employee Number is available from your Heartland Employee Masterfile.
Create the Export Format
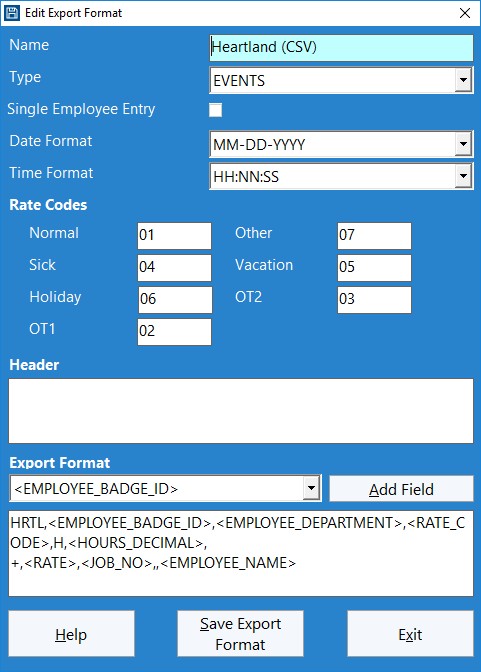
New Export Formats can be created on the Reporting->Data Export->Export Formats screen (view help topic for this screen). Navigate to that screen and create a new export format. You’ll then be shown the Add Export Format screen (see below).
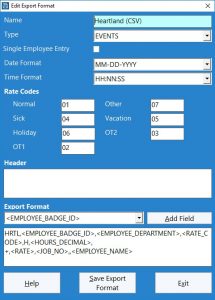
Heartland Payroll Export Format
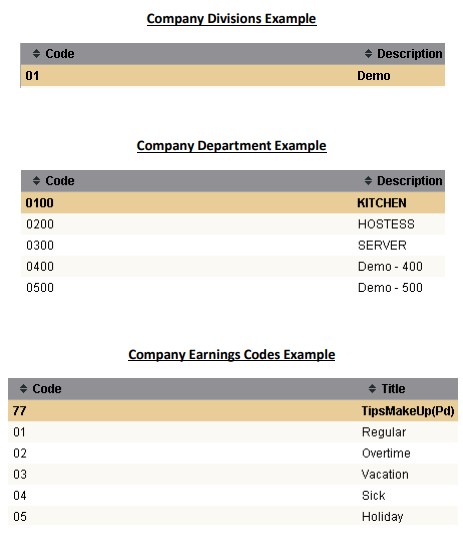
Give the export format a name and then set the type. Heartland Payroll can use either an aggregate or event type export format. However, if you want job tracking data exported you’ll need to use the EVENT based format. Once that is set you’ll want to match up your the rate codes in Time Clock MTS with the Heartland Company Earnings Codes. The Company Earnings Codes might look something like those shown below:
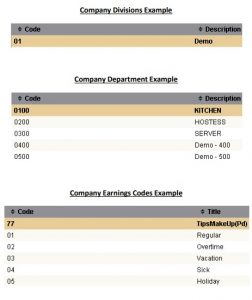
Heartland Payroll – Rate Codes, Divisions, and Departments
The Heartland export file doesn’t require a header so you can leave that field blank. The final step to take is to create the actual export line format. Here’s what Heartland needs:
“HRTL”,”<EMPLOYEE_BADGE_ID>”,”<EMPLOYEE_DEPARTMENT>”,”<RATE_CODE>”,”H”,”<HOURS_DECIMAL>”,”+”, “<RATE>”,”<JOB_NO>”,””,”<EMPLOYEE_NAME>”
The first field “HRTL” is an example Heartland company identifier, used if your payroll account has multiple companies. The exact identifier you need to use is available from your Heartland account details and will be different to the example identifier we’ve used here. Note also that we’ve included <JOB_NO> to allow you to track activity against Heartland departments (for example KITCHEN, HOSTESS, SERVER etc) but this field can be omitted if required.
Once you’re happy with your export format click the Save Export Format button and you’re done.
Export the Data
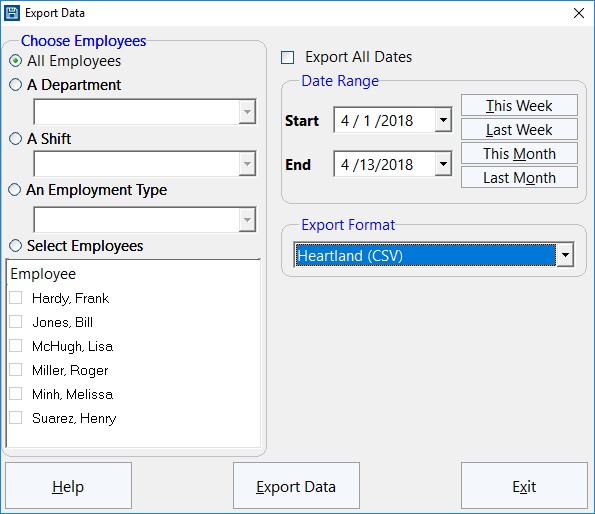
To use your new export format to export time clock data to Heartland use the Reporting->Data Export->Export Data screen.
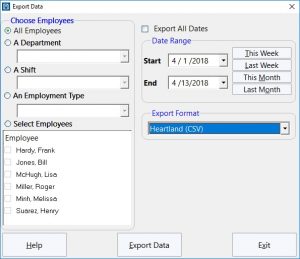
The Export Data Screen
by Mark Nemtsas | Mar 17, 2018 | Tips and Tricks, Using the Software
Last weekend’s change to daylight savings time highlight a potential problem with Time Clock MTS if you do not have your Windows time settings set correctly. Here’s the steps that had to be taken to see this issue show up:
- You’re using Time Clock MTS with an internet time server.
- You DO NOT have Windows set to adjust the time automatically for Daylight Savings Time.
- To correct the time on the computer you manually adjust the system clock forward an hour.
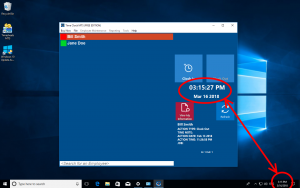
- The time display in Time Clock MTS is now 1 hour BEHIND the time shown on the system clock (see below).

Time Clock MTS clock 1 hour behind system clock
Fixing the problem is simple enough. Just take the following steps:
- Set the system time on your computer BACK one hour. It should now be one hour behind the actual time.
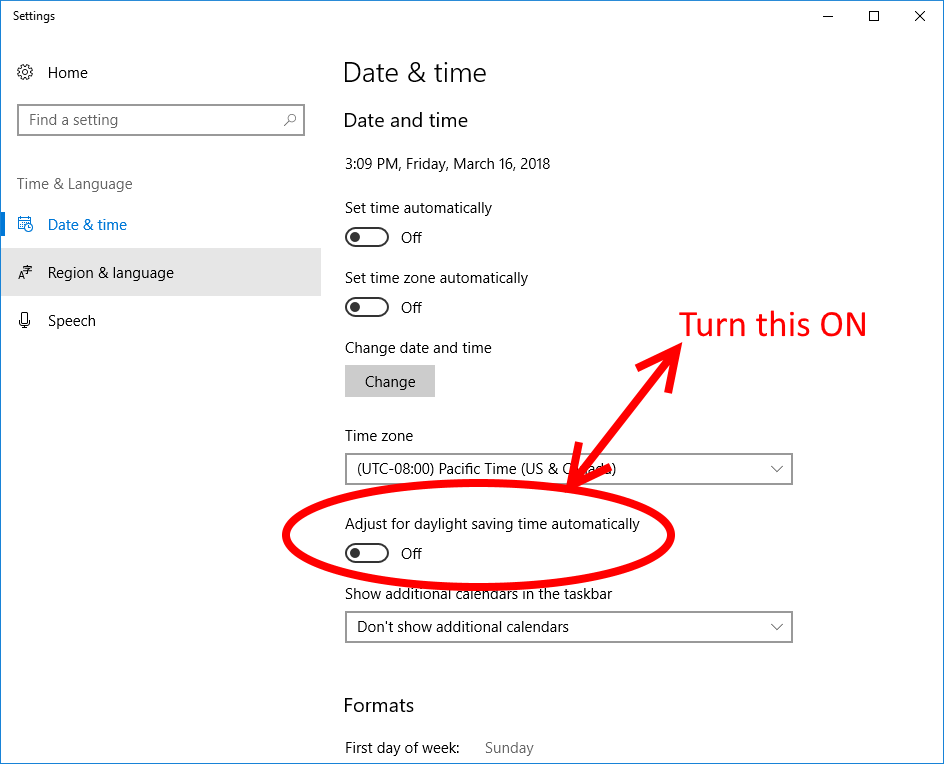
- Change your Windows settings to allow it to adjust the system clock automatically for Daylight Savings. See the image below for how this is done in Windows 10.

Setting Windows to Automatically Adjust for DST
You should find now that the clock in Time Clock MTS matches the computer system clock.
Time Clock MTS clock matches system clock
by Mark Nemtsas | Feb 13, 2018 | Tips and Tricks, Using the Software
This Time Clock MTS How-To guide explains how to restrict the employees displayed on the Time Clock MTS Client Software to a single department. This is useful if you do not want employees from one department seeing employees from another department when punching in and out. It’s even possible to create a department per employee and restrict display to a single employee per time clock computer. Here’s the steps to follow to restrict the employees displayed on the time clock client software to one department:
Create Departments and Assign them to Employees
To learn how to create and assign employees to departments take a look at this how to guide.
Show Department Folders
The next step is to display department folders on the time clock employee list. To learn how to do this take a look at this how to guide.
Configure the Time Clock Client Software to Display a Single Department
On the computer where you want to restrict display of employees to a single department start up the Time Clock MTS Client program. You’ll see that all employees and departments are displayed as per the image below:
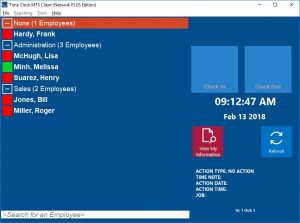
All Departments Visible
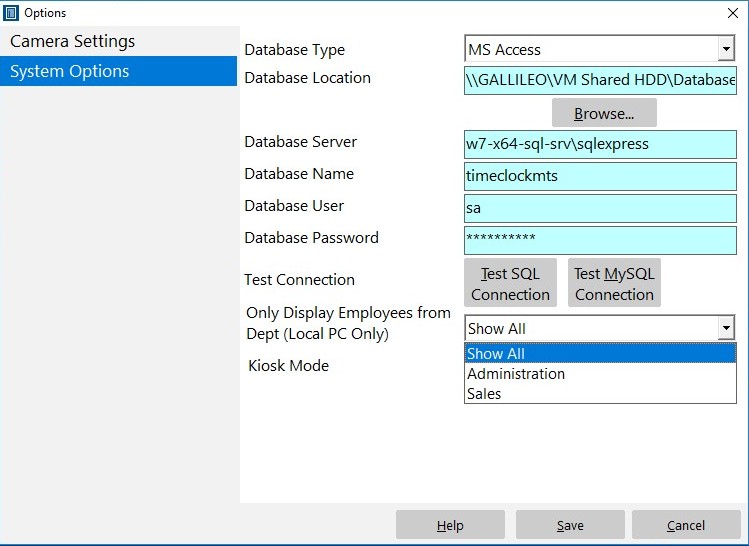
To select a department to display Log in as the Administrator and go to the Tools->Options->System Options screen. Toward the bottom of the screen is a drop down labelled Only Display Employees from Dept (Local PC Only). Click that and select a department to display. See the image below for a visual explanation:
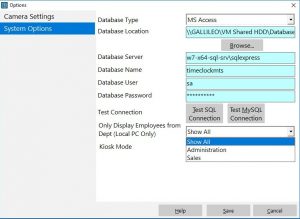
The System Options Screen
Once a department is selected click the Save button and log out of the administrator account using the File->Log Off of Administrator Account menu. The list of employees will refresh and you’ll see that only the employees from the selected department are displayed. See the image below.
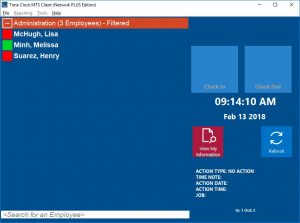
Only One Department Visible
Note that the parent department on the display has Filtered next to it to remind you that you’re seeing a filtered display of employees. Note also that the filtering ONLY takes place when you’re not logged into the Administrator account.
by Mark Nemtsas | Dec 28, 2017 | Tips and Tricks, Using the Software
This Time Clock MTS How-To guide was the result of this question by a Time Clock MTS User:
I have multiple companies under the same timeclock. How do I assign employees to a specific department? Employees are always in the same department. We do not mix the 2 departments at all.
So, how do you set up departments, assign them to employees and then report on those departments? This how-to-guide covers the entire process.
Managing / Creating Departments
The Tools->Options->Departments screen can be used to create and manage any number of departments in Time Clock MTS. Add, edit, or delete departments using this screen. The Manage Departments screen can be seen below in the process of adding a new department called “Manufacturing”.
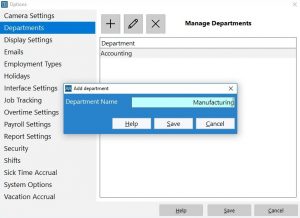
Adding a New Department
Assigning an Employee to a Department
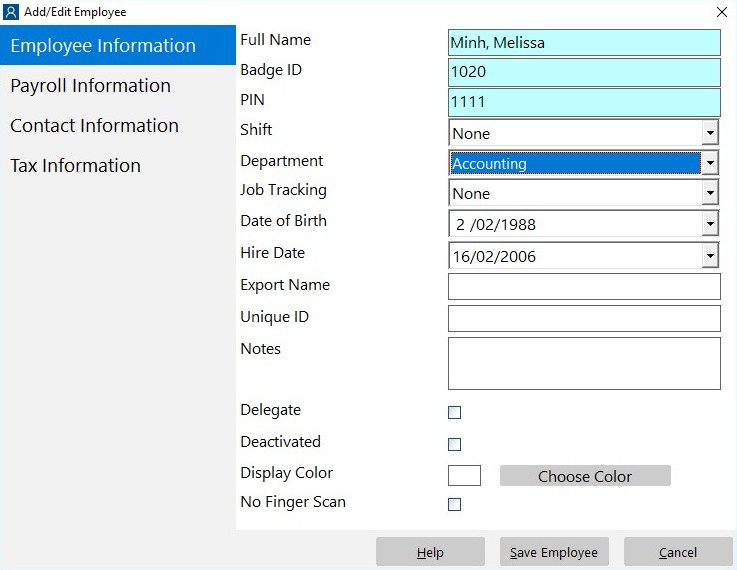
Assign your employees to the correct department once you’ve created your company department list. This is easily accomplished by selecting the employee you want to edit and going to the Employee Maintenance->Edit Selected Employee->Employee Information screen. On this screen towards the top is a dropdown box containing each of your departments. Just select the department you want your employee to work in from this drop down and click the Save Employee button. Below you can see what this screen looks like while we’re assigning an employee to the “Accounting” department.
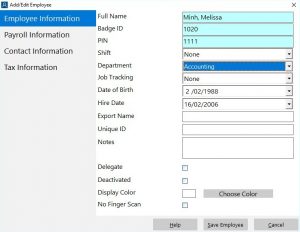
Assigning the Employee to the Department
Running a Payroll Report for a Department
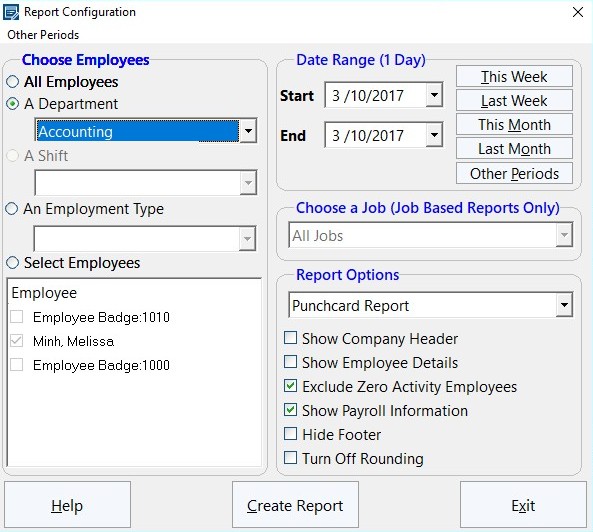
You’re going to want to report on their activity once you’ve got employees assigned to a department and they are punching in and out of Time Clock MTS every day. This is usually done by running a payroll report from the Reporting->Payroll Reports menu. Select a department from the Department drop down box at the top left of the Report Configuration screen (see image below). Making a selection from this drop down allows you to filter any report by department.
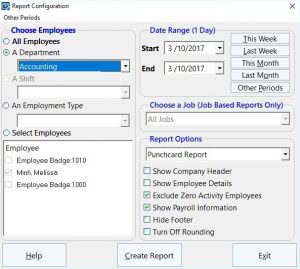
Running a Departmental Payroll Report
Some payroll reports are specifically designed to create departmental information. These include the Departmental Wages Report and the Simple Wages (Departmental) Report.
That concludes this how-to article. It should be noted that this method will only work if your employees always work in one department. If your employees split their time between departments then you’d want to use the Time Clock MTS Job Tracking System. If, for example, you’re a restaurant and your employees split their time between front-of-house and the bar then you could create a job called “front-of-house” and one for “bar” and have your employees punch in and out each job as required. But that is really the subject of another how-to article!
by Mark Nemtsas | Dec 7, 2017 | User Testimonials, Using the Software
We were recently happy to donate a license of Time Clock MTS to the the Central New York Society for the Prevention of Cruelty to Animals. Fred Legawiec, a volunteer for the Society has been kind enough to write a few works about how they’ll be using the software. You can find Fred’s words below:
First and foremost, Thank you very much and I gladly accept the terms of the donated license. Here are the plans for the stand alone time clock in regard to the Central New York Society for the Prevention of Cruelty to Animals. (CNYSPCA):
As a volunteer for the CNY SPCA, I was asked to bring the hour logging of volunteers into the 21st century. Presently the SPCA uses three large binders that volunteers sign in their time in and time out hours on individual sheets! Not fun compiling the hours used! I looked at dozens of PC time clock programs but almost all were lacking in detailed reports. I read a review of MTS time clock program and downloaded the trial version! Perfection Personified!! It was exactly what we were looking for. Very simple to use, point and click clock in and clock out functions, fantastic report functions that allow for detailed reports by job function, flexibility that allows for main screen label changes. Our goal is to be totally PC functional by 1-1-2018 and thanks to MTS, it is within our reach!! With over 250 volunteers, the productivity just increased threefold for our organization. Great program for volunteer non-profit organizations that hope to utilize their volunteers to the maximum. Thank you MTS!! Fred Legawiec, Central New York Society for the Prevention of Cruelty to Animals.
by Mark Nemtsas | Jul 26, 2017 | Using the Software
Below are some instructions showing how to give Time Clock MTS a quick test. If the software fails at any time during the test please email any error messages to support@timeclockmts.com. Screenshots of any failures would be handy too. If you’ve got any general comments such as if the software is horrifically slow please let me know what they are,
1) Download Time Clock MTS from this link
2) Install the downloaded file. Read these instructions if you’re not sure how to install the downloaded file.
3) Run the software, the first screen you’ll see is the initial setup screen for Time Clock MTS (see below). Enter a password you’ll remember into the Administrator Password and Please Retype text boxes and then click SAVE. Ignore any warnings.

Setup Screen 1
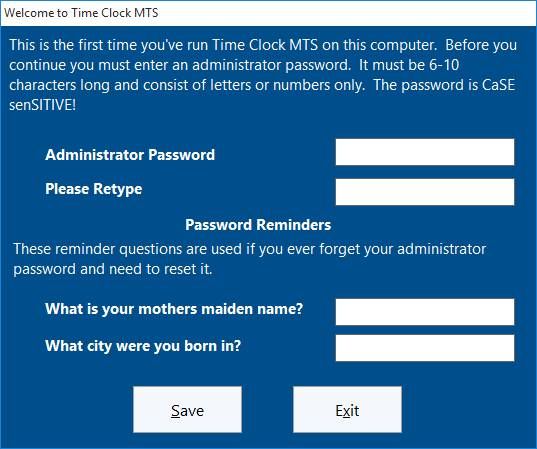
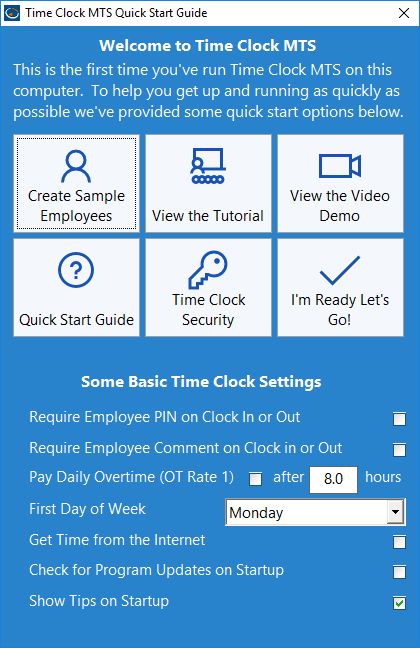
4) You’ll then be shown the Welcome to Time Clock MTS screen (see below). Click the Create Sample Employees button. Once you’ve done that click the I’m Ready Let’s Go! button.

Welcome to Time Clock MTS
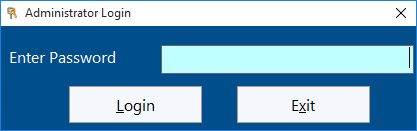
5) Log into Time Clock MTS by clicking the File menu at the top left of the application window and then clicking the Log in as Administrator menu item. You then be shown the screen below where you can enter your password that you entered in Step 3 above. Click the Login button when you’ve entered your password.
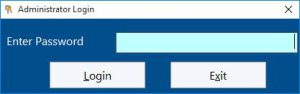
Administrator Login Screen
6) Once you’re logged in you’ll asked if you want to check for a new version. Click the NO button.
7) Click the Reporting menu and then the Employee ID Report option.
8) After a second or two you should see a screen that looks something like that below. If you do see that screen then that’s it, you’re done. Close down Time Clock MTS and uninstall it! Thanks for your help.
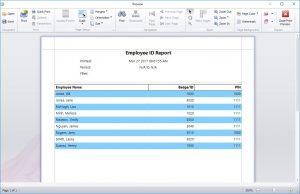
The Employee ID Report
Page 1 of 2312345...1020...»Last »