by Mark Nemtsas | Aug 18, 2009 | How To
As a Time Clock MTS administrator it can be useful to have a printed list of all the employees currently in the system. This Time Clock MTS How To Article covers how to quickly and easily generate a report showing a list of all employees and their pin numbers.
To view a report showing all employees currently stored in Time Clock MTS just follow the simple steps below.
- Log into Time Clock MTS as the administrator. How you log in as the administrator was covered in this Time Clock MTS How To Article.
Print an Employee List Step 1
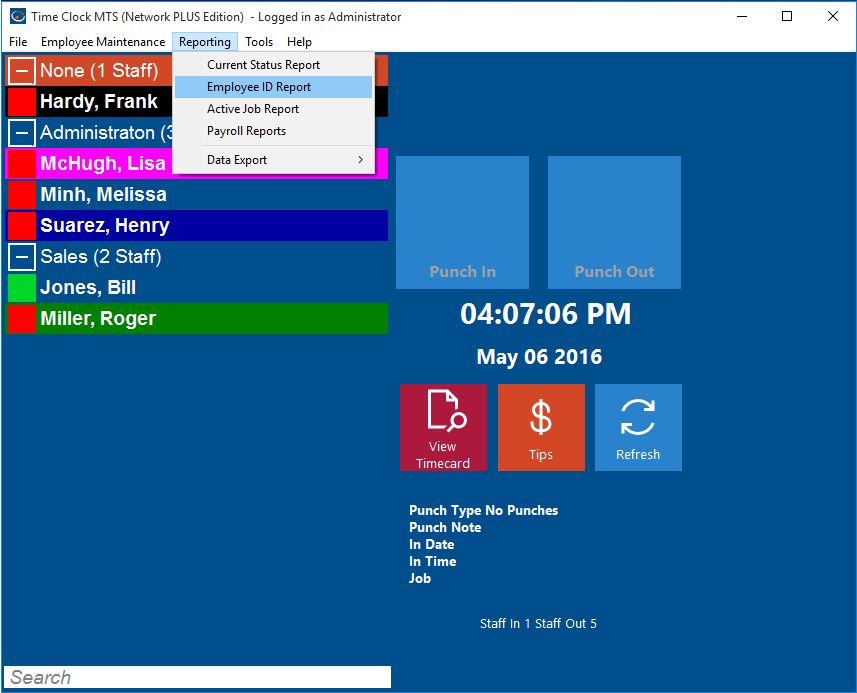
- Go to the Reporting->Employee ID Report Menu
- You’ll now be shown the Employee ID / Badge Number report. This report is simple to understand, it just shows a list of all employees in Time Clock MTS sorted alphabetically along with their badge numbers and PINs. The report can be exported or printed easily by just clicking the appropriate buttons at the bottom of the reporting screen.
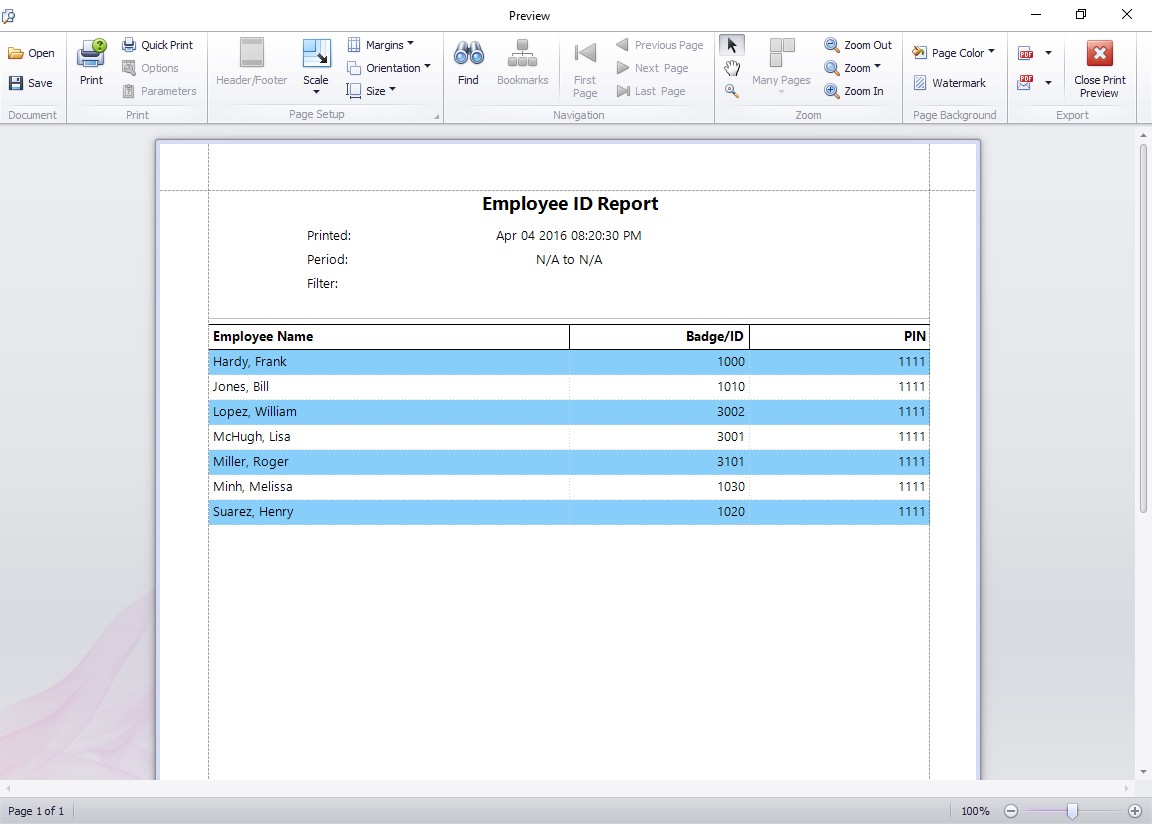
The Employee ID / Badge Number Report
That’s all there is to it, if you require more information you may like to take a look at the Badge Number Report Help Topic.
by Mark Nemtsas | Jun 15, 2009 | How To
From time to time it may be necessary to delete an employees’ Time Clock MTS account. Most likely this would be be because the employee has left the company and you no longer have any need for their time and attendance records to be reported on in Time Clock MTS. This Time Clock MTS How To Article covers how to delete a Time Clock MTS employee.
To delete an employee in Time Clock MTS just follow the steps shown below.
- Log into Time Clock MTS as the administrator. How you log in as the administrator was covered in this Time Clock MTS How To Article.
- Click on the employee in the employee list that you want to delete.
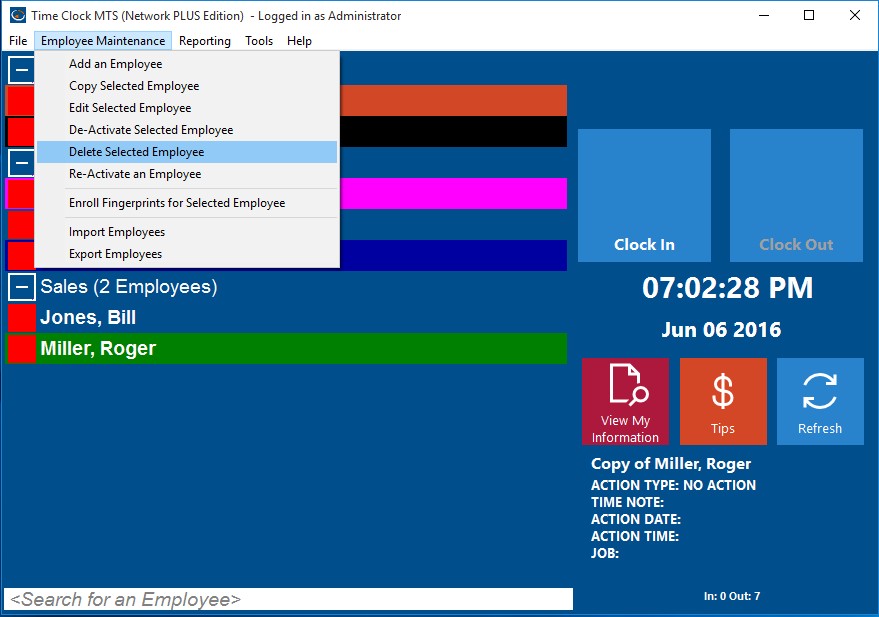
Deleting a Time Clock MTS Employee
- Once you’ve selected the employee go to the Employee Maintenance->Delete Selected Employee menu. This is shown in the image above.
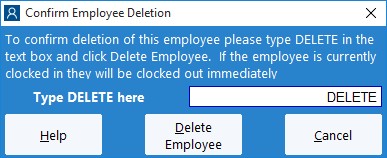
Confirm Employee Deletion
- You’ll now be shown the Delete Employee screen. Deletion of an employee can only be reversed by our support staff so a confirmation procedure is required to delete an employee. On this screen to confirm the deletion of the employee just type DELETE into the text are in capitals.
- Once you’ve entered the confirming DELETE into the text box just click the Delete Employee button to delete the selected employee.
Once deleted an employee will not be able to clock in or out. Their time records will no longer be available for reporting purposes and the employees name will no longer appear on any lists within the software. Note that an employee can be un-deleted by Time Clock MTS support staff, just contact us for more information.
by Mark Nemtsas | Jun 11, 2009 | How To
For an employee to be able to clock in and out of Time Clock MTS you must create an employee account that they can use. This Time Clock MTS How To Article very briefly covers how to create a Time Clock MTS employee.
To create a new employee in Time Clock MTS just follow the steps show below.
- Log into Time Clock MTS as the administrator. How you log in as the administrator was covered in this Time Clock MTS How To Article.
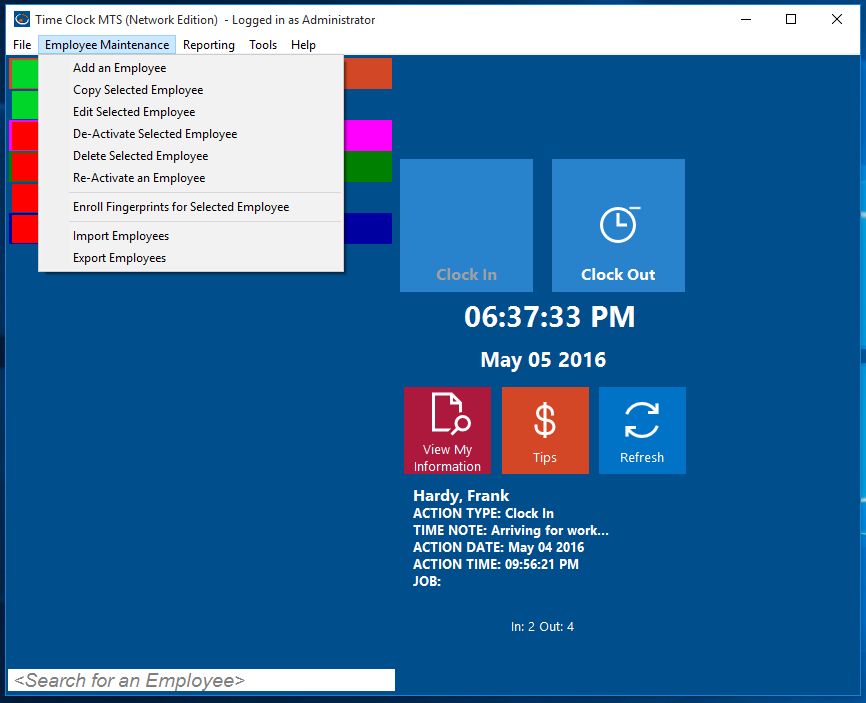
Adding an Employee
- Once you’re logged in go to the Employee Maintenance->Add an Employee menu. This is shown in the image above.
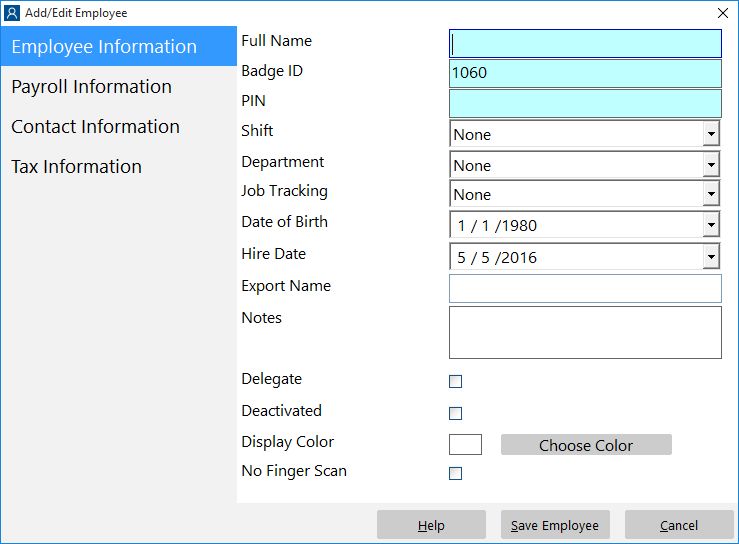
The New Employee
- You’ll now be shown the Add Employee screen. This screen is split into 4 sub pages, the Employee Information page, the Payroll Information page, the Contact Information page, and the Tax Information page. The only things you must enter to create a new employee is the employee’s full name, a unique badge ID, and a PIN (or password) for the new employee.
- Once you’ve setup the employee to your satisfaction just click the Save Employee button to create the new employee record.
That’s all there is to it. To get more detailed help on what each field on each employee sub page does consult the online help file or click on the links show in Step 3 above.
by Mark Nemtsas | Jun 11, 2009 | How To
Typically in most companies there will be groups of employees for whom the same payroll and overtime rules apply. To speed up the creation of such employees in Time Clock MTS it is possible to copy an existing employee record to easily create a new one. This Time Clock MTS How To Article covers how to copy a Time Clock MTS employee.
To create a new employee by copying an existing employee just follow the steps below.
- Log into Time Clock MTS as the administrator. How you log in as the administrator was covered in this Time Clock MTS How To Article.
- Click on the employee in the employee list that you want to copy.
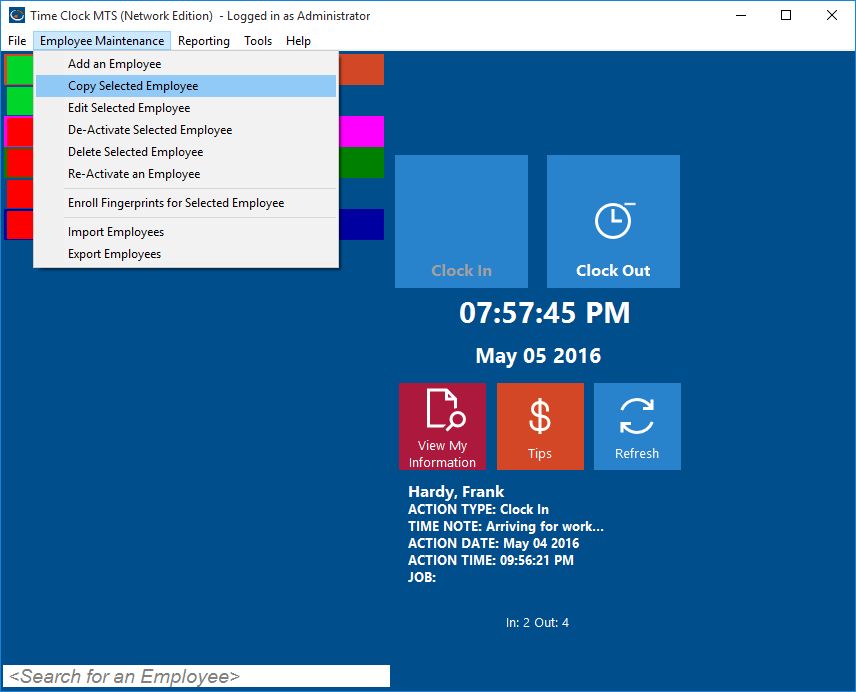
Copying an Employee
- Once you’ve selected the employee you want to copy go to the Employee Maintenance->Copy Selected Employee menu. This is shown in the image above.
The Copied Employee
- You’ll now be shown the Add Employee screen with all the details from the copied employee filled in already. The only differences will be the name and the employee ID / badge number. All you need to do is set the name to the correct name for the employee and assign them a PIN.
- Once you’ve done these couple of things to your satisfaction just click the Save Employee button to create the new employee record.
That’s all there is to it. To get more detailed help on what each field on each employee sub page does consult the online help file.
by Mark Nemtsas | Jun 11, 2009 | How To
From time to time it may be necessary to temporarily deactivate an employees’ Time Clock MTS account. This could be because the employee has left the company and you want to maintain their payroll records in the short term for reporting purposes. Or it could be to stop an employee clocking in and out for administrative reasons. This Time Clock MTS How To Article covers how to temporarily deactivate a Time Clock MTS employee. This De-Activation and Re-Activation feature in Time Clock MTS in earlier versions of the software used to be labelled disable and re-enabling employees.
It may be beneficial to use this deactivation feature instead of the delete employee option as employee deletion is permanent and unrecoverable.
To deactivate an employee in Time Clock MTS just follow the steps shown below.
- Log into Time Clock MTS as the administrator. How you log in as the administrator is covered in this Time Clock MTS How To Article.
- Click on the employee in the employee list that you want to deactivate.

Employee Maintenance Dropdown
- Once you’ve selected the employee go to Employee Maintenance->De-Activate Selected Employee. This is shown in the image above.
- You’ll now be asked to confirm the deactivation.
You can easily see which employees are deactivated on the employee list when you’re logged in as the administrator, they have a gray status icon next to their names in the employee list. If they are not shown, right-click over the employee list and Show Deactivated Employees.
Once deactivated an employee will not show in the employee list nor will they be able to clock in or out using the keypad interface. Attendance data of the deactivated employee will still be available for payroll reports.
To reverse this process and reactivate the employee see the How To Article Reactivate a Deactivated Employee in Time Clock MTS.
by Mark Nemtsas | May 24, 2009 | How To, Tips and Tricks, Using the Software
Changing the Windows System Time
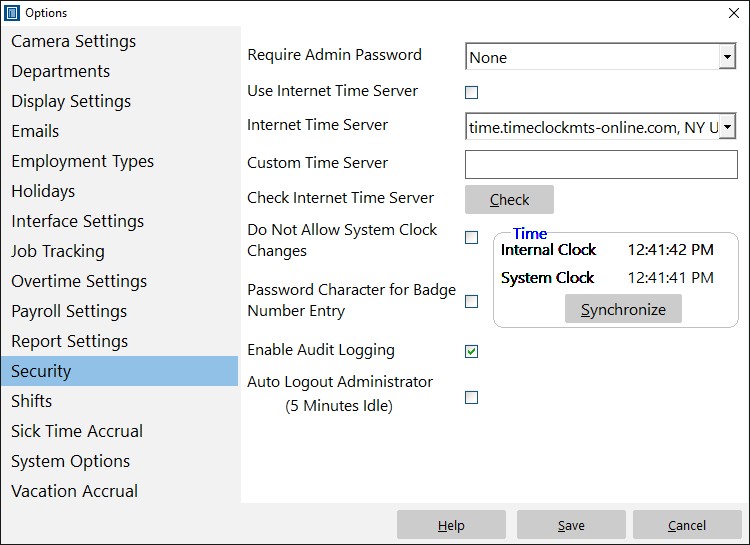
You may well know that Time Clock MTS can determine the internal time used for clocking in and out from an Internet time server. This is a pretty foolproof way of preventing time clock fraud as the times recorded are completely independent of the local PC clock setting. You can turn on this feature in the Time Clock MTS administrator program on the Tools->Options->Security Settings page. Just tick the Use Internet Time Server checkbox, then pick our dedicated time server (time.timeclockmts-online.com) from the dropdown box and click SAVE to save the change. You can read about how to do this in more detail in this blog entry
The above works well, but for whatever reason very infrequently it doesn’t work in a fool-proof fashion. This won’t result in incorrect employee attendance data but it can prevent employees from clocking in or out. Time Clock MTS will actually prevent employees from clocking in and out if it cannot contact the Internet time server for an hour (this is to stop employees just pulling a network cable to get around the Internet Time Server setting). Sometimes the reason Time Clock MTS cannot contact the time server can’t easily be determined, it may be network congestion, it might be firewall problems, or it might be problems with the time server itself. When these sorts of problems occur frequently it may be adopting a different solution to setting the system time using Windows itself. Here’s what you’ll need to do:
- Turn off the Use Internet Time Server setting in Time Clock MTS. This will result in Time Clock MTS determining all times from the local PC clock.
- Change the Windows settings to have the local pc clock time determined from an Internet time server. How you do this will depend on the version of Windows you are running. For example, in Windows Vista/7/8 you can do it by simply right clicking on the Taskbar clock and then selecting Adjust Date/Time from the popup menu.
- Change the Windows user account permissions that Time Clock MTS is run from to prevent changing the Windows System time. How you do this is well beyond the scope of this entry as it will vary tremendously depending on the version of Windows you are running and any sort of network management software you happen to be using.
That’s all there is to it. What you’ve done is set the local PC clock to get accurate time from an Internet time server and Time Clock MTS will get it’s clock in and out times directly from this. By adjusting the Windows user account permissions you’ve prevented employees from changing the system clock of the PC in an attempt to provide fraudulent time clock data.