by Mark Nemtsas | Aug 26, 2009 | How To
Preventing Employees from Stopping and Starting Time Clock MTS
A fairly common method of defrauding computer time clocks is to stop the time clock software running, change the computers’ system clock, and then restart the software and record a fraudulent clock in or out. To prevent this Time Clock MTS includes a feature to prevent employees from stopping and restarting Time Clock MTS without the intervention of the Time Clock MTS administrator. This Time Clock MTS How To Article covers how to prevent employees from stopping and re-starting Time Clock MTS.
To prevent employees from stopping and re-starting Time Clock MTS just follow the steps shown below.
- Log into Time Clock MTS as the administrator. How you log in as the administrator was covered in this Time Clock MTS How To Article.
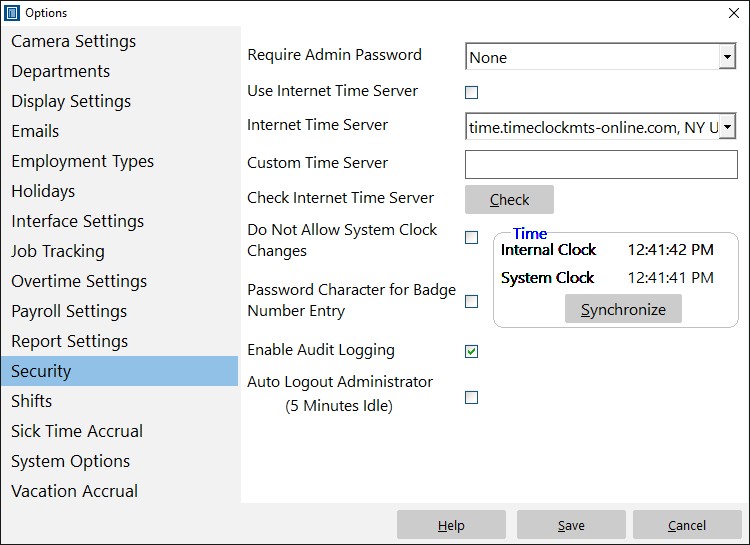
- Go to the Tools->Options->Security screen and you’ll be shown the screen at the top of this article. Select the require password setting from the dropdown. The options are to require password on program start, program end, or both. The most secure options are program start or program start AND program end. Just selecting program end is not particularly secure because Time Clock MTS could just be stopped using the Windows Task Manager.
- When you’re happy with your Require Administrator Password setting press the Save button to save the changes. Now, depending on what setting you’ve selected the Time Clock MTS administrator password will need to be entered on program start, stop, or both.
It is worth noting that this setting is most effective at preventing employee time clock fraud when used in conjunction with the Prevent System Clock Changes feature.
by Mark Nemtsas | Aug 26, 2009 | How To
Preventing System Clock Changes
There are several features in Time Clock MTS designed to prevent employee fraud. One of these allows you to prevent system clock changes while Time Clock MTS is running, and thus prevent employees from simply changing the system clock to tamper with their clock in and clock out times. This Time Clock MTS How To Article covers how to prevent system clock changes while Time Clock MTS is running.
To dis-allow system clock changes in Time Clock MTS while it is running just follow the steps shown below.
- Log into Time Clock MTS as the administrator. How you log in as the administrator was covered in this Time Clock MTS How To Article.
- Go to the Tools->Options->Security Settings screen and you’ll be shown the screen at the top of this article. To get Time Clock MTS to prevent system clock changes while it is running just check the Do Not Allow System Clock Changes checkbox.
- When you’re happy the change press the Save button to save the changes and Time Clock MTS will now monitor the system clock for any changes.
It is worth noting that Time Clock MTS does not actually prevent the system clock being changed, it will however prevent any employee clocking in or out if it detects that the system clock has been changed by more than a few seconds. It is also worth noting that this feature is only really useful if it is teamed up with the ‘Require Admin Password’ setting (see image above). This means the admin password will need to be entered on software startup, software shutdown, or both.
by Mark Nemtsas | Aug 25, 2009 | How To
Setting Up Report Rounding
While Time Clock MTS records all clock in and out times to the nearest second it can be useful to round the times for reporting purposes. There are several reasons why you might like to do this, but the primary reason is that your overtime policy may require overtime to be of a certain length before it can apply. Rounding could therefore be used to exclude overtime from payroll calculations if an employee was to clock in just a few minutes early or just a few minutes late every day. This Time Clock MTS How To Article covers how setup report time rounding.
To setup report time rounding in Time Clock MTS just follow the steps shown below.
- Log into Time Clock MTS as the administrator. How you log in as the administrator was covered in this Time Clock MTS How To Article.
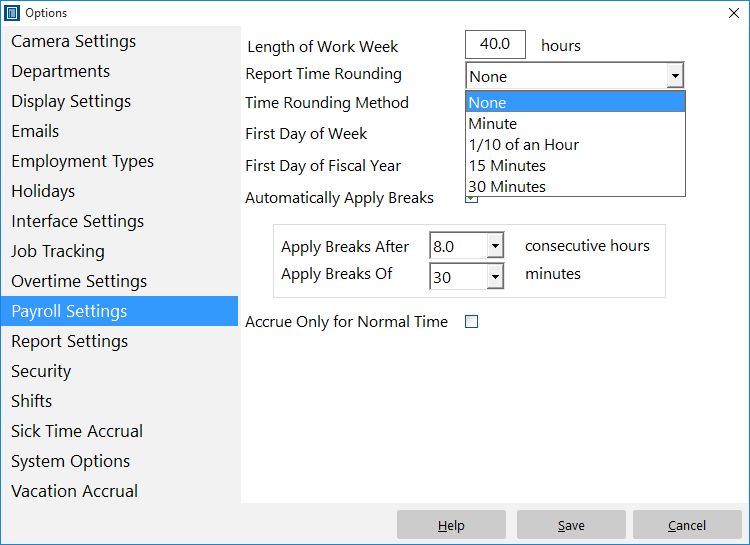
- Go to the Tools->Options->Payroll Settings screen and you’ll be shown the screen at the top of this article. There are 4 different rounding options, the nearest minute, nearest 1/10th of an hour (6 minutes), nearest 15 minutes and nearest 30 minutes. To select one just choose it from the Report Time Rounding dropdown box.
- Check the least quantity box if required. When this option is selected all clock in times will be rounded up and clock out times will be rounded down to the nearest time increment selected from the rounding drop down box.
- When you’re happy with your selection press the Save button to save the changes and the next time you run a report the times will be rounded.
It is worth noting that Time Clock MTS uses standard rounding to round report times. So, if for example, you’ve got rounding set to 15 minutes the following case would apply. Any clock in from 8:00:01am to 8:07:29AM would be rounded down to 8:00AM. Any time between 8:07:30AM and 8:14:59AM would be rounded up to 8:15:00AM. Of course this does not apply if the Least Quantity setting is checked.
Another thing to note is that report rounding occurs at the time of reporting only, the actual clock in and clock out times are maintained at their original accurate to the nearest second value that was recorded originally.
by Mark Nemtsas | Aug 25, 2009 | How To
Setting Up Automatic Employee Breaks
In some cases it may be more efficient to automatically assign a break period to an employees’ payroll information rather than getting them to clock in and out at lunch break for example. Time Clock MTS can account for this by allowing you to allocate an automatic break period to your employees. This Time Clock MTS How To Article covers how to setup automatic employee breaks.
To setup automatic employee breaks in Time Clock MTS just follow the steps shown below.
- Log into Time Clock MTS as the administrator. How you log in as the administrator was covered in this Time Clock MTS How To Article.
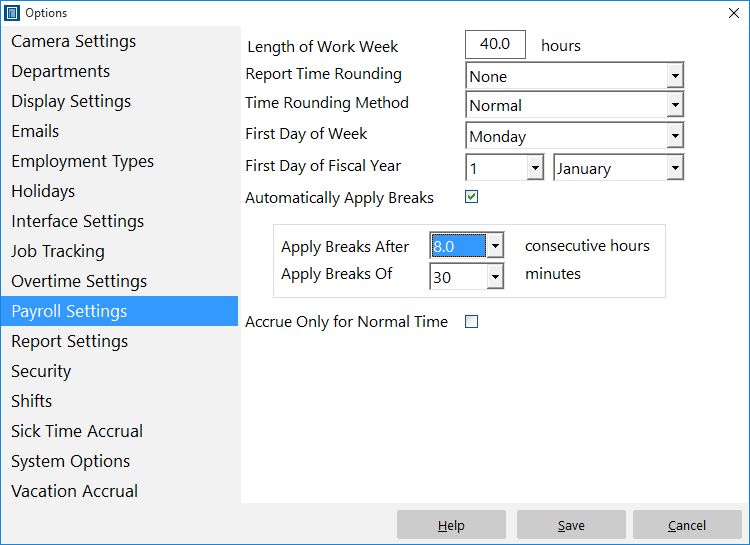
- Go to the Tools->Options->Payroll Settings screen and you’ll be shown the screen at the top of this article. To setup automatic breaks you must determine how long an employee must work before a break is applied and how long the automatic break will be. You can apply breaks after 1 to 8 of consecutive hours worked (in half hour increments). The length of the break applied can range from 5 minutes to 90 minutes (in 5 minute increments). To apply an automatic break check the Automatically Apply Breaks checkbox and select the appropriate break length and work period from the drop down boxes.
- When you’re happy with your automatic break setup press the Save button to save the changes and the next time you run a report the times will be rounded.
It is worth noting that Time Clock MTS does not create a clock in / out pair for the automatic break, it is simply applied at report time.
by Mark Nemtsas | Aug 21, 2009 | How To
As I’ve mentioned previously it is possible to deactivate an employee in Time Clock MTS to prevent them from clocking in or out. However, you may find that you need to reactivate these employees so they can start using the software again. This Time Clock MTS How To Article covers how to reactivate a Time Clock MTS employee who has been deactivated. In previous versions of Time Clock MTS this was known as disable and re-enable employees.
To reactivate an employee in Time Clock MTS just follow the steps shown below.
- Log into Time Clock MTS as the administrator. How you log in as the administrator was covered in this Time Clock MTS How To Article. You can easily see which employees are deactivated on the employee list when you’re logged in as the administrator, they have a gray status icon next to their names in the employee list. If they are not shown, right-click over the employee list and Show Deactivated Employees.

Employee Maintenance Dropdown
- Go to Employee Maintenance->Re-Activate an Employee.
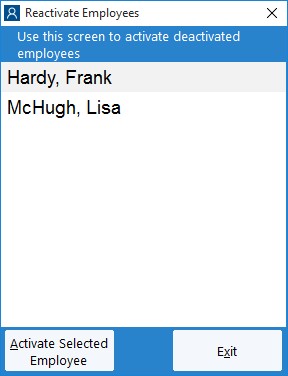
Reactivate Employee
- Click Activate Selected Employee and confirm the action, once you’ve done so the employee will be reactivated.
by Mark Nemtsas | Aug 19, 2009 | How To
It is is important that a supervisor be able to see at a glance who is currently clocked in for work and who is not. Time Clock MTS provides this information visually via the Employee List (people clocked in have green status icon, people clocked out a red). However, if your employee list is long or you need a paper print out there is a better way of viewing this information. This Time Clock MTS How To Article covers how to quickly and easily generate a report to see who is currently clocked in or out of Time Clock MTS.
To view a report showing who is clocked in or out of Time Clock MTS just follow the steps below.
- Log into Time Clock MTS as the administrator. How you log in as the administrator was covered in this Time Clock MTS How To Article.
Checking Who is Currently Clocked In Step 1
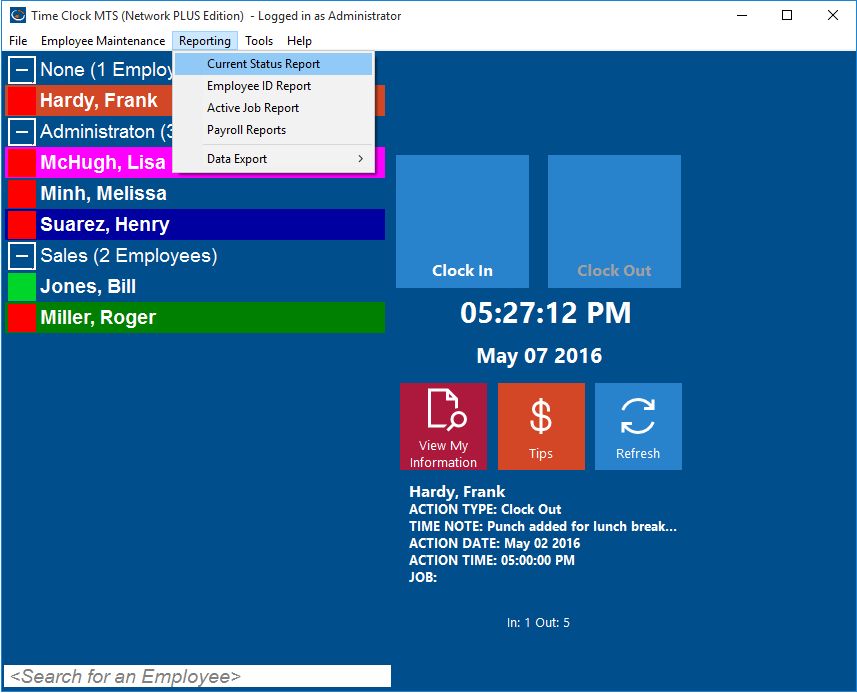
- Go to the Reporting->Current Status Report Menu
Checking Who is Currently Clocked In Step 2
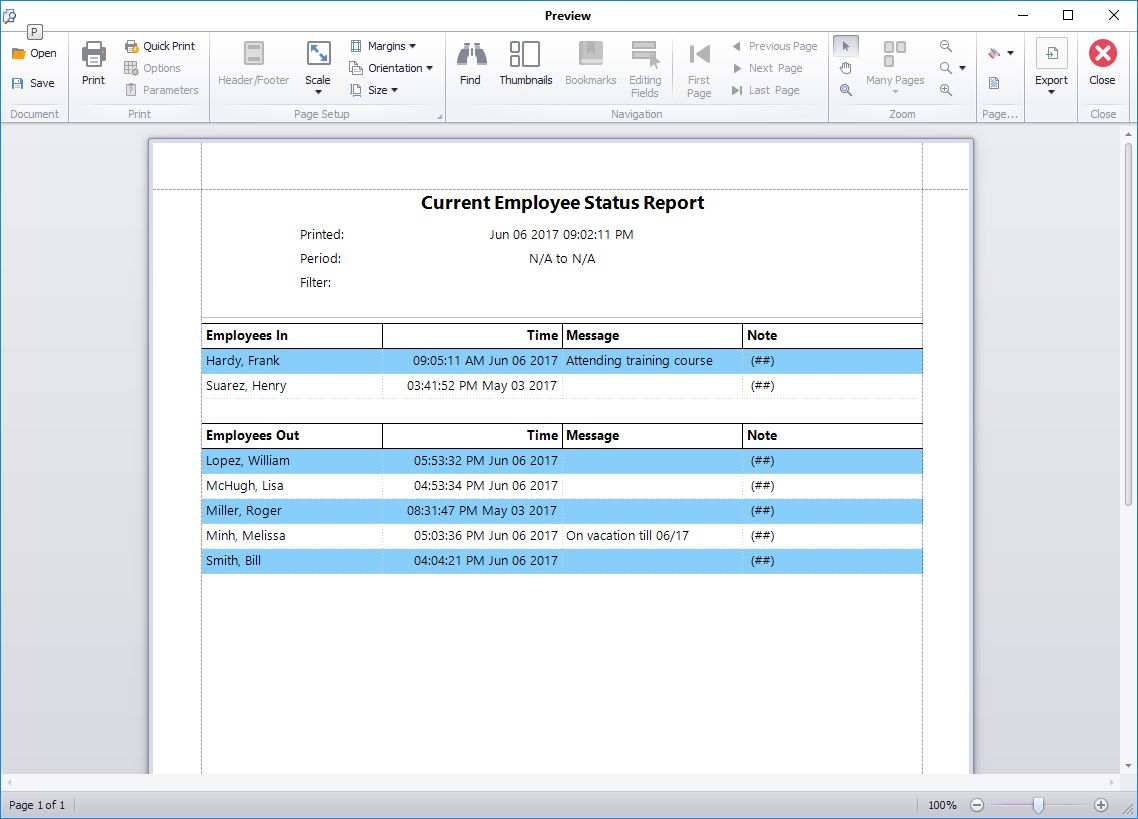
- You’ll now be shown the Current Status Report. This report is simple to understand, it is split into two main areas, employees clocked in at the top, and employees clocked out at the bottom. The time of the last action for each employee is displayed next to their name. The report can be exported or printed easily by just clicking the appropriate buttons at the bottom of the reporting screen.
That’s all there is to it, if you require more information you may like to take a look at the Current Status Report Help Topic.