A lot of businesses either want to track employee costs based on what tasks they’re working on, or perhaps on a customer based project by project basis. In Time Clock MTS we call this ‘job tracking’. This Time Clock MTS How To Article describes how to easily setup Time Clock MTS to track jobs in your employee time clock and then leads you briefly through the process of how an employee would record their time against a job as they use Time Clock MTS.
Creating and Editing Jobs
Step 1 : Defining Jobs
Firstly log into Time Clock MTS as the administrator. How you log in as the administrator was covered in this Time Clock MTS How To Article. Once you’ve done this go to the Tools->Options->Job Tracking screen, where you’ll see the screen above. To create a new job just click the new job button and you’ll be shown the screen below.
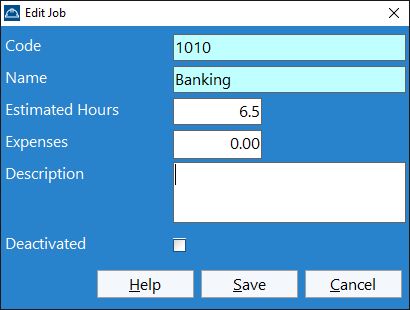
Creating a Job
To create a job give it a unique numerical job code, give the job a name, and if you like a description. If you do not have your own job numbering system Time Clock MTS will automatically assign each new job a unique job code. You can also disable a job to prevent employees booking time to that job. This might be useful if you’re just setting your system up, or your customer isn’t paying you for that job anymore, or perhaps your internal budget for a project has been exceeded.
Employee Details
Step 2 : Deciding Which Employees will Use Job Tracking
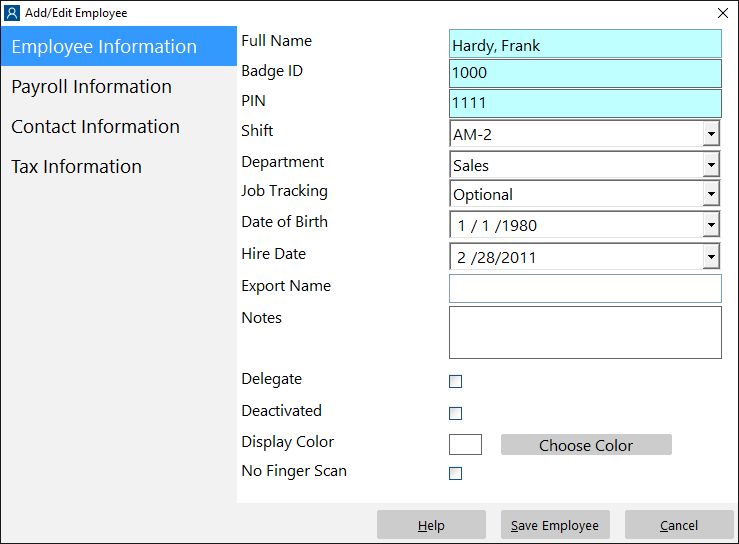
The next step is to decide which employees will have to use job tracking and how they will use it. Select an employee on the employee list and go to the Employee Maintenance->Edit Selected Employee screen (which you can see above). On the employee information screen use the job tracking drop down box to define how an employee will use job tracking. They can either not use it, use it optionally (they can choose not to enter a job code when they clock in) or must use it (they must enter a job code when they clock in).

Entering a Job Code
Step 3 : Employees Entering Job Codes
Entering job codes for employees couldn’t be any easier. When employees clock in they’ll be shown the enter job code screen above. Employees need to enter the job code for the job they want to book the time to either via keyboard or via the numeric buttons on the screen (with a mouse click or via a touchscreen). Time Clock MTS will try to auto complete the job code for the employee and show the job details so that the employee is sure he or she is booking their time to the correct job. It would be very useful to have printed out the Active Job Report and have this next to your Time Clock MTS computers so that the employees have a readily available list of the jobs they can book time to.
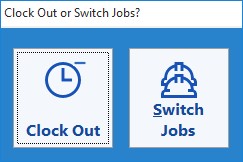
Switching Jobs
Employees can quickly switch jobs by clocking out of Time Clock MTS (via either the employee list or keypad screens of Time Clock MTS). The screen above will be shown to employees where they can either clock out or switch jobs. If they switch jobs the enter job code screen will be shown again and the employee can enter a new job code and switch to a new job.
Step 4 : Reporting on Jobs
The Job Time Report provides the Time Clock Administrator with all the information they’ll need to understand how time is being booked to jobs. It shows a break down of each job defined in Time Clock MTS, and how much time each employee has logged against each job.
