by Mark Nemtsas | Feb 17, 2014 | Tips and Tricks
A Time Clock MTS user in the Czech Republic sent us in their time clock data last week and we were delighted to see that they’d translated the main screen labels in to Czech. You can see what this looks like below. Nifty.
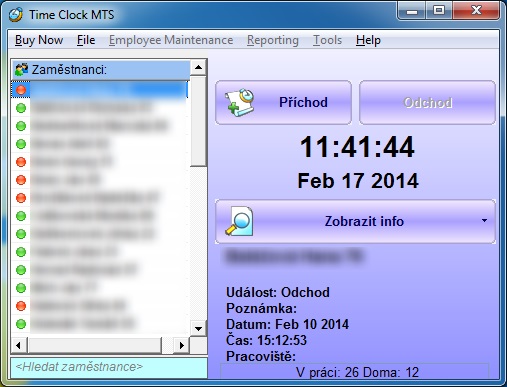
Time Clock MTS in Czech
The user has done this by changing all of the the main screen labels in the software on the Display Settings screen. If you want different time clock stations to have different display languages (for example Czech on one computer and English on another) then you can also translate the screen labels for each different client computer.
by Mark Nemtsas | Feb 17, 2014 | Tips and Tricks
Some users have reported some problems upgrading to Time Clock MTS Version 5 when they are using SQL Server as a backend database. I suspect this only occurs for users who have imported an Access database using SQL Server Management Studio. It appears that this process creates some indexes and constraints that prevent the upgrade process from occurring. Unfortunately there’s no automated fix because the names of the constraints and keys are randomly generated during the import process and will be different in each case.
The fix for this issue is complex and should only be attempted by users who are familiar with SQL Server and SQL Server Management Studio. If you’re not sure what either of these are or you think I’ve suddenly started talking another language then you’re not the right person to be implementing this fix. Talk to your IT staff or your database administrator before continuing.
You can be sure you’ve got this problem when you see an error like this the first time you run Time Clock MTS Version 5 after upgrading:
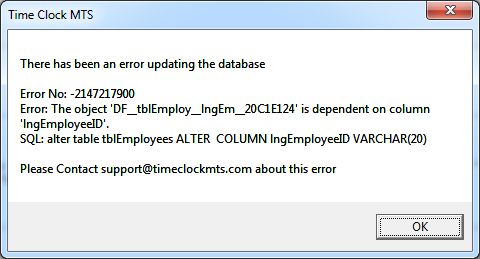
Note down the name of the object (of the form DF_tblEmploy_lngEm_XXXXXX) because we’re going to need that later. Close down Time Clock MTS and open up SQL Server Management Studio.
1. Backup your Database
Before we start this process you should backup your database. In SQL Server Management Studio (SSMS) you can do this by right clicking on your time clock database in the object explorer and choosing the Tasks->Backup menu option.
2. Determine Name of Constraints/Indexes to Delete
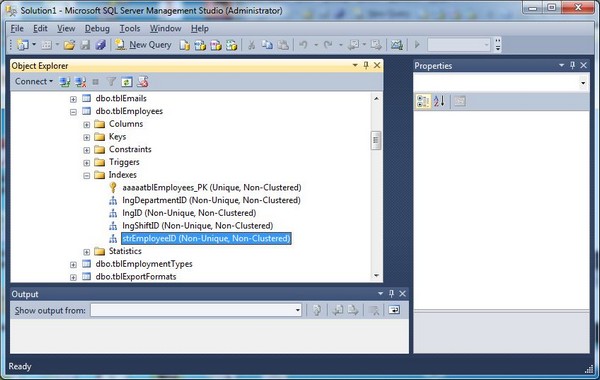
In SSMS we’re going to determine the names of the constraints and indexes to delete. The first is the one shown in the image above (but of course yours will most likely have a different name). Open up the table tblEmployees in the SSMS object explorer and click on the “Indexes” folder icon. It should look something like the image below. You may see an index called “strEmployeeID” there. If so, note down the name.
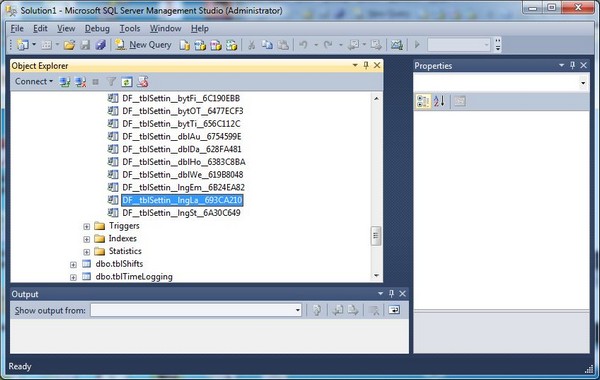
Now scroll down to tblSettings in the SSMS Object Explorer and open the Constraints folder. Scroll through the list of constraints looking for a constraint of the form “DF__tblSettin_lngLa_XXXXXX”. It might look something like the image below. If you find the constraint note down the name.
Click on the Indexes folder icon for tblSettings and you may see an index named “lngLastEmployeeID”. If you do note down that name.
3. Build and Run a Query to Delete Indexes/Constraints
Now we’re going to build a query to delete the offending indexes and constraints. Click on the New Query toolbar button in SSMS and cut and paste the code below into your new query window.
USE [YourDatabaseName]
GO
/** if you have a lngLastEmployeeID index in tblSettings include this line**/
DROP INDEX [lngLastEmployeeID] ON [dbo].[tblSettings]
/** if you have a strEmployeeID index in tblEmployees include this line**/
DROP INDEX [strEmployeeID] ON [dbo].[tblEmployees]
/** if you have a constraint of the form DF__tblSettin__lngLa__XXXXX tblSettings include this line**/
ALTER TABLE [dbo].[tblSettings] DROP CONSTRAINT [DF__tblSettin__lngLa__XXXXXX]
/** if you have a constraint of the form [DF__tblEmploy__lngEm__XXXXXXX] tblSettings include this line**/
ALTER TABLE [dbo].[tblEmployees] DROP CONSTRAINT [DF__tblEmploy__lngEm__XXXXXXXXX]
GO
Make sure to change YourDatabaseName to the name of your database. Delete the lines from the code that you do not need. For example, if you didn’t find a “lngLastEmployeeIndex” in step 2 then you can delete that line from the code. Also, make sure to change the names of the constraints to match those you found in Step 2. For example, if your tblEmployees constraint was named DF__tblEmploy__lngEm_20C1E124 then you’ll have to change DF__tblEmploy__lngEm__XXXXXXXXX to match that name.
When you’re happy that your query is correct we can run it by clicking the Execute toolbar button in SSMS and the offending indexes and constraints will be deleted.
4. Change Time Clock MTS Startup Settings File
Now you’re going to need to open up the Time Clock MTS Startup Settings file in Windows Notepad. The file can be found here:
c:\Program Data\Time Clock MTS\timeclock.ini
Look for a setting at the bottom of the file called “Version5DatabaseUpdates” and set the value back to 0 (it should be set 1) so that the entry looks something like this:
Version5DatabaseUpdates=0
Save the changes to the file and startup Time Clock MTS and everything should now work just fine.
by Mark Nemtsas | Feb 5, 2014 | How To, Tips and Tricks
Based on certain events occurring in Time Clock MTS the software can automatically send out emails to one or more recipients. This could be useful for a number of reasons. For example notifying a payroll supervisor or department supervisor that an employee has requested time off. Or perhaps notifying the employee themselves when their time off request has been approved or denied.
This how-to guide takes the Time Clock MTS user through the steps required to create an email alert.
1. Log in as the Administrator
The first step is to log into the Time Clock MTS Administrator program as the administrator and go to the Tools->Emails Alerts screen (see the image below).
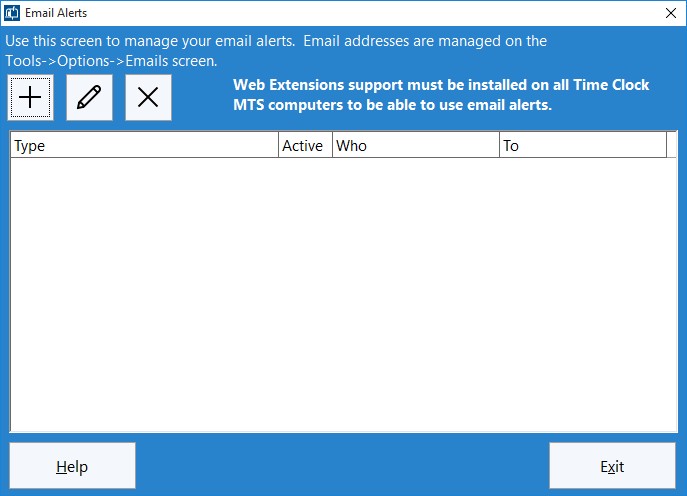
Figure 1 – The Manage Emails Alerts Screen
2. Add an Alert
To add an email alert click the  button and you’ll be shown the Add Email Alert screen (see below).
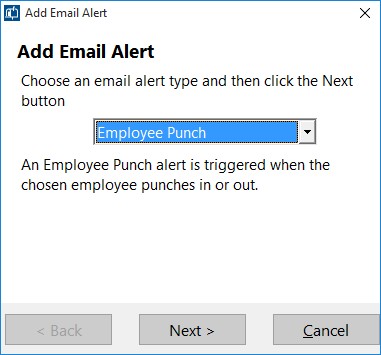
Figure 2 – Adding an Email Alert
Lets add an employee punch alert by choosing it from the dropdown and then click the Next button.
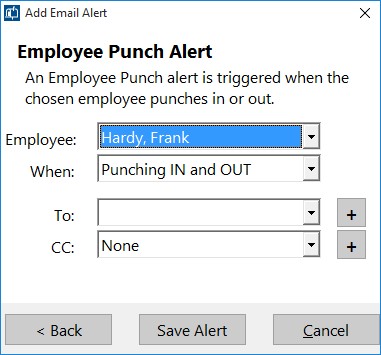
Figure 3 – Adding an Employee Punch Email Alert
3. Set Up the Employee Punch Alert
Above you can see the Employee Punch Alert configuration options. We can choose what employee should raise the alert, what action triggers the alert (punching in, punching out, or both) and two different emails we can send the alert to. In the above example we’ve chosen to raise an alert when Frank Hardy punches in or out but we still need to add a couple of email addresses to send the notifications to. This can be done easily from this screen by clicking the + buttons. If you don’t see the + buttons then you’ll need to update your software to the latest version. Once you’ve added an email address you won’t need to do it again. It’ll always be available to be selected from the dropdown list. Don’t forget though that emails can be added and managed from the Manage Emails screen.
In this case we’re going to add an email for the To field and one for the CC field. The first will be a department supervisor and might look something like this:
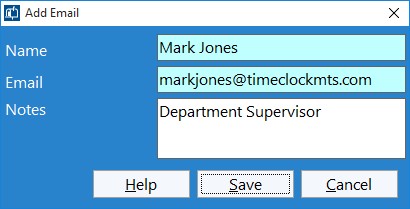
Figure 4 – Adding Department Supervisor Email
And the second is our payroll supervisor:
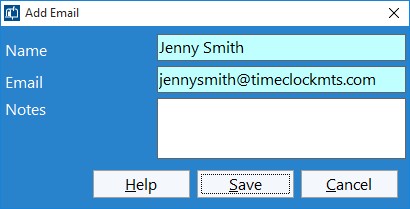
Figure 5 – Adding Payroll Supervisor Email
Note that once they are added they’ll be automatically selected in the corresponding email dropdown box.
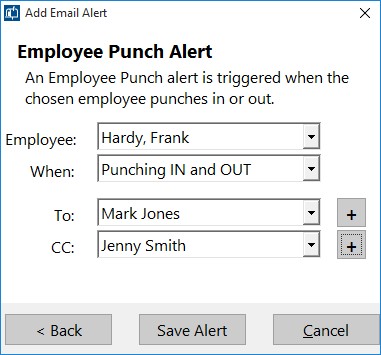
Figure 6 – The Completed Email Alert
4. Save the New Email Alert
When you’re happy with the alert we can save it by clicking the Save Alert button and we’ll be returned to the Manage Alerts screen which should now display it.
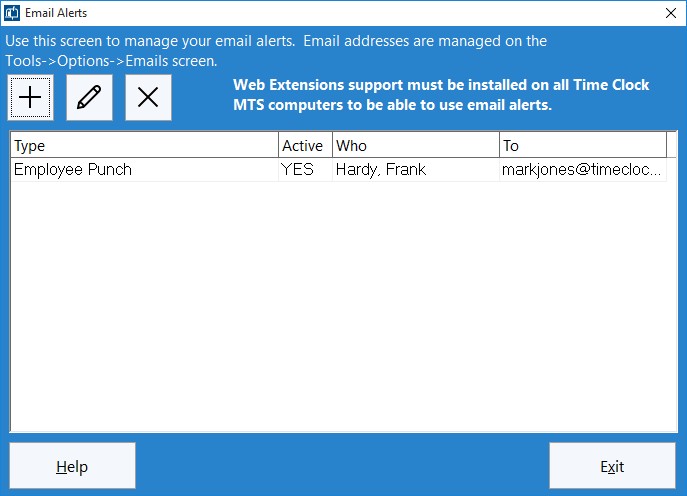
Figure 7 – New Alert on Manage Alerts Screen
5. Install Web Extensions Support
Any computer that has Time Clock MTS on it that needs to create email alerts must have the Time Clock MTS Web Extensions Support installed on it. You can learn what this means and how to install it in this blog article about web extensions.
6. You’re Done!
That’s all there is to it. Now when our employee Frank Hardy punches in or out of any computer our two email addresses will receive a notification of the event via email.
by Mark Nemtsas | Jan 29, 2014 | How To, Tips and Tricks
Time Clock MTS has allowed you to define the labels for almost every button on the employee clock in screen for a while now. You can do it via the Display Settings screen. Just select the “Main Screen Labels” drop down and enter some text for each different label. This is particularly useful if your workforce speaks a different language or your business uses different terminology (for example you punch in and out rather than clock in and out). However, a problem arises when you want to provide two different label sets to different groups of employees. For example, you might want one employee time clock terminal in Spanish and another in English. With the release of Time Clock MTS Version 5 this is now possible.
Here’s how to do it:
- On the computer with Time Clock MTS that you want to have custom labels open up the timeclock.ini file in Windows Notepad. This file can be found in this folder:
c:\Program Data\Time Clock MTS\
Note that you might have to show hidden files and folders to see this location
- Towards the bottom of the file you should see a section that looks like this:
[LocalLabels]
ClockInLabel=1
ClockOutLabel=1
SearchForEmployeeLabel=1
ViewInformationLabel=1
EmployeesLabel=1
ActionTypeLabel=1
TimeNoteLabel=1
ActionDateLabel=1
ActionTimeLabel=1
JobLabel=1
EmployeesInLabel=1
EmployeesOutLabel=1
- Enter a new label next to each setting if you want the local client to display that label in preference to your global labels. So, for example, if you wanted to display “Punch In” and “Punch Out” in preference to your global labels then you”d change the above to something that looks like this:
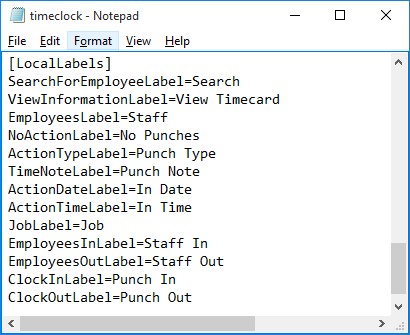
Edited timeclock.ini file
- Any labels you don’t want changed from your global settings should just be left blank or at the default setting of 1. Once you’re happy with your new set of labels save the timesheets.ini file and re-start the software and you should see your new labels in action. See the image below.
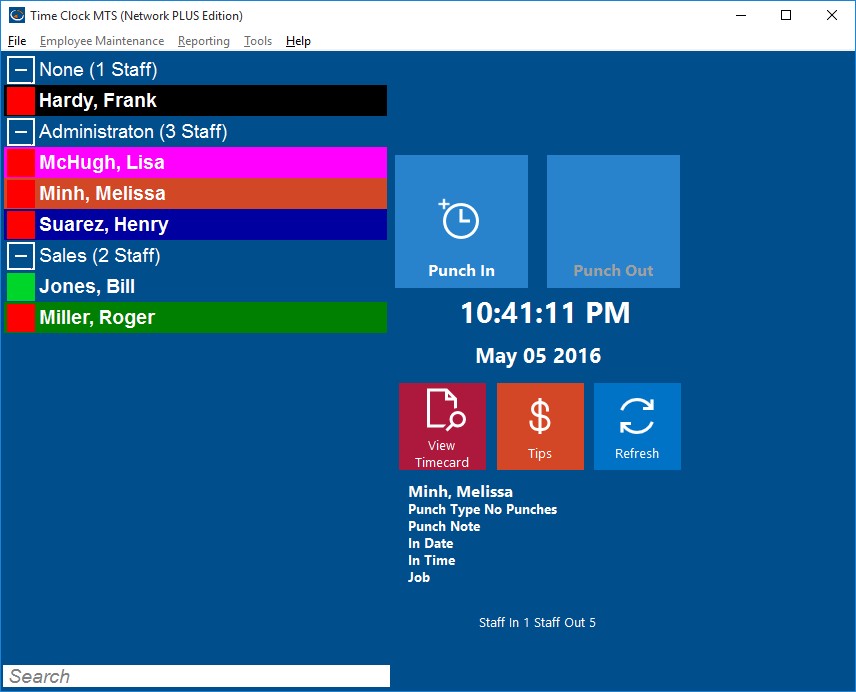
Time Clock MTS with New Labels
by Mark Nemtsas | Jan 27, 2014 | Tips and Tricks, Using the Software
This is an upgrade guide for existing users of Time Clock MTS wanting to upgrade the Network Edition (multi-computer) from an earlier version to Version 5. If you’re wondering what changes are included in version 5 then you should read this blog article.
1. Gather Required Information
Note down the following information:
- The current version of Time Clock MTS you’re using. Look on the Help->About menu.
- Your current registration details, this includes the registration name, the registration key, and the number of clients and employees you’re licensed for. You can see these on the Help->Registration screen within Time Clock MTS.
- The location of your current Time Clock MTS database. This can be found on the Tools->Options->System Options menu within Time Clock MTS.
2. Close Down Client Computers
Close down the Time Clock MTS client software on any computers that are currently running it.
3. Backup Your Time Clock MTS Data
While the Time Clock MTS Administrator program is running on your computer make a backup of the database using the Tools->Backup Database menu. Alternatively you can make a manual back using Windows Explorer and the location of the database you noted down in step 1. You’ll need to close down Time Clock MTS before you do a manual backup using Windows Explorer.
4. Download the Upgrade Installers
Download the Version 5 Administrator upgrade installer from here:
Version 5 Administrator Upgrade Installer
Download the Version 5 Client upgrade installer from here:
Version 5 Client Upgrade Installer
Make sure to save both installers somewhere you can find them later.
5. Install the Administrator Upgrade
Run the Administrator Upgrade Installer that you downloaded on the computer where your Time Clock MTS Administrator software is installed. When the upgrade installation is complete choose to run Time Clock MTS.
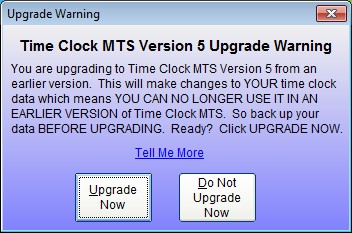
Time Clock MTS Version 5 Upgrade Warning
6. Complete the Administrator Upgrade Process
The first time you run Version 5 of the Administrator software you’ll be shown the above screen warning you about changes that are about to be made to your time clock data. You can read more about these changes here. If you’re happy to complete the upgrade click the Upgrade Now button.
7. Install Upgrade on Client Computers
Run and install the Client upgrade installer on any computer that you’ve got the Time Clock MTS Client software on.
8. Get a New Version 5 Registration Key
If you’ve evaluated Version 5 and are happy with it then you’ll find that you’re going to need a new registration key to keep using it. Never fear though, registered users of Time Clock MTS who bought the software prior to Version 5 are entitled to either a free upgrade or a discounted price upgrade. To check if you’re entitled to a free upgrade or to receive discounted upgrade pricing you should visit the Version 5 Registration Key page. You’ll need to know your current Time Clock MTS registration key to use that page. If you can’t find your registration key please contact us for help.
Once you’ve got your new registration key you’ll have to register the Time Clock MTS Administrator program on the
Help->Registration details screen. You may also have to register any computers that are using the Time Clock MTS Client software (using the same menu in the client software).
by Mark Nemtsas | Jan 27, 2014 | Tips and Tricks, Using the Software
This is an upgrade guide for existing users of Time Clock MTS wanting to upgrade the stand-alone (single computer) edition from an earlier version to Version 5. If you’re wondering what changes are included in version 5 then you should read this blog article.
1. Gather Required Information
Note down the following information:
- The current version of Time Clock MTS you’re using. Look on the Help->About menu.
- Your current registration details, this includes the registration name, the registration key, and the number of clients and employees you’re licensed for. You can see these on the Help->Registration screen within Time Clock MTS.
- The location of your current Time Clock MTS database. This can be found on the Tools->Options->System Options menu within Time Clock MTS.
2. Backup Your Time Clock MTS Data
While Time Clock MTS is running on your computer make a backup of the database using the Tools->Backup Database menu. Alternatively you can make a manual back using Windows Explorer and the location of the database you noted down in step 1. You’ll need to close down Time Clock MTS before you do a manual backup using Windows Explorer.
3. Download the Upgrade Installer
Download the Version 5 upgrade installer from here: Version 5 Upgrade Installer and save it somewhere you can find it later.
4. Install the Upgrade
Run the upgrade installer that you downloaded. When the upgrade installation is complete choose to run Time Clock MTS.
Time Clock MTS Version 5 Upgrade Warning
5. Complete the Upgrade Process
The first time you run Version 5 you’ll be shown the above screen warning you about changes that are about to be made to your time clock data. You can read more about these changes here. If you’re happy to complete the upgrade click the Upgrade Now button.
6. Get a New Version 5 Registration Key
If you’ve evaluated Version 5 and are happy with it then you’ll find that you’re going to need a new registration key to keep using it. Never fear though, registered users of Time Clock MTS who bought the software prior to Version 5 are entitled to either a free upgrade or a discounted price upgrade. To check if you’re entitled to a free upgrade or to receive discounted upgrade pricing you should visit the Version 5 Registration Key page. You’ll need to know your current Time Clock MTS registration key to use that page. If you can’t find your registration key please contact us for help.
Once you’ve got your new registration key you’ll have to register the Time Clock MTS program on the Help->Registration details screen.
Page 7 of 23« First«...56789...20...»Last »