by kathryn@timeclockmts.com | Feb 23, 2014 | How To, Tips and Tricks, Using the Software
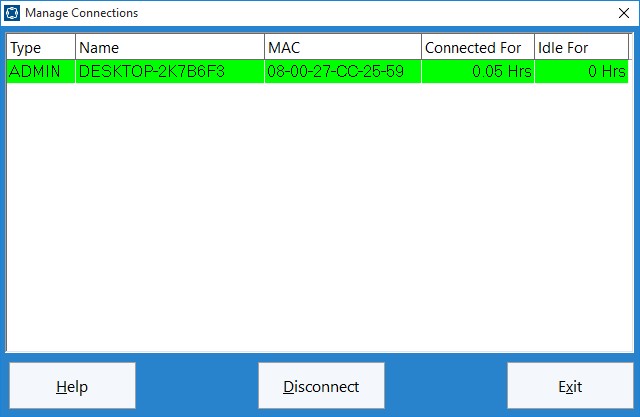
The Manage Connections Screen
Above you can see the Manage Connections screen. This screen is used to view and manage the connections to your Time Clock MTS database. Generally you won’t need to use this screen for much, but every now and again you may need it to delete old, stale connections that are using up your Time Clock MTS Client Licenses. This can commonly happen two ways. Firstly, you’ve installed the Time Clock MTS Client software on too many computers and you’re continually using up your client licenses (you should only install the Time Clock MTS Client software on as many computers as you are licensed for). The second reason is that perhaps a computer with the client software on it has suddenly died or shutdown incorrectly and you’re going to install the software on a new PC because the old one is kaput. In this case the connection record for the old computer can often not be deleted correctly and you’ll need to remove it manually.
This blog describes the process to remove a connection record from Time Clock MTS.
1. Find the connection you want to remove in the list on the Manage Connections screen. You can identify the computer the connection is coming from by the name of the computer or the MAC address of the computer.
2. Ensure that the computer named is no longer running the Time Clock MTS Client software.
3. Click on the connection record you want to delete.
4. Click the Disconnect button to remove the connection record.
That’s all there is to it, but as always if you have any problems please Contact Us and we’ll do our best to help you out!
by Mark Nemtsas | Jan 27, 2014 | Tips and Tricks, Using the Software
This is an upgrade guide for existing users of Time Clock MTS wanting to upgrade the Network Edition (multi-computer) from an earlier version to Version 5. If you’re wondering what changes are included in version 5 then you should read this blog article.
1. Gather Required Information
Note down the following information:
- The current version of Time Clock MTS you’re using. Look on the Help->About menu.
- Your current registration details, this includes the registration name, the registration key, and the number of clients and employees you’re licensed for. You can see these on the Help->Registration screen within Time Clock MTS.
- The location of your current Time Clock MTS database. This can be found on the Tools->Options->System Options menu within Time Clock MTS.
2. Close Down Client Computers
Close down the Time Clock MTS client software on any computers that are currently running it.
3. Backup Your Time Clock MTS Data
While the Time Clock MTS Administrator program is running on your computer make a backup of the database using the Tools->Backup Database menu. Alternatively you can make a manual back using Windows Explorer and the location of the database you noted down in step 1. You’ll need to close down Time Clock MTS before you do a manual backup using Windows Explorer.
4. Download the Upgrade Installers
Download the Version 5 Administrator upgrade installer from here:
Version 5 Administrator Upgrade Installer
Download the Version 5 Client upgrade installer from here:
Version 5 Client Upgrade Installer
Make sure to save both installers somewhere you can find them later.
5. Install the Administrator Upgrade
Run the Administrator Upgrade Installer that you downloaded on the computer where your Time Clock MTS Administrator software is installed. When the upgrade installation is complete choose to run Time Clock MTS.
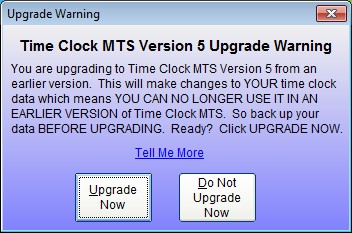
Time Clock MTS Version 5 Upgrade Warning
6. Complete the Administrator Upgrade Process
The first time you run Version 5 of the Administrator software you’ll be shown the above screen warning you about changes that are about to be made to your time clock data. You can read more about these changes here. If you’re happy to complete the upgrade click the Upgrade Now button.
7. Install Upgrade on Client Computers
Run and install the Client upgrade installer on any computer that you’ve got the Time Clock MTS Client software on.
8. Get a New Version 5 Registration Key
If you’ve evaluated Version 5 and are happy with it then you’ll find that you’re going to need a new registration key to keep using it. Never fear though, registered users of Time Clock MTS who bought the software prior to Version 5 are entitled to either a free upgrade or a discounted price upgrade. To check if you’re entitled to a free upgrade or to receive discounted upgrade pricing you should visit the Version 5 Registration Key page. You’ll need to know your current Time Clock MTS registration key to use that page. If you can’t find your registration key please contact us for help.
Once you’ve got your new registration key you’ll have to register the Time Clock MTS Administrator program on the
Help->Registration details screen. You may also have to register any computers that are using the Time Clock MTS Client software (using the same menu in the client software).
by Mark Nemtsas | Jan 27, 2014 | Tips and Tricks, Using the Software
This is an upgrade guide for existing users of Time Clock MTS wanting to upgrade the stand-alone (single computer) edition from an earlier version to Version 5. If you’re wondering what changes are included in version 5 then you should read this blog article.
1. Gather Required Information
Note down the following information:
- The current version of Time Clock MTS you’re using. Look on the Help->About menu.
- Your current registration details, this includes the registration name, the registration key, and the number of clients and employees you’re licensed for. You can see these on the Help->Registration screen within Time Clock MTS.
- The location of your current Time Clock MTS database. This can be found on the Tools->Options->System Options menu within Time Clock MTS.
2. Backup Your Time Clock MTS Data
While Time Clock MTS is running on your computer make a backup of the database using the Tools->Backup Database menu. Alternatively you can make a manual back using Windows Explorer and the location of the database you noted down in step 1. You’ll need to close down Time Clock MTS before you do a manual backup using Windows Explorer.
3. Download the Upgrade Installer
Download the Version 5 upgrade installer from here: Version 5 Upgrade Installer and save it somewhere you can find it later.
4. Install the Upgrade
Run the upgrade installer that you downloaded. When the upgrade installation is complete choose to run Time Clock MTS.
Time Clock MTS Version 5 Upgrade Warning
5. Complete the Upgrade Process
The first time you run Version 5 you’ll be shown the above screen warning you about changes that are about to be made to your time clock data. You can read more about these changes here. If you’re happy to complete the upgrade click the Upgrade Now button.
6. Get a New Version 5 Registration Key
If you’ve evaluated Version 5 and are happy with it then you’ll find that you’re going to need a new registration key to keep using it. Never fear though, registered users of Time Clock MTS who bought the software prior to Version 5 are entitled to either a free upgrade or a discounted price upgrade. To check if you’re entitled to a free upgrade or to receive discounted upgrade pricing you should visit the Version 5 Registration Key page. You’ll need to know your current Time Clock MTS registration key to use that page. If you can’t find your registration key please contact us for help.
Once you’ve got your new registration key you’ll have to register the Time Clock MTS program on the Help->Registration details screen.
by Mark Nemtsas | Jan 27, 2014 | Tips and Tricks, Using the Software
This guide covers how existing users of Time Clock MTS can upgrade to Version 5 quickly and easily.
How Are You Using Time Clock MTS?
If you’re using Time Clock MTS in stand-alone mode (on a single computer) then you should look at the Stand-Alone Edition Upgrade Guide.
Time Clock MTS Stand Alone Edition
If you’re using the Network Edition (on more than one computer) then should look at the Network Edition Upgrade Guide.
by kathryn@timeclockmts.com | Dec 26, 2013 | New Features, New Releases, Using the Software
One of the major new features that is will be included in Time Clock MTS Version 5 (due to for release in January 2014) is email alerts. Email alerts can be configured by the time clock administrator and will automatically send emails to recipients of your choosing based on certain events happening in your employee time clock. Email recipients are configured on the manage time clock emails screen I spoke about a few days ago. Email alerts are set up on the new Email Alerts screen (see below) which will be available from the Tools->Email Alerts menu from within the Time Clock MTS Administrator software.
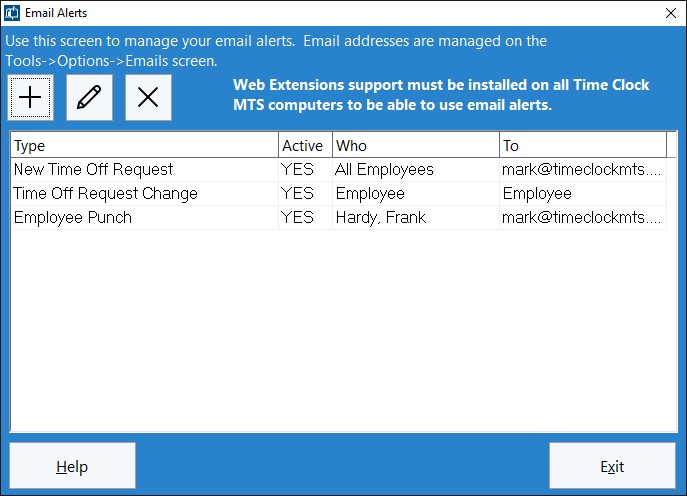
This screen is used by the administrator to manage email alerts.
The Email Alerts screen looks like many other screens in the software. A new alert is added using the New Alert button, existing alerts are edited by double clicking on them in the list or by selecting an alert and clicking the Edit Alert button. Deleting alerts is simply a matter of selecting an alert on the list and clicking the Delete Alert button. The initial release will include three different types of email alerts. The first is a raised when an employee creates a new time off request, the second is raised when the status of a time off request is changed by the time clock administrator, and the final type can be raised when an employee punches in or out (or both). I’ll preview the detailed features of each of these types of alerts in another blog entry in the next week.
As we get feedback from Time Clock MTS users after Version 5 is released we’ll be including more types of email alerts as time goes by.
by kathryn@timeclockmts.com | Dec 23, 2013 | New Features, New Releases, Using the Software
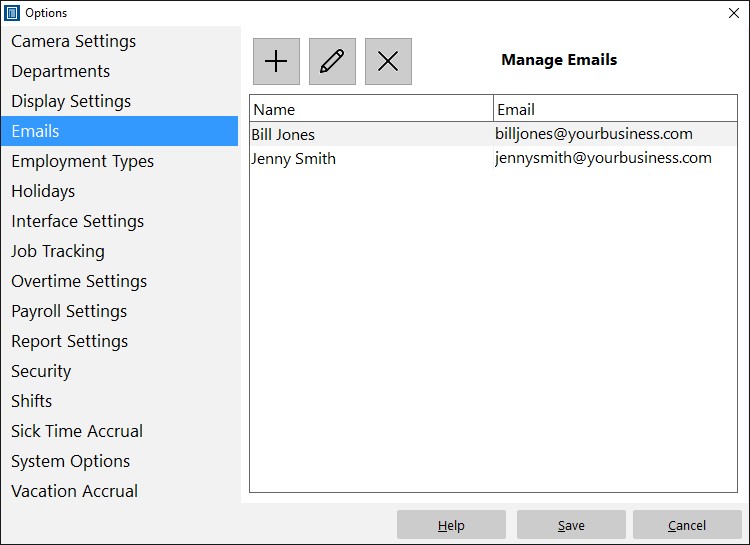
The Manage Emails Screen
Above you can see what the Manage Emails screen is going to look like in Time Clock MTS Version 5 (due for release in January 2014). This screen will be available from the Tools->Options menu in the Time Clock MTS Administrator software.and is used to add, edit, and delete emails from the master email list. In the initial release of the new version emails will be used to send email alerts. In the future time clock emails will also be used to allow direct emailing of PDF versions of reports from the reporting screen.
It is suggested that you create emails for the time clock administrator, department supervisors, payroll supervisor, and any other employee supervisor. Of course each of these people will need to actually have an email account they can check. It doesn’t matter if this is their work email or a web based email system like GMail.