Installation Instructions
This page takes you step-by-step through the process of installing Time Clock MTS once you’ve downloaded the installation file from our website. Note that some of the screenshots may look a bit different on your computer depending on what internet browser you’re using, or what version of Microsoft Windows you’re using, or even how your computer is configured.
1. Double Click on the Downloaded File
Once the Time Clock MTS installation file has finished downloading to your PC you can double click on the downloaded file to start the software installing.
2. Run the Installation File
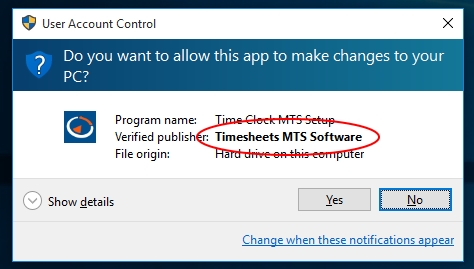
Depending on how your computer is setup you might see a security window (see below) when you run the Time Clock MTS installation file. It should say that the publisher is Timesheets MTS Software, if it does not please contact us To proceed click the Run button.
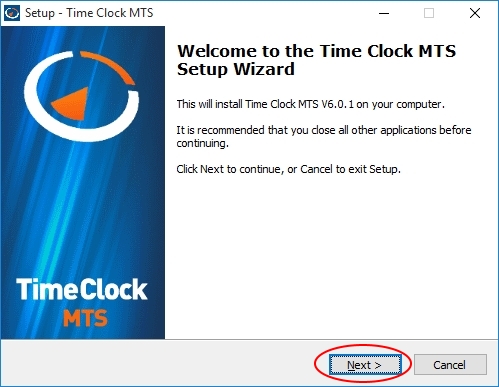
3. Start the Time Clock MTS Installer
The Time Clock MTS installer should now start. Read the instructions displayed and click the Next button to continue.
Click Image to Enlarge
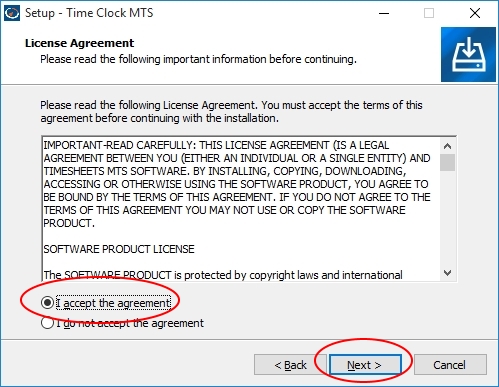
4. Accept the Licence Agreement
The Time Clock MTS installer will now display the licence agreement. If you are happy with the agreement you must accept it by selecting the I accept the agreement option and clicking the Next button to proceed.
Click Image to Enlarge
5. Select Destination Location
It’s strongly recommended that you leave the destination location as suggested by the installer. Click the Next button to proceed. Note that if you’ve installed Time Clock MTS on your computer before you might get a warning that The Folder c:\Program Files\Time Clock MTS\ already exists. Would you like to install in that folder anyway? If you do, click Yes to continue.

Click Image to Enlarge
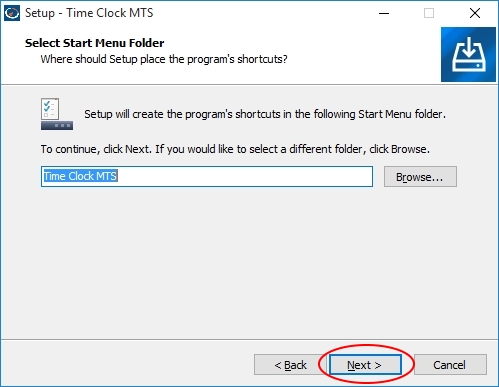
6. Select Start Menu Folder
It’s strongly recommended that you leave the start menu folder as suggested by the installer. Click the Next button to proceed.
Click Image to Enlarge
7. Select Additional Tasks
Check the Create a desktop icon checkbox if you want a shortcut to Time Clock MTS created on your Windows desktop. Check the Create a Quick Launch icon checkbox if you want a shortcut to Time Clock MTS created in the quick launch area of your Windows taskbar. Click the Next button to proceed.
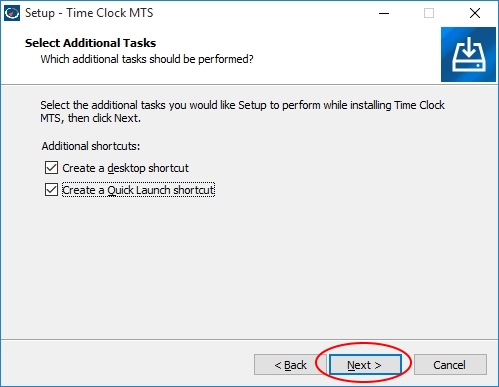
Click Image to Enlarge
8. You’re Ready to Install!
Now that the installer has got all the information it needs from you it’s time for Time Clock MTS to be installed. Click the Install button to get started.
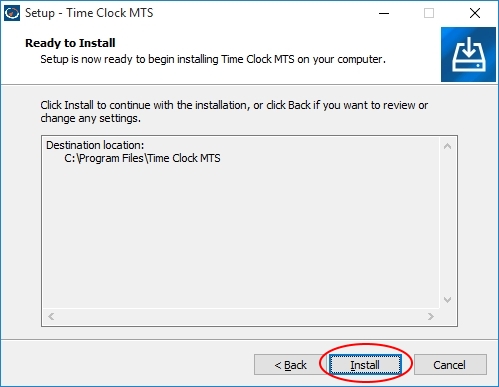
Click Image to Enlarge
9. Time Clock MTS Information
When the installation is complete the installer will display some information to help you get started with Time Clock MTS. Read through this information if you’re new to the software. Click the Next button to proceed. 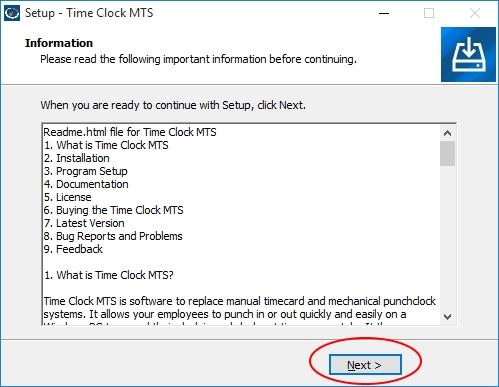
10. You’re Done!
The Time Clock MTS installation is now complete. Check the Launch Time Clock MTS checkbox if you want Time Clock MTS to start running when you close the installer. Click the Finish button and you’re done.