by Mark Nemtsas | Dec 1, 2012 | Tips and Tricks, Using the Software
I had a good question from a user of our employee timeclock software about wanting to track the hours employees spend at lunch but still pay the employees for those hours. The solution is to make use of the job tracking features of Time Clock MTS. I thought it would be worthwhile giving a step-by-step example of how you might set this up and how employees would track their lunch hours.
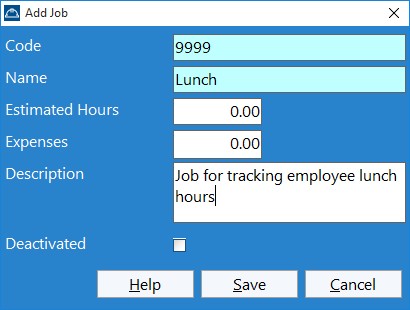
Figure 1 – Adding a Lunch Job
1. Create a Lunch Job
Log into the Time Clock MTS Administrator program and go to the Tools->Options->Job Tracking screen. On the Job Tracking screen click the  button to create a new job. You’ll then be shown the Add/Edit Job screen (see Figure 1). Enter some details for the Lunch Job and give it a job code that can be easily remembered. In this case I gave it the code 9999. Click the Save Job to add the job. You’ll be taken back to the Job Tracking screen where you’ll see the new Lunch Job in the job list. See Figure 2.
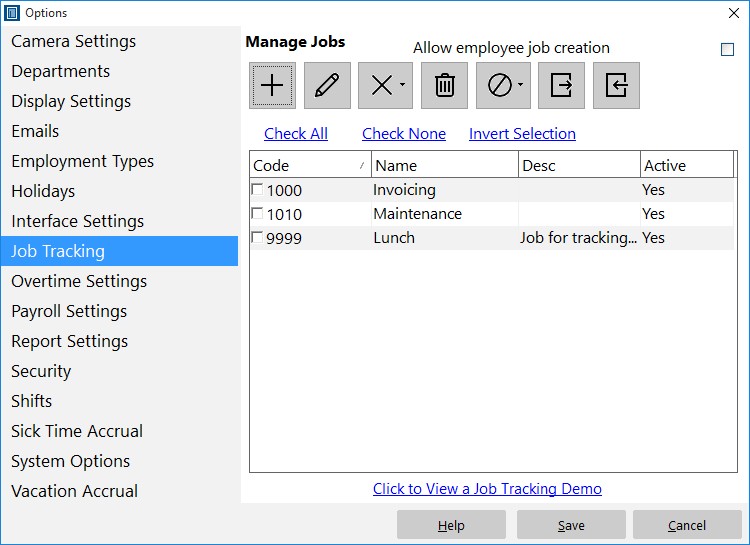
Figure 2 – The Job is Created
2. Turn on Job Tracking
The next step is to turn on job tracking for each employee that you want to track lunch hours for. This is done via the Employee Maintenance->Edit Employee->Employee Information screen (see figure 3). When on this screen make a selection from the Job Tracking dropdown. If you’re not going to be tracking other jobs then you should probably set this to Optional. Don’t forget to press the Save Employee button to save the changes.
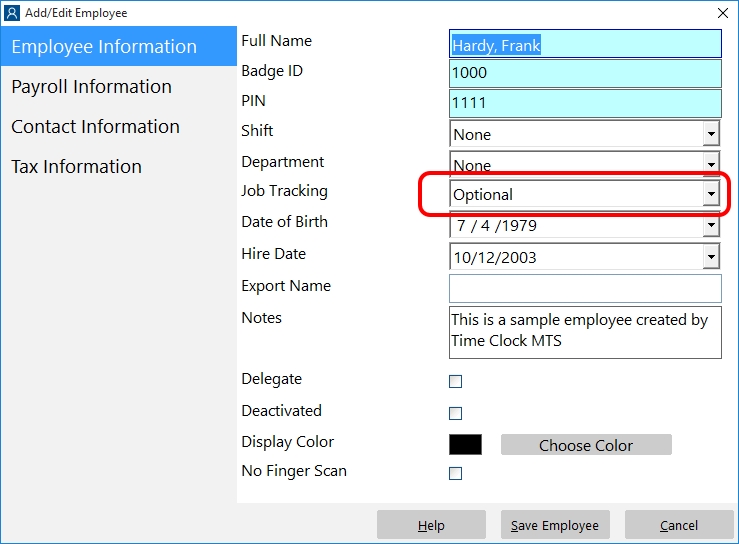
Figure 3 – Turn on Job Tracking
3. Clock Onto the Lunch Job
Clocking onto the Lunch Job is simple. When the employee is ready to take their lunch break, they need to clock out of Time Clock MTS. When they do they’ll be shown the Switch Jobs screen (see Figure 4). Have them click the Switch Jobs button. The Enter Job Code screen (See Figure 5) will then be displayed where the employee can enter the Lunch Job code (in this case 9999). When the code is entered correctly click the Enter button to clock onto the Lunch Job.
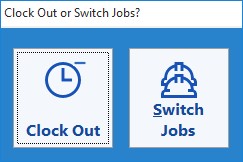
Figure 4 – Switching Jobs
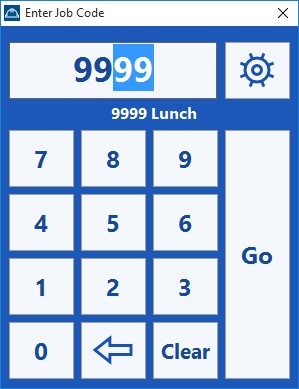
Figure 5 – Choosing the Lunch Job
4. Clock Off of the Lunch Job
When the employee is finished lunch and they need to clock out of the Lunch Job have them clock out as normal. Again they’ll be shown the Switch Jobs screen (Figure 4). Click the Switch Jobs button again and then when the Enter Job Code screen is displayed the employee just needs to click the Enter button WITHOUT entering a job code. This will put them back on normal Time Clock MTS time.
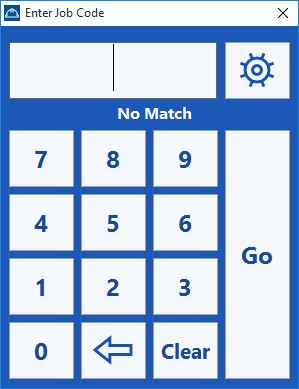
Figure 6 – Clocking Out of Lunch Job
5. Run Reports
Once your employees are tracking their lunch hours you can use one of the job-based Time Clock MTS reports such as the Job Time Report or the Job Punchcard Report. In this example I decided to run the Job Punchcard report which you can see in Figure 7. Towards the bottom of the report you can see that this employee booked 0.95 hours (or 57 minutes) to lunch on November 30.
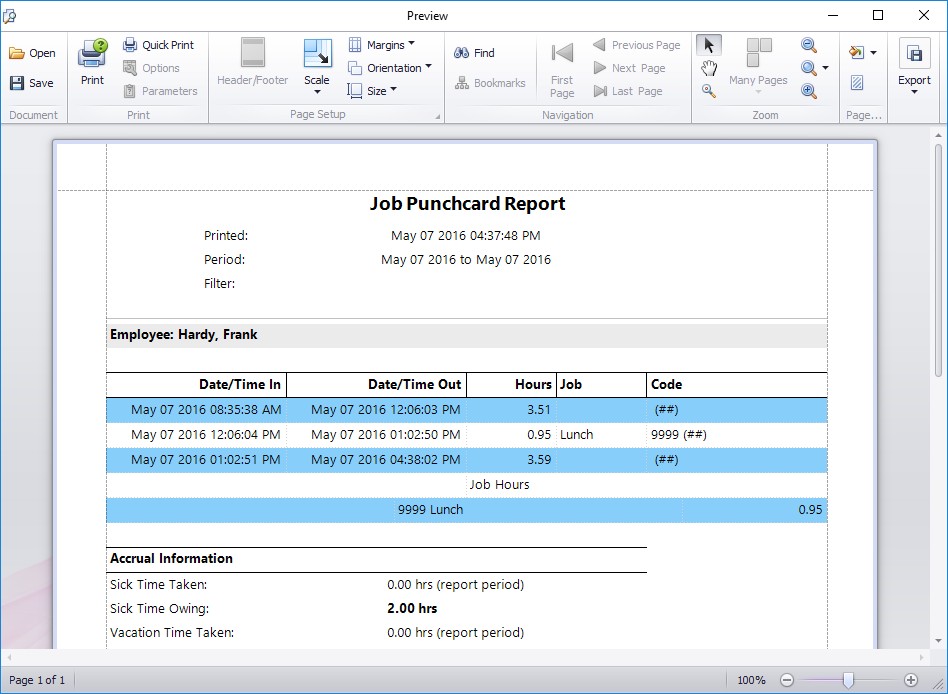
Figure 7 – The Job Punchcard Report
6. Conclusions
I hope that you’ll find that process useful. It can be setup in just a few minutes and allows you to break down the time spend fairly easily. It doesn’t have to be restricted to tracking lunch hours though, you could track other break times, or even track the time that employees spend working in different roles inside your company.
by Mark Nemtsas | Nov 20, 2012 | How To, Tips and Tricks, Using the Software
Time Clock MTS has some features that allow you to create multiple employees for your time clock system quickly and accurately. This can significantly speed up the process of setting up Time Clock MTS for the first time as well as adding new employees to an existing system. It can also help to greatly reduce data entry errors when creating new employees.
This Time Clock MTS How-To Article takes you through the process of creating four new employee records using the Export Employee Data and Import Employee Data features within Time Clock MTS.
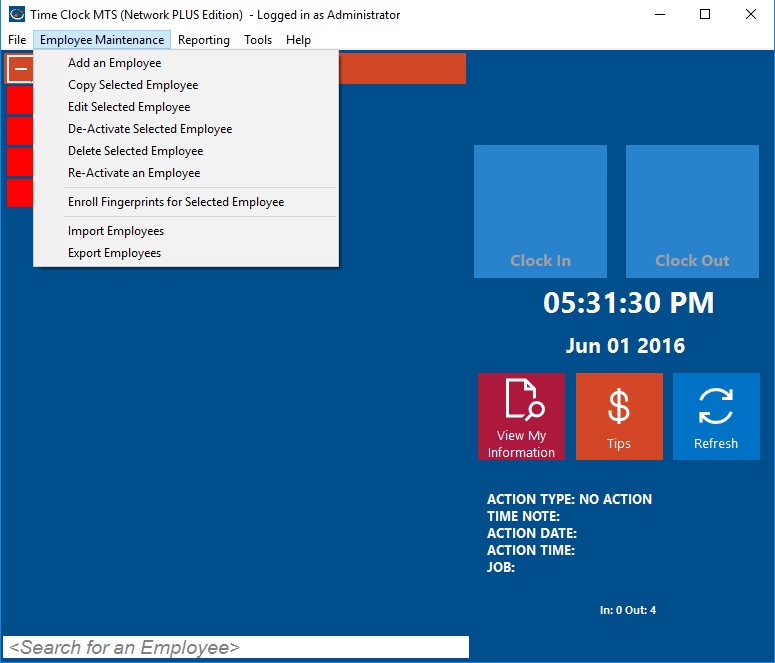
Figure 1 – The Export Employees Menu
1. Export Your Existing Employees to Microsoft Excel
This process relies on you having some existing employees in your Time Clock MTS database and that you have Microsoft Excel installed on your computer. Log into the Time Clock MTS Administrator program as the admin and go to the Employee Maintenance->Export Employees menu (see the image above).
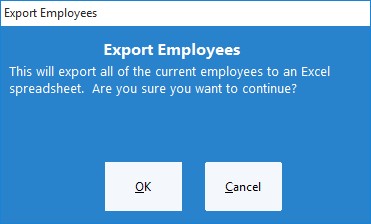
Figure 2 – Confirm Export Employees Action
2. Confirm the Export Employees Action
Time Clock MTS will ask you to confirm the export employees action (see the image above). Click the OK button to proceed.
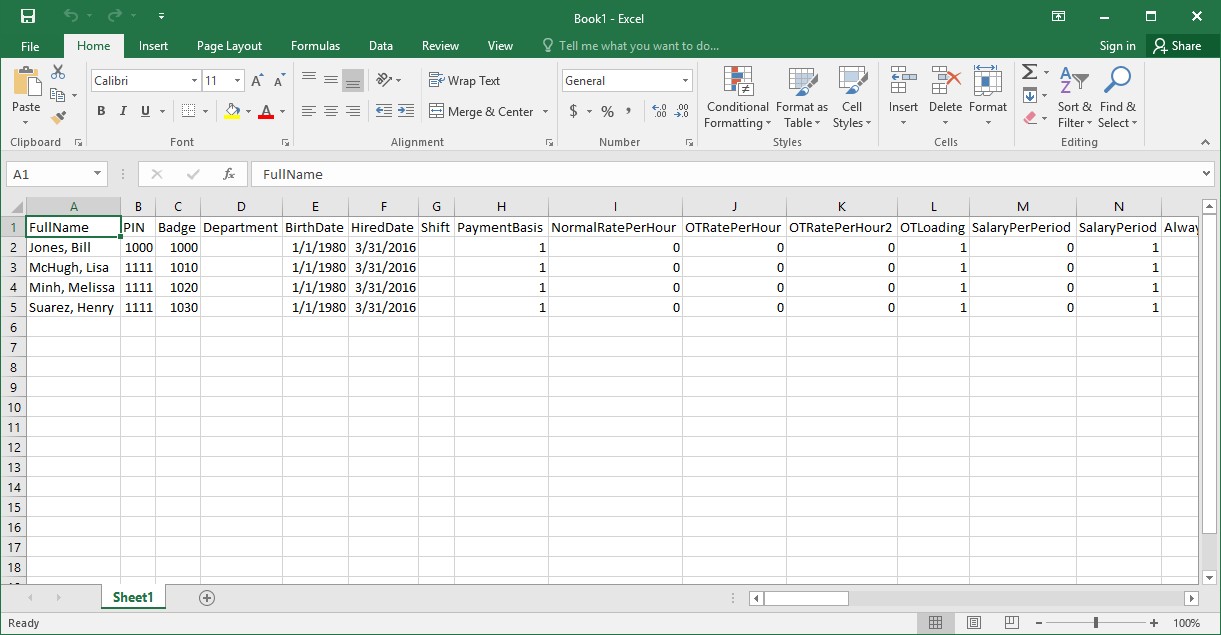
Figure 3 – Exported Employee Data
3. View the Exported Employee Data
A Microsoft Excel window will appear containing your existing employee data (see the image above). It is important to realize that Time Clock MTS uses the Employee Badge as the unique identifier for each employee. The consequence of this is if you change the Badge numbers of the employees in your exported data to new numbers and import that data back into Time Clock MTS it considers them to be entirely new employees.
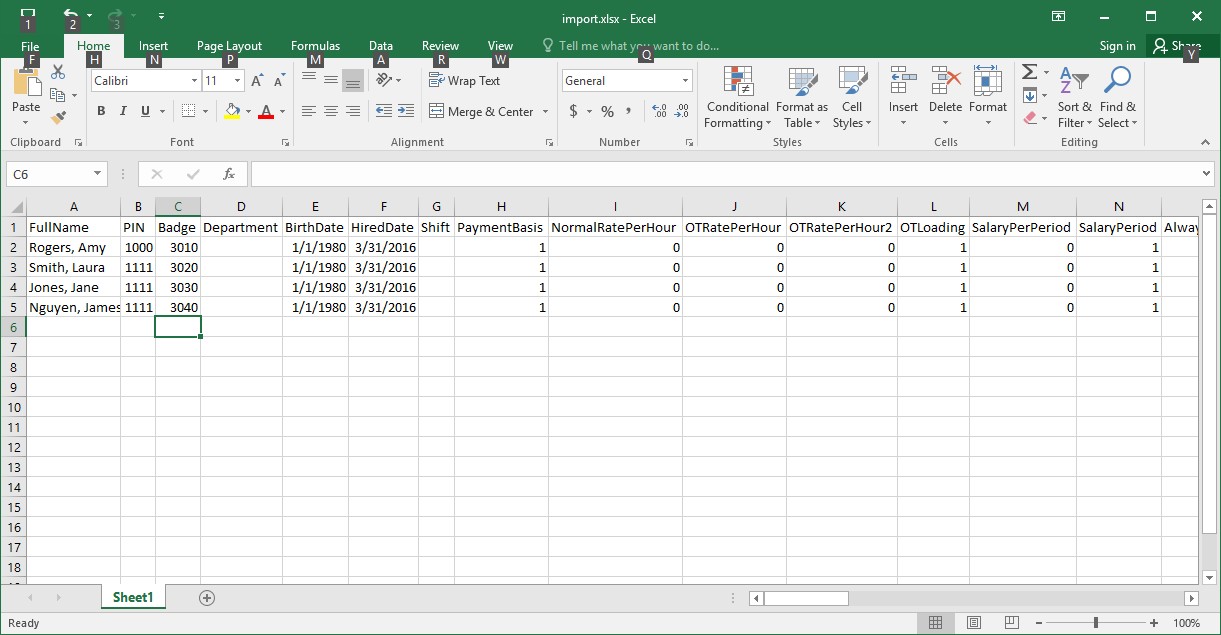
Figure 4 – New Employee Data
4. Edit the Exported Employee Data
We’re going to change the employee name column of each exported employee and (most importantly) give each one a new badge number. You can see what this might look like in the image above. You should note that at this step you could create copies of your employee data rows and create as many new employee records as you like, conversely you could delete export rows and create fewer new employees than you exported. The choice is yours. In this example we exported 4 employees and we’re going to create four new ones.
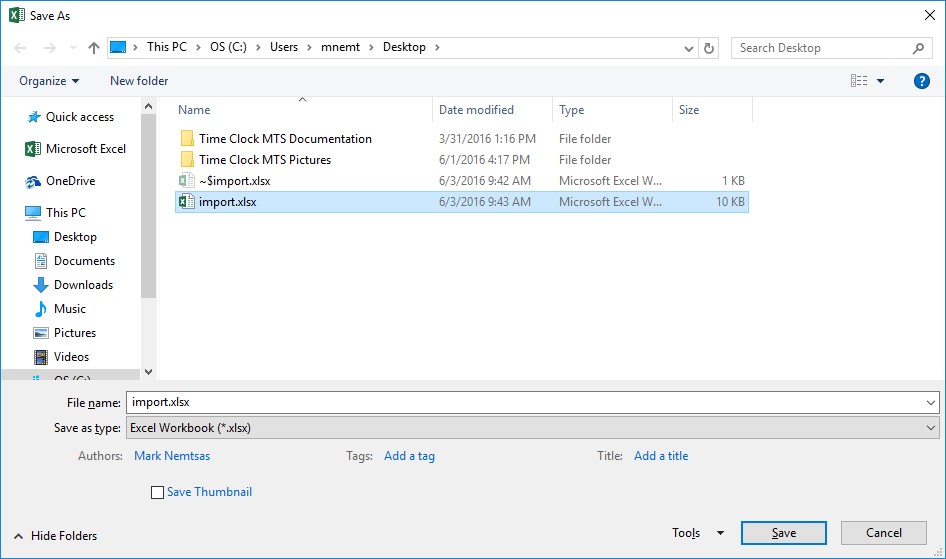
Figure 5 – Saving the Employee Data
5. Save the New Employee Data
The next step is to save the Microsoft Excel spreadsheet that contains your new employee data. Note the location where you save it because you’ll need to know the location in the following steps. In our example I saved the spreadsheet to a folder on my Windows desktop (see image above).

Figure 6 – The Import Employees Menu
6. Import the New Employee Data Back into Time Clock MTS
While still logged into Time Clock MTS as the administrator go to the Employee Maintenance->Import Employees menu (see above).
Figure 7 – The Import Employees Screen
7. Select the New Employee Data Spreadsheet
On the Import Employees screen (shown above) click the Import Employees button. This will allow you to navigate to where you saved your new employee data in Step 5. Once you’ve found it open the file.
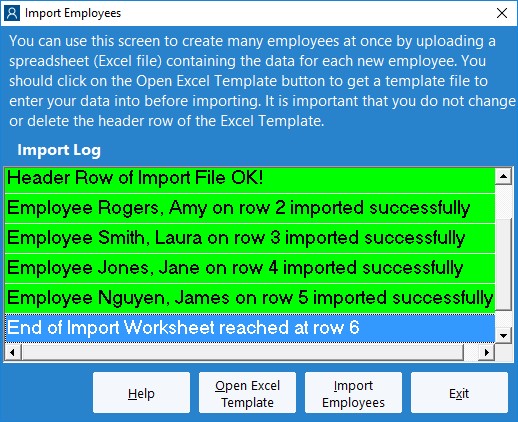
Figure 8 – Import Employees Complete
8. Watch the Employee Import Process
Time Clock MTS will now import the new employee data from the spreadsheet. As it imports each employee a message will be displayed on the Import Employees screen telling you whether that employee was created successfully or not. When the process is complete the Import Employees screen may look something like the image shown above. Note that each new employee is reported as being imported successfully.
Figure 9 – The New Employees
9. View Your New Employees
The final step is to exit out of the Import Employees screen by clicking the Exit button. When we are returned to the employee time clock we can see that the new employees are present on the employee list.
Important Note
If you happen to try to import an employee whose badge number matches the badge number of an employee that is already present in your Time Clock MTS database do not worry. The Import Employee process will not import that employee and leave your existing employee information intact.
by Mark Nemtsas | Oct 8, 2012 | Tips and Tricks, Using the Software
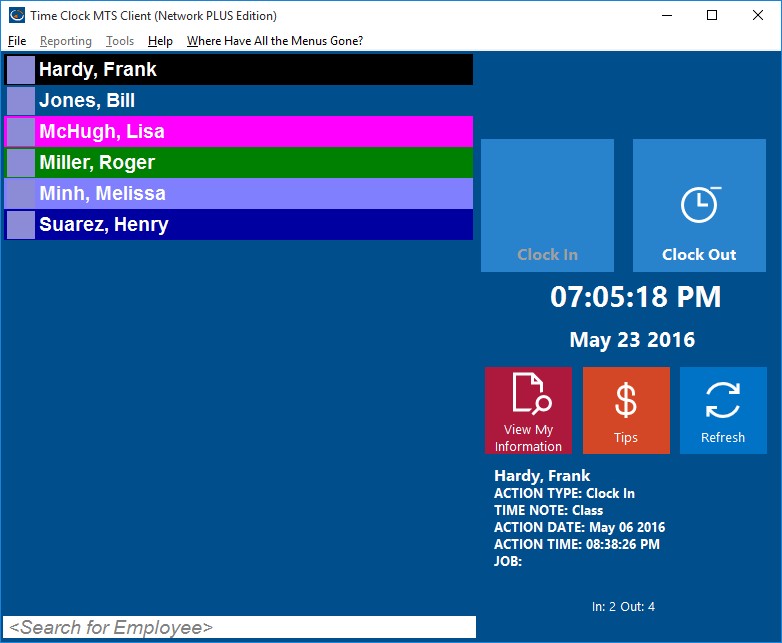
Time Clock MTS Client in Idle State
Above you can see a screenshot of the Time Clock MTS Client that has entered the idle state. You can tell this because the status icons have turned blue. Usually these icons are either red (indicating the employee is clocked out) or green (indicating the employee is clocked in). However, the Time Clock MTS client enters an idle state 60 seconds after any activity (such as someone moving a mouse or clocking in or out) to reduce network traffic. When someone clicks on an employee name in the employee list the Time Clock MTS client will query the Time Clock MTS database to get the employee’s state to ensure that they can only clock in or out as appropriate.
This idle state behaviour of the Time Clock MTS client is turned on by default, but if you find this confusing it can be turned off via a setting in the Time Clock MTS administrator program. To do this go to the Tools->Options->Interface Options screen and check the No Idle Client State checkbox. This will ensure that every 60 seconds every Time Clock MTS client program on your network will update the status of your employees in the employee list.
by Mark Nemtsas | Aug 20, 2012 | Tips and Tricks
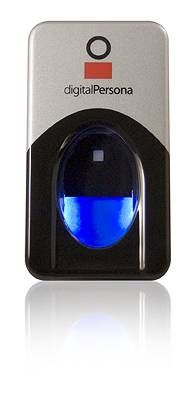
A Digital Personal USB Finger Scanner
It appears at first glance that using a time clock software package like Time Clock MTS with magnetic swipe cards or using it with a biometric finger scanner similar to the one shown above are two very different methods to tracking employee attendance. But, In my opinion, they are remarkably similar and really only differ in one key area. Swipe card time clock systems (or for that matter PIN based systems or barcode based systems) rely on each employee having a unique token to identify themselves. Obviously in the case of swipe card and barcode systems the unique employee identifier is encoded on the card or in the barcode. When employees use a PIN the PIN itself identifies the employee. A biometric time clock system has a unique identifier too, some biometric feature of the employee themselves. This could be a voice, a facial pattern or feature, an iris pattern, or most commonly a fingerprint.
It seems to me that the fundamental difference between a time clock system that uses a PIN, swipe card, or barcode to identify an employee and one that uses a biometric feature to identify an employee is the assurance that the actual employee is presenting the unique identifier or someone else is. Obviously magnetic cards and barcodes can be shared between employees and employee PINs can be passed on by word of mouth. Conversely, properly selected biometric identifiers are much, much harder to share between employees. The obvious conclusion is that a biometric time clock system gives employers a much greater assurance that the time clock data they are collecting is a true and valid reflection of actual employee attendance.
Time Clock MTS supported Digital Persona 4500 USB finger scanners are available from Amazon at under $100 and a single computer license of Time Clock MTS is just $99 (US). This affordable combination allows any small business to setup a biometric time clock solution for minimal cost, a price you’d probably recoup in just a few weeks of payroll savings.
by Mark Nemtsas | Aug 9, 2012 | Tips and Tricks, Using the Software
Here’s an email we received recently from a user of Time Clock MTS.
We have been using your time clock software for a few years now and are really happy with how it has been working. About six months ago we upgraded one of our PCs to a newer Windows 7 computer. We purchased a new License for Time Clock MTS for the new machine and it has been working very well up to today. The computer developed a PSU issue and will not boot. We are trying to get the power supply replaced but it may have more issues.
My questions are:
Is there any way to retrieve the clock in and out times without accessing the HDD on the broken computer?
By default our employee timeclock system installs a database on the local disk when you first install the software. If that disk happens to fail and you haven’t moved the database then the database (and all the time clock data therein) will be lost. So, no, there’s no way this user can retrieve their clock in and out times if they have no access to the HDD of their PC.
To prevent this sort of disaster you should keep your Time Clock MTS database on your network server where it is backed up with all your other files (you do have backups don’t you?). Actually moving the database to your network server can be done within Time Clock MTS itself. That process is pretty simple and covered completely in the How to Move the Time Clock MTS Database how-to article.
The moral of the story is, if you have shared network drive that is backed up then you should be using it to store your Time Clock MTS database. This will prevent you from losing your data in the event of hardware failure.
by Mark Nemtsas | Aug 9, 2012 | Tips and Tricks
A common question we get asked is whether purchasing our employee timeclock software is a one-time fee or is there a monthly or annual fee to keep using the software. Quite simply you pay once to use the software but there can be on-going support costs if you require our assistance. Here’s how it works in more detail:
- The purchase gives you a lifetime license to use that major version of Time Clock MTS. Currently we’re at version 5.1.2, so the major version is 5. If you were to purchase Time Clock MTS now your registration key would work until the software went to version 6. But of course, you can keep using Version 5 indefinitely, you do not have to upgrade.
- The purchase entitles you to one year of email support and access to software updates. If the software goes up a major version within this year you’ll get a new registraton key for the new version.
- After the first year email support (and software updates) is $25 (US) for the Stand Alone Version, $50 (US) for the Network Version, and $100 (US) for the Network PLUS Version. Purchasing support is optional, your registration key will keep working whether you purchase it or not. You just will not be entitled to any email support or access to new versions of the software if you do not have a valid support contract.