I had a good question from a user of our employee timeclock software about wanting to track the hours employees spend at lunch but still pay the employees for those hours. The solution is to make use of the job tracking features of Time Clock MTS. I thought it would be worthwhile giving a step-by-step example of how you might set this up and how employees would track their lunch hours.
Figure 1 – Adding a Lunch Job
1. Create a Lunch Job
Log into the Time Clock MTS Administrator program and go to the Tools->Options->Job Tracking screen. On the Job Tracking screen click the  button to create a new job. You’ll then be shown the Add/Edit Job screen (see Figure 1). Enter some details for the Lunch Job and give it a job code that can be easily remembered. In this case I gave it the code 9999. Click the Save Job to add the job. You’ll be taken back to the Job Tracking screen where you’ll see the new Lunch Job in the job list. See Figure 2.
Figure 2 – The Job is Created
2. Turn on Job Tracking
The next step is to turn on job tracking for each employee that you want to track lunch hours for. This is done via the Employee Maintenance->Edit Employee->Employee Information screen (see figure 3). When on this screen make a selection from the Job Tracking dropdown. If you’re not going to be tracking other jobs then you should probably set this to Optional. Don’t forget to press the Save Employee button to save the changes.
Figure 3 – Turn on Job Tracking
3. Clock Onto the Lunch Job
Clocking onto the Lunch Job is simple. When the employee is ready to take their lunch break, they need to clock out of Time Clock MTS. When they do they’ll be shown the Switch Jobs screen (see Figure 4). Have them click the Switch Jobs button. The Enter Job Code screen (See Figure 5) will then be displayed where the employee can enter the Lunch Job code (in this case 9999). When the code is entered correctly click the Enter button to clock onto the Lunch Job.
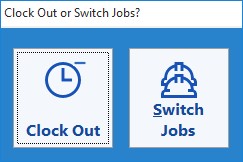
Figure 4 – Switching Jobs
Figure 5 – Choosing the Lunch Job
4. Clock Off of the Lunch Job
When the employee is finished lunch and they need to clock out of the Lunch Job have them clock out as normal. Again they’ll be shown the Switch Jobs screen (Figure 4). Click the Switch Jobs button again and then when the Enter Job Code screen is displayed the employee just needs to click the Enter button WITHOUT entering a job code. This will put them back on normal Time Clock MTS time.
Figure 6 – Clocking Out of Lunch Job
5. Run Reports
Once your employees are tracking their lunch hours you can use one of the job-based Time Clock MTS reports such as the Job Time Report or the Job Punchcard Report. In this example I decided to run the Job Punchcard report which you can see in Figure 7. Towards the bottom of the report you can see that this employee booked 0.95 hours (or 57 minutes) to lunch on November 30.
Figure 7 – The Job Punchcard Report
6. Conclusions
I hope that you’ll find that process useful. It can be setup in just a few minutes and allows you to break down the time spend fairly easily. It doesn’t have to be restricted to tracking lunch hours though, you could track other break times, or even track the time that employees spend working in different roles inside your company.
