by Mark Nemtsas | Sep 8, 2016 | How To
This post details the second way that the Employee List Interface of Time Clock MTS can be used with some sort of data reader (such as a barcode scanner, magnetic card reader, or RFID reader). This method relies on a unique identifier being stored with each employee and changing a single setting on the Interface Settings screen.
Data and Scanner Requirements
The first requirement for this method to a unique number of identifiers that are stored on a bar code, proximity card, or magnetic card. It doesn’t matter too much what the identifiers are as long as they are 255 characters or shorter. They could be pre-programmed fobs, bar codes generated in Excel using a barcode font, your internal ID badges, or a national identity card. Of course you must have means of reading this data and inputting it into a computer via a keyboard wedge or software wedge, which is the de-facto method most card, RFID, and bar code readers use.
Storing an Employee’s Unique ID
Store Unique ID’s with Employee Records
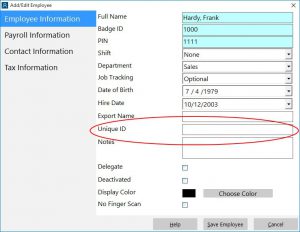
The first step in the process is to store a unique ID against each employee’s record in Time Clock MTS. This is done on the Employee Information screen (see above). Once you’ve got the employee’s information showing select the Unique ID field and scan the card, RFID fob, or barcode you’ve decided to allocate that employee. Your data reader will populate the field. Once done click the Save button. Repeat for each employee, remembering of course to allocate a different card, fob, or barcode to each employee.
Enable the Match Unique ID Setting
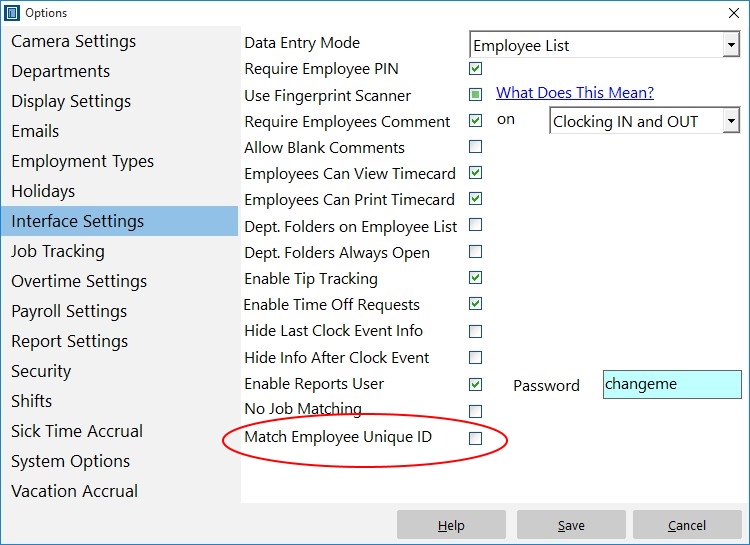
Enable the Match Employee Unique ID Setting
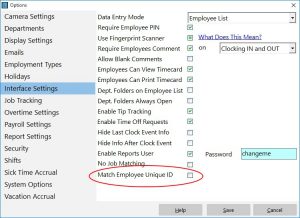
The next step is to enable the Match Employee Unique ID setting on the Interface Settings screen (see above). Simply check the box and click Save.
Start Scanning Your Unique ID’s!
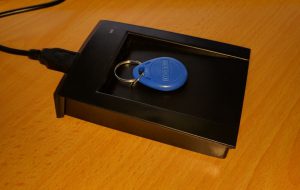
The final step is simply to start scanning your employee ID’s using your data scanner of choice. Of course, you must have the employee list interface selected for this to work. When an ID is scanned using your barcode scanner, or magnetic card reader, or your RFID fob reader (see below) Time Clock MTS will attempt to match the employee with that ID and punch them in or out depending on what their current status is. By the way the RFID scanner below was purchased for less than $20 along with 10 pre-programmed fobs like that shown. So it’s really not expensive to set this sort of system up!
USB RFID Reader and Fob
by Mark Nemtsas | Jun 29, 2015 | How To
This Time Clock MTS how-to guide is for users of the software who are replacing their in-house file server with a new one and need to move their time clock data file from the old server to the new one. This guide covers what to do with both the Time Clock MTS Administrator software and the Time Clock MTS Client software.
Moving the Data File
1. Set Up New Mapped Drive
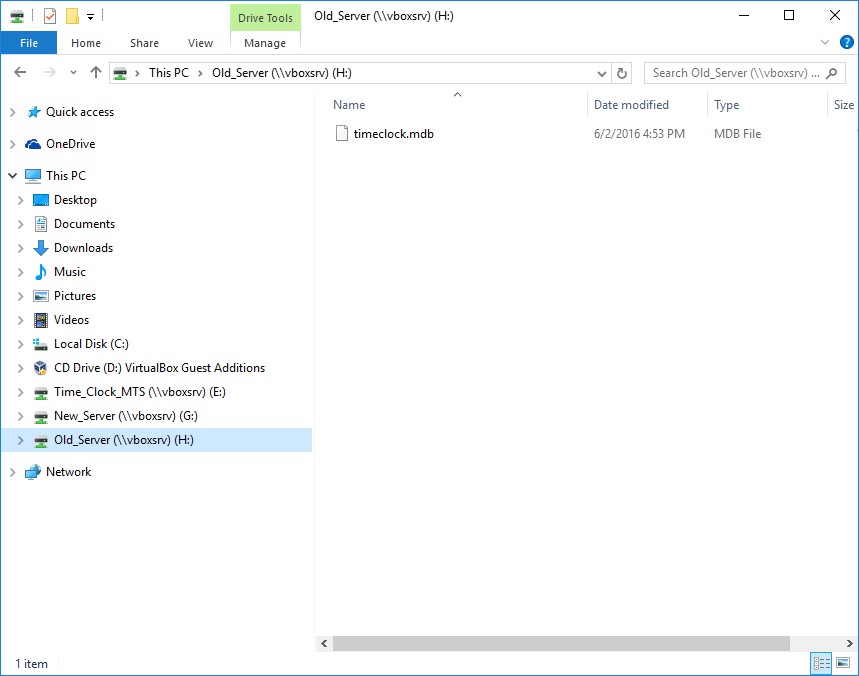
The first step in the process is to set up a mapped drive on your new server that points to the folder that your time clock data file is going to reside in. All computers that have Time Clock MTS on them must have full read/write/delete permissions on this folder. The actual process of setting up a mapped drive (and assigning correct permissions) is beyond the scope of this article but this guide may be useful. For this tutorial we’ve set up folders in the Windows Explorer window below. In the bottom left you can see mapped drives to the Old Server and the New Server, which are the G:\New_Server and H:\Old_Server folders. Of course your folder names and paths will be different but for the sake of an example we’ll work with this for this tutorial.
Setting up the Mapped Drives
2. Move the Time Clock MTS Data File
Whether you’re using the Stand Alone Edition or the Network Edition of Time Clock MTS the first step is to move the Time Clock Data File to your new mapped drive. This is done by starting up the Time Clock MTS administrator software and logging in as the administrator using the File->Log in as Administrator menu and going to the Tools->Options->System Options screen. You can see that screen below.
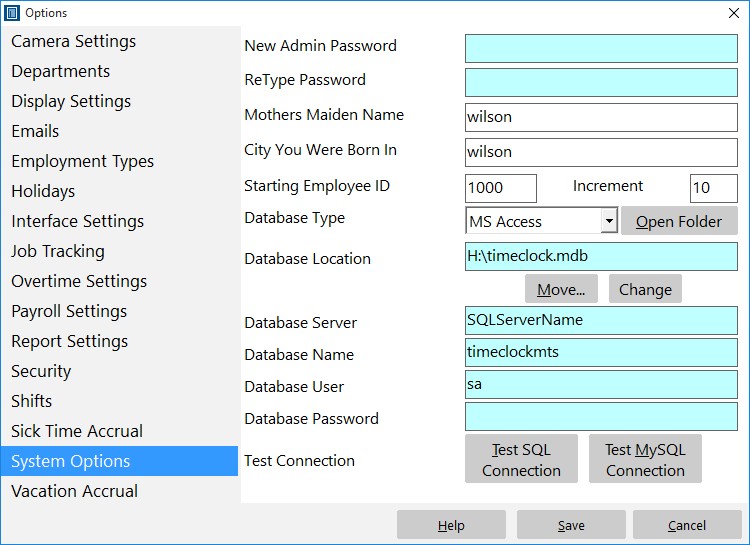
The Time Clock MTS Administrator System Options Screen
Once you’re on that screen click the Move button. You’ll then be asked to confirm that you want to move the data file via these two screens:
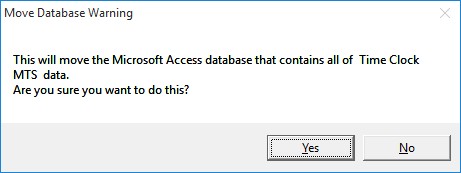
Confirm the Move
Now Select a Directory to Move it To
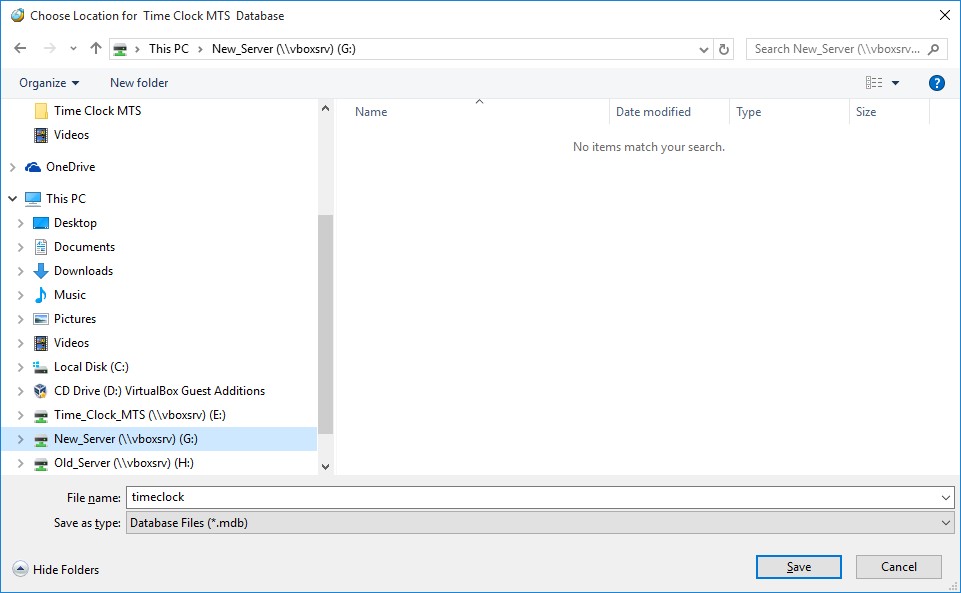
Once accepted you’ll be shown a Windows Explorer window like the one below. It will be opened by default to the directory that your time clock data file is currently in (on your old server). In this example that’s the H:\Old_server folder.

Moving the Data File Location 1
Just navigate to the new folder where your data file is going to be moved to (on your new server). In the case of our example that’s the E:\New_Server folder.
Moving the Data File Location 2
Once you’re done selecting the folder to move your data file to click the Save button and you’ll be shown the screen below informing you of the success of the move. If you’re using the Time Clock MTS Stand-Alone Edition then that’s all that you need to do to move your data file to your new server. If you’re using the Time Clock MTS Network Edition then please read the Redirect the Time Clock MTS Client Software section of this how-to article.
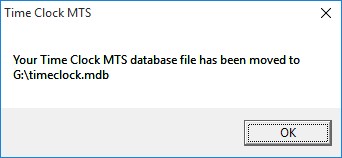
Success! The file has been moved.
Redirect the Time Clock MTS Client Software
Once you’ve moved your time clock data file to your new server you’re going to have to redirect the Time Clock MTS Client software to look for the data file in the new location. Note that you’ll have to do this on every computer that has the client software installed on it. Start up the Time Clock MTS Client software and log in as the administrator using the File->Log in as Administrator menu and go to the Tools->Options->System Options screen.
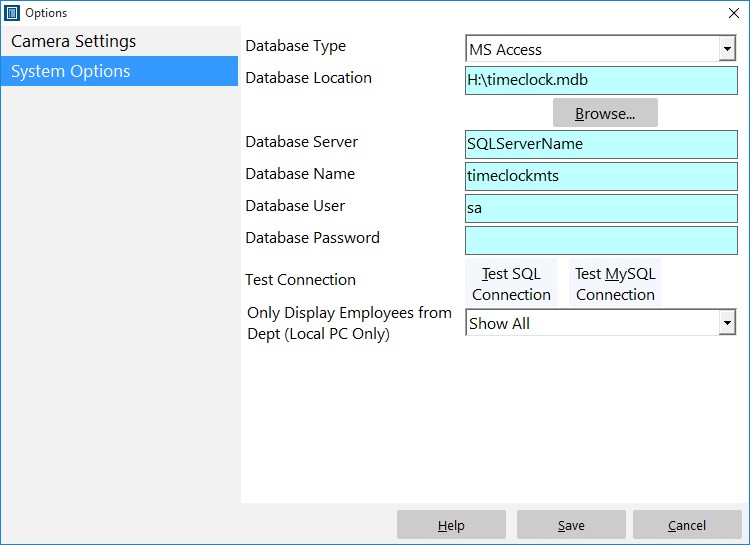
The Time Clock MTS Client System Options Screen
Once you’re on that screen click the Browse button and you’ll be shown a Windows Explorer window like the one below. It will be opened by default to the old directory that your time clock data file was in. In this example that’s the F:\Old_server folder.

Changing the Client Data File Location 1
Now navigate to the new folder where your data file was moved to. In the case of our example that was the G:\New_Server folder.
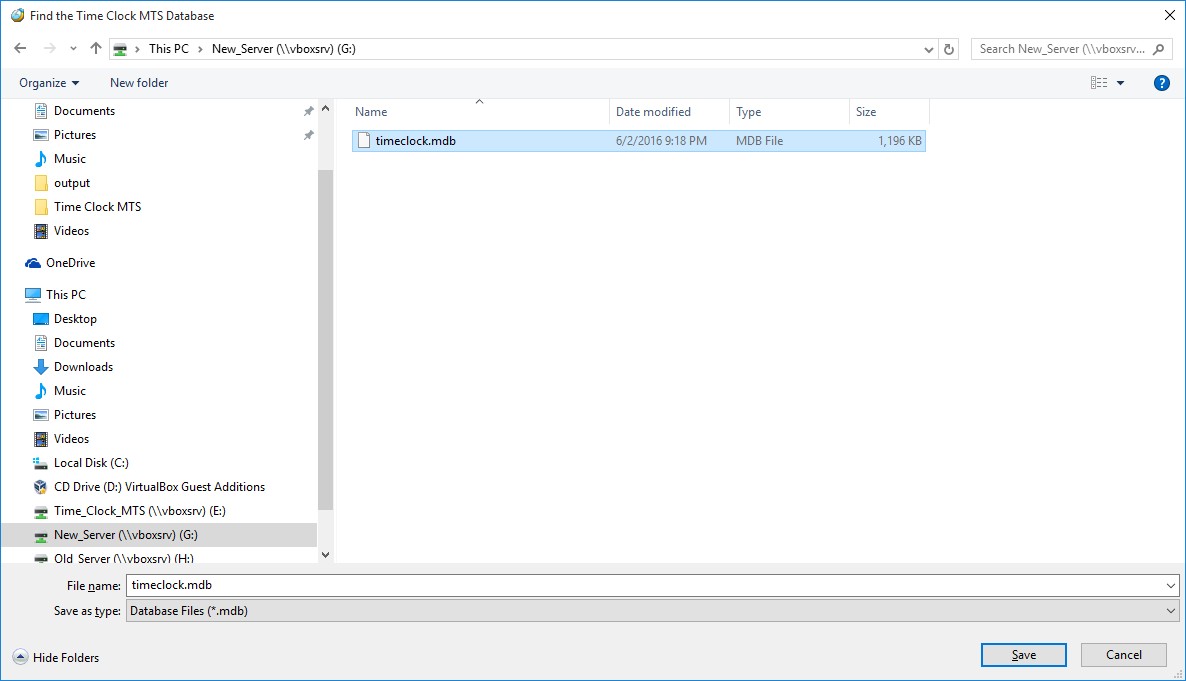
Changing the Client Data File Location 2
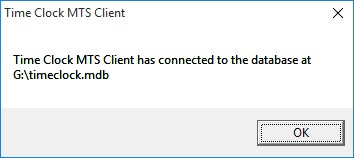
Click the Save button and you’ll be shown the message below informing you of your success! Don’t forget that you’ll have to follow this process for every computer that has the Time Clock MTS Client software installed on it.
by Mark Nemtsas | Apr 30, 2015 | How To, Using the Software
SmoothPay is software for simple and efficient payroll processing. It originates from New Zealand and appears to be targeted at users in that country as well as those in Australia and Pacific nations such as PNG, Samoa, and the Solomon Islands. It runs on PC and Mac and the publishers have asked us about getting data from Time Clock MTS to their payroll system. Their export requirements are well documented and it’s a fairly simple matter to create a Time Clock MTS Export Format to suit SmoothPay.
First Step – Match Employee Badge Numbers
The first step you’re going to have to take is to match the Time Clock MTS Employee Badge Numbers with those used in SmoothPay. The badge numbers can be edited on the Employee Information Screen.
Create the Export Format
New Export Formats can be created on the Reporting->Data Export->Export Formats screen (view help topic for this screen). Navigate to that screen and create a new export format. You’ll then be shown the Add Export Format screen (see below).

SmoothPay Data Export Format
Give the export format a name and then set the type. SmoothPay needs an aggregate format (total hours per employee for each day of the period) and requires the DD/MM/YYYY date format so you should go ahead and choose those options. Once you’ve done that you’ll need to match up your rate codes with the time types that are defined by SmoothPay. In the image above we’ve used the default SmoothPay rate codes that are found in their documentation but you should check with your own SmoothPay installation to make sure they match correctly.
The SmoothPay export file doesn’t require a header so you can leave that field blank. The final step to take is to create the actual export line format. Here’s what SmoothPay needs:
1,<EMPLOYEE_BADGE_ID>,”<RATE_CODE>”,””,””,””,<HOURS_DECIMAL>,””,””,””,””,<HOURS_DATE>,””,””,””
Just copy and paste that line into the export format text box, click the Save Export Format button and you’re done.
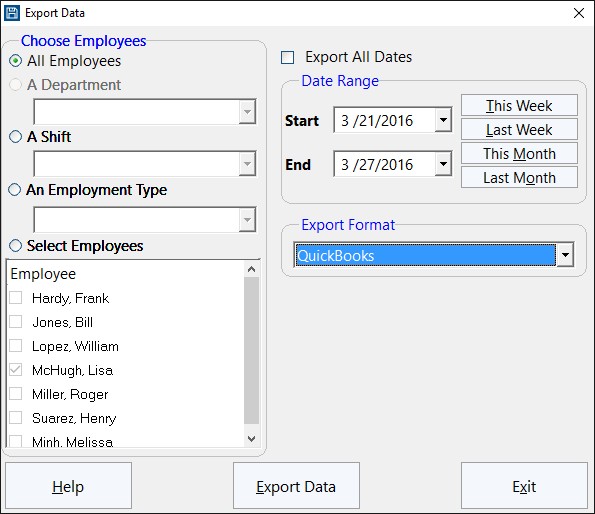
To use your new export format to export time clock data to SmoothPay use the Reporting->Data Export->Export Data screen.

The Export Data Screen
by Mark Nemtsas | Apr 30, 2015 | How To
This Time Clock MTS How-To Guide helps users determine why their employees are not being paid overtime by the software when they believe they should be.
Check Overtime Limits
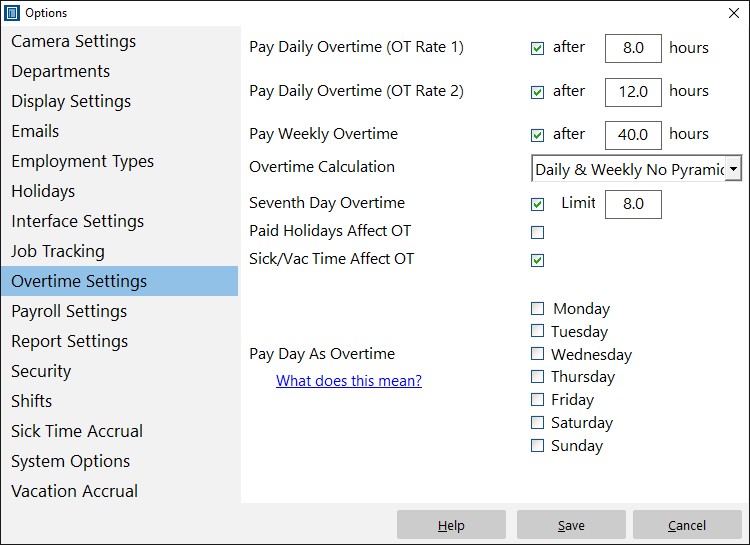
Go to the Tools->Options->Overtime Settings screen (see below) and check that overtime limits are actually set up and the overtime check boxes are ticked to tell Time Clock MTS to calculate overtime.
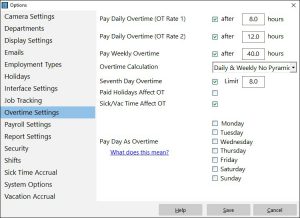
The Overtime Settings Screen
Check the Employee Payment Type
Time Clock MTS does not calculate overtime for salaried employees. Go to each employee’s Payroll Information screen (see below) and check that their payment type is set to Hourly Rate.
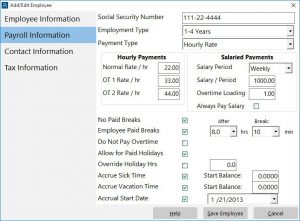
The Payroll Information Screen
Check that Employees can Accrue Overtime
It’s possible to switch off overtime accrual on an employee by employee basis. This is done via the Do Not Pay Overtime checkbox on each employee’s Payroll Information screen.
Are Employees Working Enough Hours?
The next step is to run your payroll reports and check that employees are actually working enough daily or weekly hours to exceed your overtime limits. A great report for this is the Time Breakdown Report.
Are Times Excluded from Overtime Calculations?
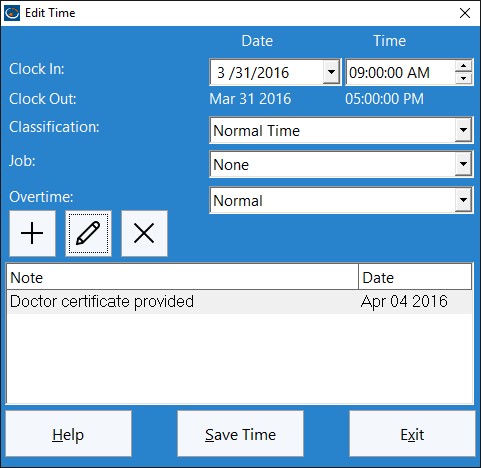
Administrators using the Edit Time Punch screen (see below) to edit employee’s times can adjust overtime calculations on a time by time basis. One of the settings available from the Overtime drop down box on this screen is Exclude from Overtime. If this is set then that time punch will not be included in overtime calculations. If your employees are not getting overtime paid then this may well be the reason why.
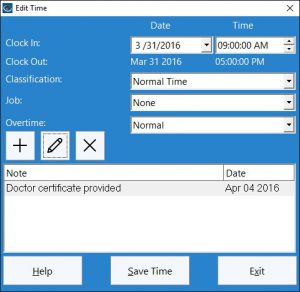
This screen is used to edit an existing time punch.
Help – I’ve Tried Everything and Overtime Still Won’t Work!
If you’ve tried everything above then please reach out to us via our contact page and we’ll help you out.
by Mark Nemtsas | Apr 25, 2015 | How To
Uninstalling Time Clock MTS couldn’t be any easier. Just follow these easy instructions:
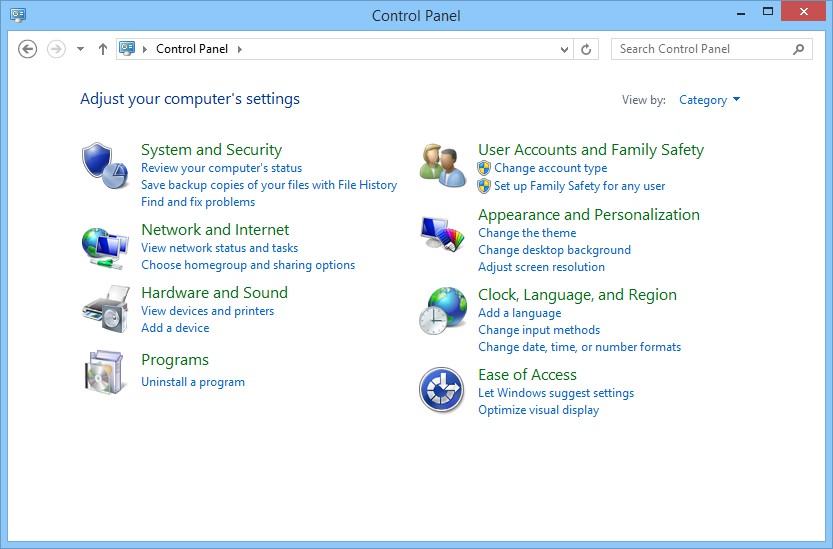
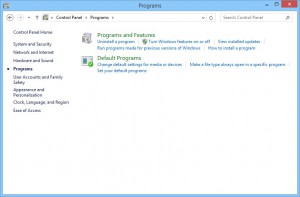
First step is to open the Windows Control panel, which you can see below. Select the Programs – Uninstall a program option.

Open the Windows Control Panel
You’ll then be shown the screen below. Choose the Uninstall a program option.
Choose the uninstall program option
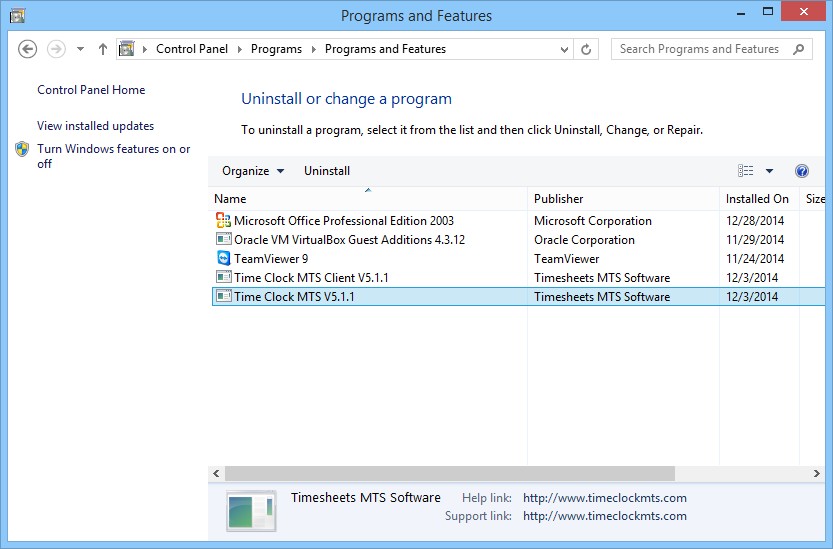
Find Time Clock MTS in the installed program list that is shown to you (see below) and double click on it.
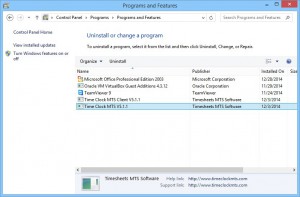
Select Time Clock MTS from the program list
Confirm that you want to uninstall Time Clock MTS.
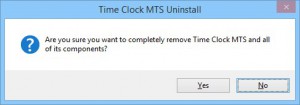
Confirm the uninstall
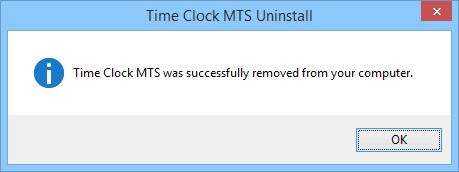
Let the process run and when done you’ll be shown the message below indicating the software was successfully removed from your computer.

Uninstall complete!
by Mark Nemtsas | Dec 24, 2014 | How To
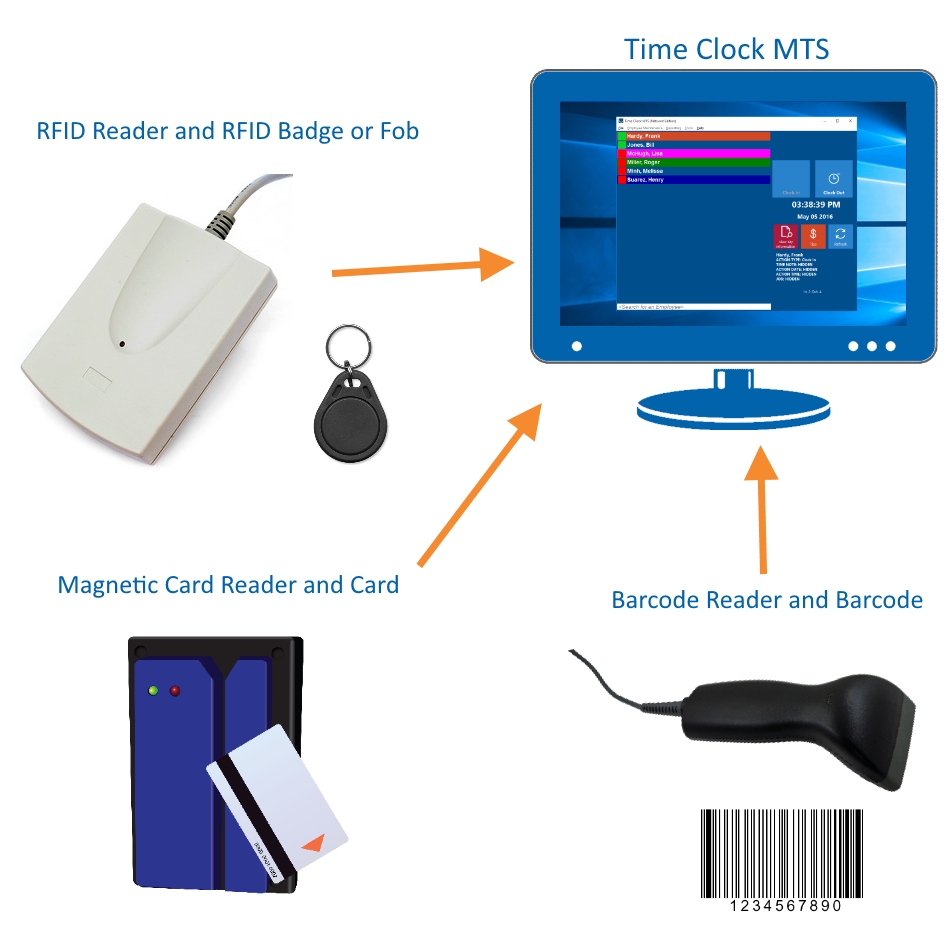
It is possible to use the Employee List Interface of Time Clock MTS with a barcode scanner, a magnetic card reader, or other input devices such has RFID badges or fobs. The only proviso is that the device chosen must be able to output data to your computer like a keyboard. This can be done directly via a device that plugs directly into your keyboard port (a so-called keyboard wedge) or if your device is attached via USB through the use of a software program that allows the device to emulate a keyboard. This is known as a “software wedge”. In either case Time Clock MTS must be the currently active program in Windows for a data scan from your device to punch an employee in or out.
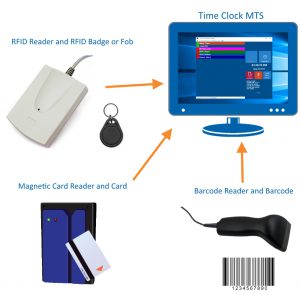
Time Clock MTS with RFID readers, magnetic card readers, or barcode readers.
There are two ways of using data scanners with the Employee List Screen.
Badges / Barcodes /RFID Tags Encoded with Employee Names
If you’ve got a magnetic card writer, a programmable RFID writer, or have the capability to print your own barcode badges then you can encode them with your employee names. This is ideal if you want a individual ID for each employee that will not be re-used. See this blog entry for detailed information on how to setup the software and badges for this method.
Badges / Barcodes /RFID Tags Badges with Unique ID’s
If you have pre-programmed magnetic cards, RFID fobs, or printed barcode badges each with unique data encoded on them then this method is suitable. It is also ideal if you want to make use of existing ID cards like student cards or National Identity Cards (such has Chilean ID cards) that include a unique barcode or QR code. See this blog entry for detailed information on how to store unqiue ID’s against employee records and configure Time Clock MTS.
Other Time Clock MTS Security Features
All other forms of Time Clock MTS security, such as fingerprint scanning and employee PINs will still work once you’ve scanned an employee badge. If you have fingerprint or PIN security set up the employee will need to enter their PIN or scan their fingerprint AFTER they’ve scanned their badge.
Page 3 of 16«12345...10...»Last »