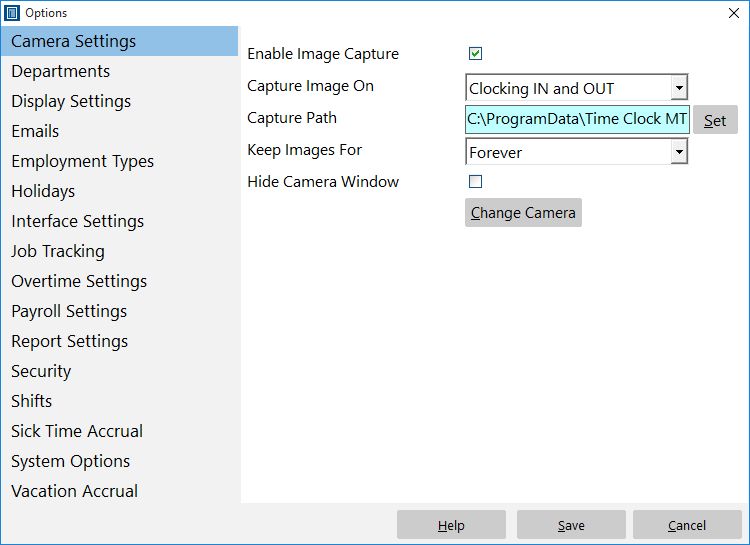
If your Time Clock MTS computer has an attached camera then it can capture images from the camera when employees clock in or clock out. This is a useful feature to help minimize or eliminate buddy punching. The Time Clock MTS administrator can verify the images attached to clock ins and outs on the Edit Times page.
| Enable Image Capture | Check this box to enable Time Clock MTS to capture images from an attached camera. Note that you must have an attached camera that is Video for Windows compliant for image capture to function. Also note that for image capture to function the camera cannot be in use by any other application. |
| Capture Image On | Select when you want images to be captured. They can be captured on Clock In, Clock Out, or both. |
| Capture Path | Set the path to capture image files to here. You can click the Set button to choose a directory. If you are using the Network Edition or Network PLUS Edition of Time Clock MTS then make sure to use the SAME shared folder for each computer. If you do not then images will not be available to the Time Clock MTS Administrator computer. |
| Keep Images For | Select how long you want images to be retained by Time Clock MTS for. |
| Hide Camera Window | Check this box to hide the camera window if there is no camera on this computer. Note that the Window CANNOT be hidden if there is an active camera. |
| Change Camera | Click to change the camera used to capture images. |