Adding Times for a Time Off Request
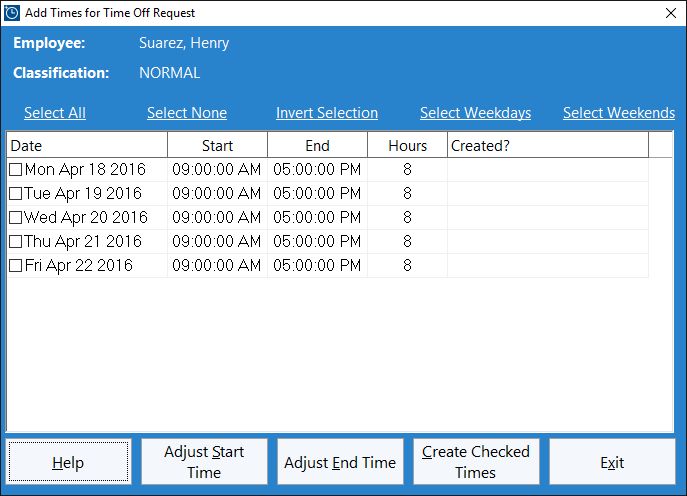
The Add Times for Time Off Request screen (shown above) is used by the administrator to create clock in / out pairs across the time off request period. It appears when you approve the request. The screen includes a number of tools to allow you to select exactly what days during the period you want to create times for and tools to adjust the start / end time of each day. When the times are configured correctly the Create Checked Times button can be clicked and all the checked times will be created and inserted into the Time Clock MTS database. Note that if an employee is clocked in then you can only create times for that employee that are not within 24 hours of their current clock in time.
Selecting Times to Be Created
Time Clock MTS will pre-populate the time list with a clock in / out for each day during the time off request period. The administrator should tick the check boxes next to each day in the period that a clock in / out pair is to be created for. Care should be taken to ensure times are only created for the correct days. For example, an employee working Monday to Friday should not have times created for Saturday or Sunday. Above the time list are five different links allowing easy selection of days including all the days, none of the days, weekdays only, or weekends only.
Adjusting the Start Time
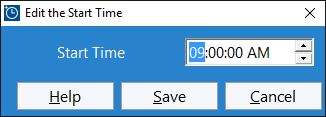
It's possible to adjust the start time of a day by selecting the date in the list and then clicking the Adjust Start Time button. This could be useful if the employee normally works partial days or if perhaps they are starting their time off with a half day. When adjusting the start time you'll be shown the screen above. Just make the changes to the time as required and click the Save button.

Adjusting the End Time
It's possible to adjust the end time of a day by selecting the date in the list and then clicking the Adjust End Time button. When adjusting the end time you'll be shown the screen above. Just make the changes to the time as required and click the Save button.
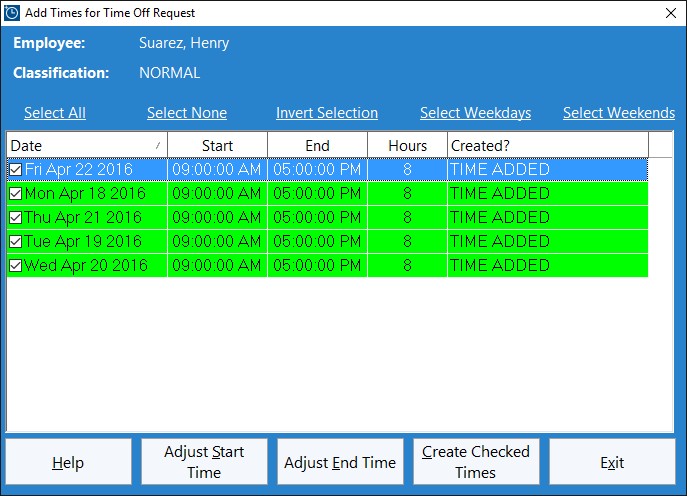
Creating the Times
Once the days that clock in / out pairs need to be created for are checked and the start/end times are adjusted properly the Create Checked Times button can be clicked. Time Clock MTS will then work through the days one at a time and try to create a clock in / out pair for the day. If the time can be created the row for that day the row will turn green and a "TIME ADDED" message will appear in the Created? column. If the time cannot be created then the row for that day will turn red and a message will appear in the Created? column explaining what the problem is. Below is a screenshot showing what the screen might look like after times have succesfully been created. You can only create times for an employee that is currently clocked in if those times are not within 24 hours of their current clock in time.