by Mark Nemtsas | Jun 11, 2009 | How To
From time to time it may be necessary to temporarily deactivate an employees’ Time Clock MTS account. This could be because the employee has left the company and you want to maintain their payroll records in the short term for reporting purposes. Or it could be to stop an employee clocking in and out for administrative reasons. This Time Clock MTS How To Article covers how to temporarily deactivate a Time Clock MTS employee. This De-Activation and Re-Activation feature in Time Clock MTS in earlier versions of the software used to be labelled disable and re-enabling employees.
It may be beneficial to use this deactivation feature instead of the delete employee option as employee deletion is permanent and unrecoverable.
To deactivate an employee in Time Clock MTS just follow the steps shown below.
- Log into Time Clock MTS as the administrator. How you log in as the administrator is covered in this Time Clock MTS How To Article.
- Click on the employee in the employee list that you want to deactivate.

Employee Maintenance Dropdown
- Once you’ve selected the employee go to Employee Maintenance->De-Activate Selected Employee. This is shown in the image above.
- You’ll now be asked to confirm the deactivation.
You can easily see which employees are deactivated on the employee list when you’re logged in as the administrator, they have a gray status icon next to their names in the employee list. If they are not shown, right-click over the employee list and Show Deactivated Employees.
Once deactivated an employee will not show in the employee list nor will they be able to clock in or out using the keypad interface. Attendance data of the deactivated employee will still be available for payroll reports.
To reverse this process and reactivate the employee see the How To Article Reactivate a Deactivated Employee in Time Clock MTS.
by Mark Nemtsas | Jun 9, 2009 | Tips and Tricks
Time Clock MTS operates in two main modes. Normal mode, which is used by employees to clock in and out, and Administrator mode, which is used by the administrator to configure the software and run payroll reports. This Time Clock MTS How To Article covers normal mode.
Employee List Interface in Normal Mode
The normal mode of operation in Time Clock MTS is the mode in which it will operate almost all of the time. By far the most common activity that will be carried out in the normal mode of operation is employees clocking in or out. A key indicator that Time Clock MTS is currently in normal mode of operation is that all the menus at the top are disabled apart from the File menu and the Help menu. When operating in Normal mode with the employee list interface enabled Time Clock MTS will look like the image above. Note that most of the menus are disabled. Using the employee list interface employees may also be able to view their own time cards and you can see the last activity each employee carried out.
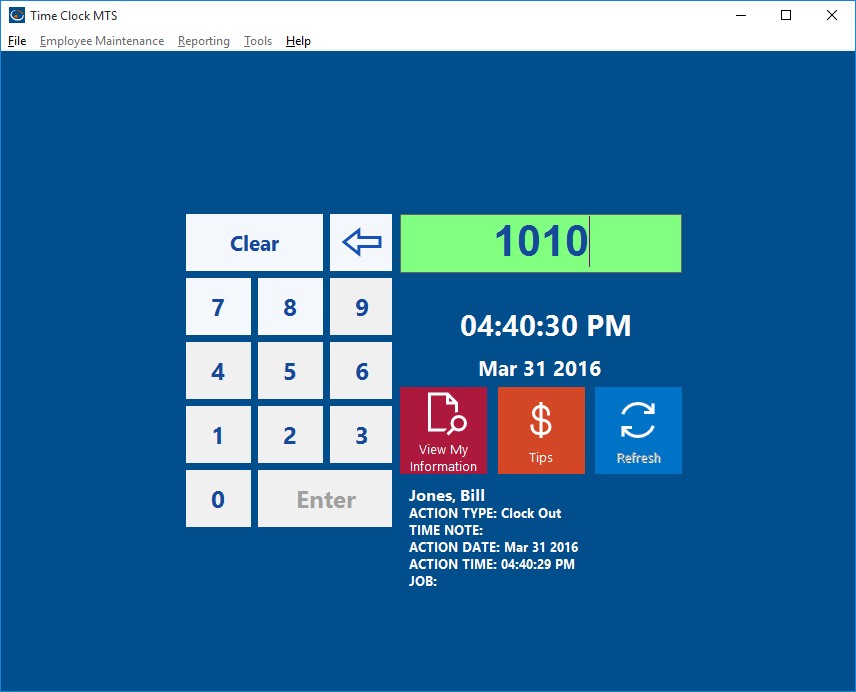
The Keypad Interface
When using the keypad interface employees can only clock in and out using the numeric keypad. There are no other activities available to them while operating in normal mode. You can see what the keypad interface looks like while operating in normal mode in the image above. Note again that most of the menus are disabled.
by Mark Nemtsas | Jun 9, 2009 | Tips and Tricks
The Keypad Interface
Time Clock MTS provides two different interfaces to allow employees to clock in and out. The first of these is the Employee List interface designed to be used with a computer mouse, the second is the Keypad interface designed to be primary be used with a touchscreen. Like the Employee List Interface the keypad screen can also be used with an input device such as a bar code reader, magnetic swipe card reader, or RFID reader. This article discussed was the keypad interface and how it can be used.
The Keypad interface is selected by the Time Clock MTS Administrator on the Tools->Options->Interface Settings page (read about it in the help file). To turn on the Keypad Interface select the Keypad option from the Data Entry Mode dropdown box. Note that the Keypad interface is ONLY active in normal mode, that is when the time clock administrator IS NOT logged in.
The keypad interface comprises two main areas. The keypad (which can be used with a computer mouse or touch screen) on the left, and the entry text box and employee status area on the right. To use the keypad interface to clock in or out an employee simply enter their employee ID (or badge number) using the keypad and clicks Enter when they are ready to clock in or out. Time Clock MTS will clock the employee in or out depending on what their last action was. When they are successfully clocked in or out the details of the action will be displayed in the status area.
The Keypad interface can be used with data readers such as bar code readers or magnetic card readers. All you need to do is encode your barcode badges or magnetic cards with the Time Clock MTS employee badge ID’s and scan in the data. The data reader will populate the entry text box with the employee Badge ID and at the end of the data read (usually) a data reader sends the return code (the same as pressing the return key on the keyboard). This will press the Enter button on the Keypad interface and clock the employee in or out. There are more detailed guides to setting up the software with bar code scanners, magnetic card readers, and RFID readers elsewhere on the site.
by Mark Nemtsas | Jun 9, 2009 | Tips and Tricks
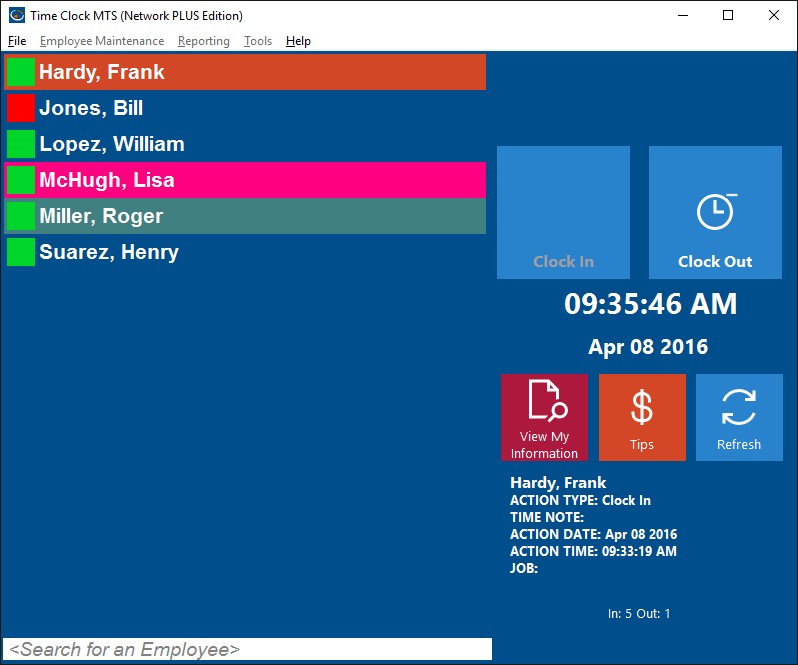
Employee List Interface
Time Clock MTS provides two different interfaces to allow employees to clock in and out. The first of these is the Employee List interface designed to be used with a computer mouse, the second is the Keypad interface designed to be used with a touchscreen. Both interfaces allow the use of data input devices such as magnetic card readers, bar code scanners, and RFID scanners. This article covers the Employee List interface.
The Employee List interface is selected by the Time Clock MTS Administrator on the Tools->Options->Interface Settings page (read about it in the help file). You can see what the employee list interface looks like above. The screen is split into two main sections, an alphabetically sorted list of the active Time Clock MTS employees on the left, and the clock in / out buttons and current employee status area on the right.
The sorted employee list contains a line for each active Time Clock MTS employee along with a status icon next to each name. An employee with a green icon is clocked in and with a red icon clocked out. To save on network traffic the Time Clock MTS Client only maintains the status icons for each employee for 60 seconds before the icons all change to gray. As you select an employee in the list the status light will update automatically showing you the most up to date status for that employee. The clock in / out buttons on the right side will be enabled or disabled depending on the status of the selected employee, so an employee that is clocked in will only be able to clock out and vice versa. The status of the employee will also be updated showing the time and date (and any note) for the last action performed by the selected employee. At the bottom of the employee list is a light blue search box that allows you to enter a few letters and be quickly taken to that employee in the employee list. This is a quick way of finding employees if you have a very long employee list.
On the right hand side of the screen the employee selected in the employee list can clock in or out using the Clock In or Out buttons. The current date and time is shown below the Clock In / Out buttons. If the Time Clock MTS administrator has enabled it, the employee may also be able to view their own time cards by clicking the View My Information button. Note that on the Time Clock MTS Client there is an additional button entitled ‘Refresh’ that will update the status icons in the employee list. The status area shows the name of the currently selected employee and the details of the last action that employee performed.
The Employee List Interface can be used with data readers such as bar code readers or magnetic card readers. This how-to-guide
covers exactly how to use Time Clock MTS with any of these devices.
by Mark Nemtsas | Jun 9, 2009 | Tips and Tricks
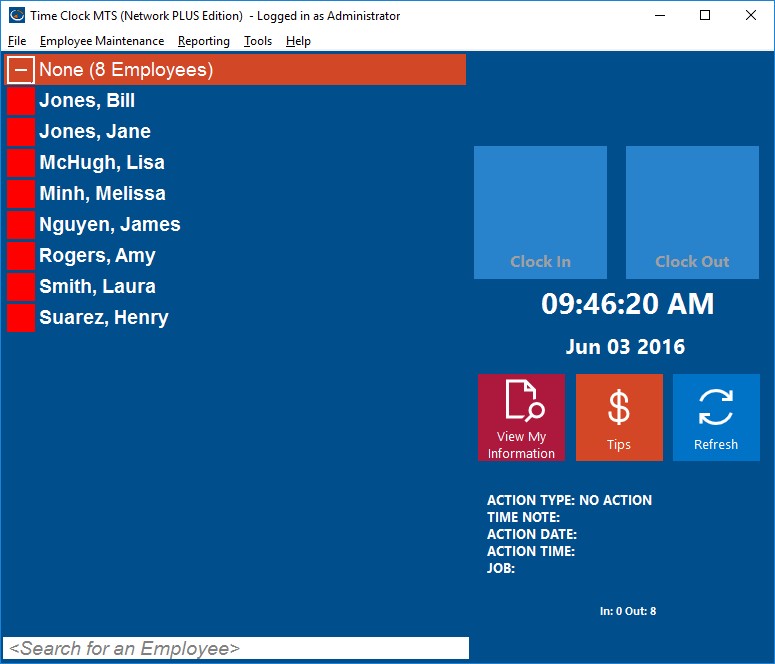
Time Clock MTS in Administrator Mode
Time Clock MTS operates in two main modes. Normal mode, which is used by employees to clock in and out, and Administrator mode, which is used by the administrator to configure the software and run payroll reports. This Time Clock MTS How To Article covers administrator mode.
You can get into the Time Clock MTS Administrator by logging in as the administrator via the File->Log In As Administrator menu (covered in this article). Once you’re logged in as the administrator you’ll have access to all the menus in Time Clock MTS. In the image above you can see that all menus are enabled. Note that in the Time Clock MTS Client, most of these menus are not available. While you’re operating Time Clock MTS in the Administrator mode you can perform all of the reporting and maintenance functions of the software, a short list of the sorts of things you can do follows. Please note that this is by no means a full listing of all the things you can do within Time Clock MTS!
- Create, edit, disable and delete employees using the Employee Maintenance page.
- Setup fingerprint security for employees using the Employee Maintenance page.
- Run payroll reports using the Report menu.
- Search, backup, and restore the Time Clock MTS database using the Tools menu.
- Setup employee bulletin notices using the Tools menu.
- Configure the software using the Tools->Options menu.
- Access help resources and register the software using the Help menu.