by Mark Nemtsas | Apr 13, 2018 | How To, Using the Software
Heartland, one of the world’s biggest payment processing companies offers a comprehensive and time saving payroll processing service. We’re happy to say that Time Clock MTS can export data easily to Heartland Payroll. Here’s the step’s you’re going to need to take:
First Step – Match Employee Badge Numbers
The export file uses the Badge ID to match the Heartland Employee Number. You’ll need to make sure that your Time Clock MTS employee Badge ID (set on the Employee Information Screen) is identical to the Heartland Employee Number. The Heartland Employee Number is available from your Heartland Employee Masterfile.
Create the Export Format
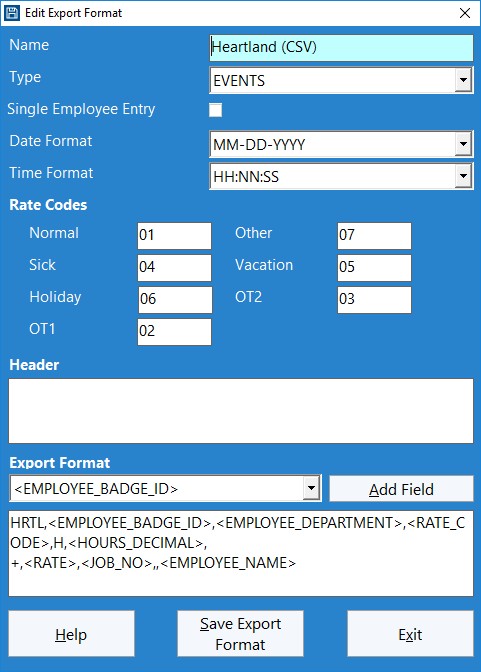
New Export Formats can be created on the Reporting->Data Export->Export Formats screen (view help topic for this screen). Navigate to that screen and create a new export format. You’ll then be shown the Add Export Format screen (see below).
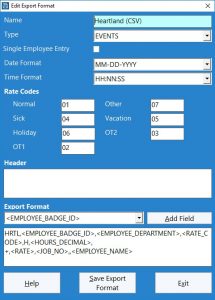
Heartland Payroll Export Format
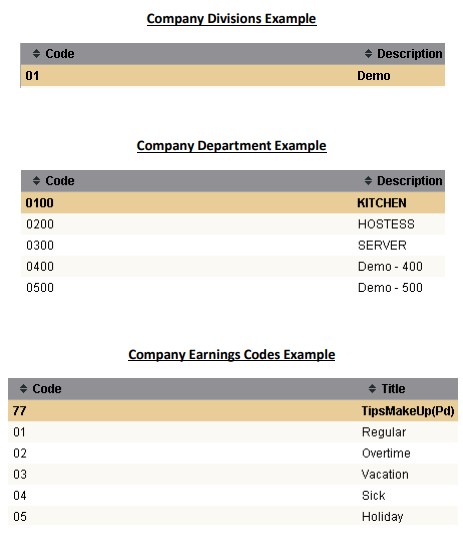
Give the export format a name and then set the type. Heartland Payroll can use either an aggregate or event type export format. However, if you want job tracking data exported you’ll need to use the EVENT based format. Once that is set you’ll want to match up your the rate codes in Time Clock MTS with the Heartland Company Earnings Codes. The Company Earnings Codes might look something like those shown below:
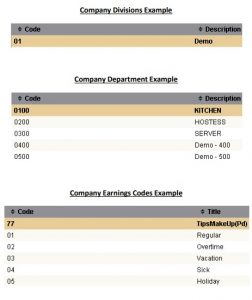
Heartland Payroll – Rate Codes, Divisions, and Departments
The Heartland export file doesn’t require a header so you can leave that field blank. The final step to take is to create the actual export line format. Here’s what Heartland needs:
“HRTL”,”<EMPLOYEE_BADGE_ID>”,”<EMPLOYEE_DEPARTMENT>”,”<RATE_CODE>”,”H”,”<HOURS_DECIMAL>”,”+”, “<RATE>”,”<JOB_NO>”,””,”<EMPLOYEE_NAME>”
The first field “HRTL” is an example Heartland company identifier, used if your payroll account has multiple companies. The exact identifier you need to use is available from your Heartland account details and will be different to the example identifier we’ve used here. Note also that we’ve included <JOB_NO> to allow you to track activity against Heartland departments (for example KITCHEN, HOSTESS, SERVER etc) but this field can be omitted if required.
Once you’re happy with your export format click the Save Export Format button and you’re done.
Export the Data
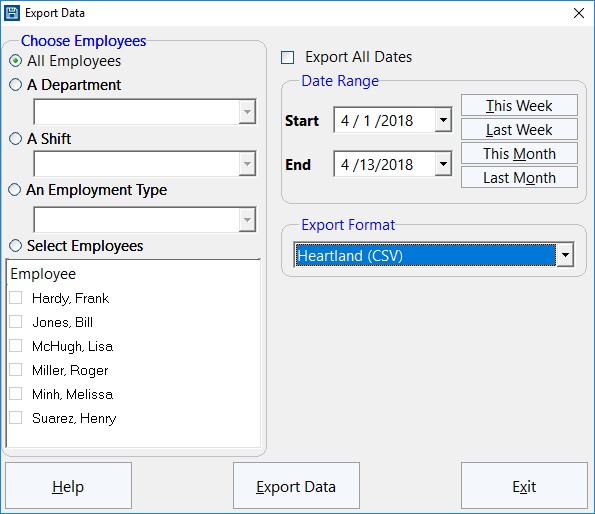
To use your new export format to export time clock data to Heartland use the Reporting->Data Export->Export Data screen.
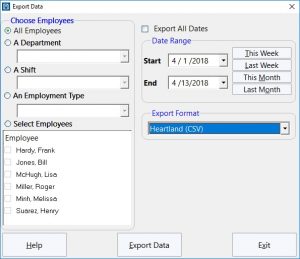
The Export Data Screen
by Mark Nemtsas | Nov 6, 2017 | How To, Tips and Tricks
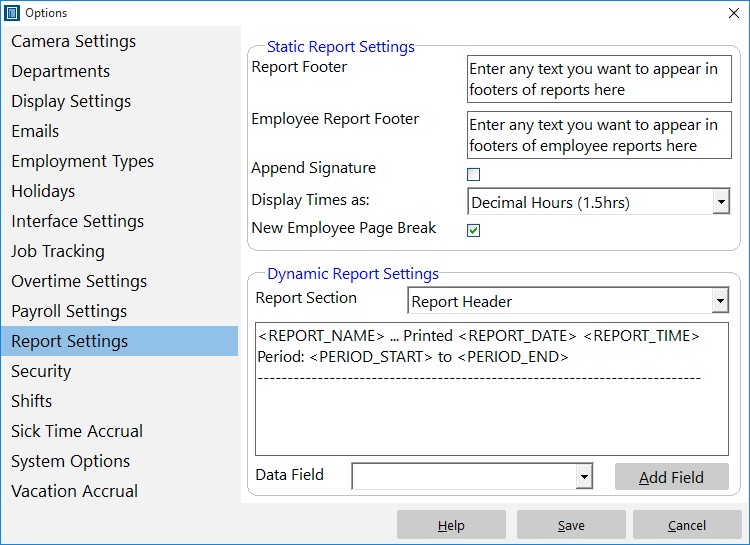
Time Clock MTS records all time punches accurate to the second. It can display elapsed times between time punches in either hours and minutes (1:30) or decimal hours (1.50). Hours and minutes are typically used for timesheets in most businesses. Decimal hours are usually used when time needs to be tracked, costed, and even charged out. Obviously it’s a lot easier to cost out 10.85 hours at $50 / hr than it is to cost out 10 hours and 51 minutes at $50 per hour. Changing how times are displayed in Time Clock MTS is controlled from the Tools->Options->Report Settings Screen.
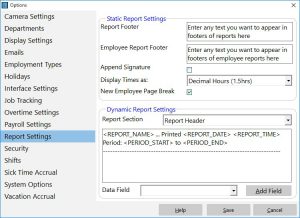
Change the Time Display Format on the Report Settings screen.
Choosing between the two time display formats is simply a matter of choosing an option from the Display Times as drop down.
A Comparison of the Two Time Display Formats
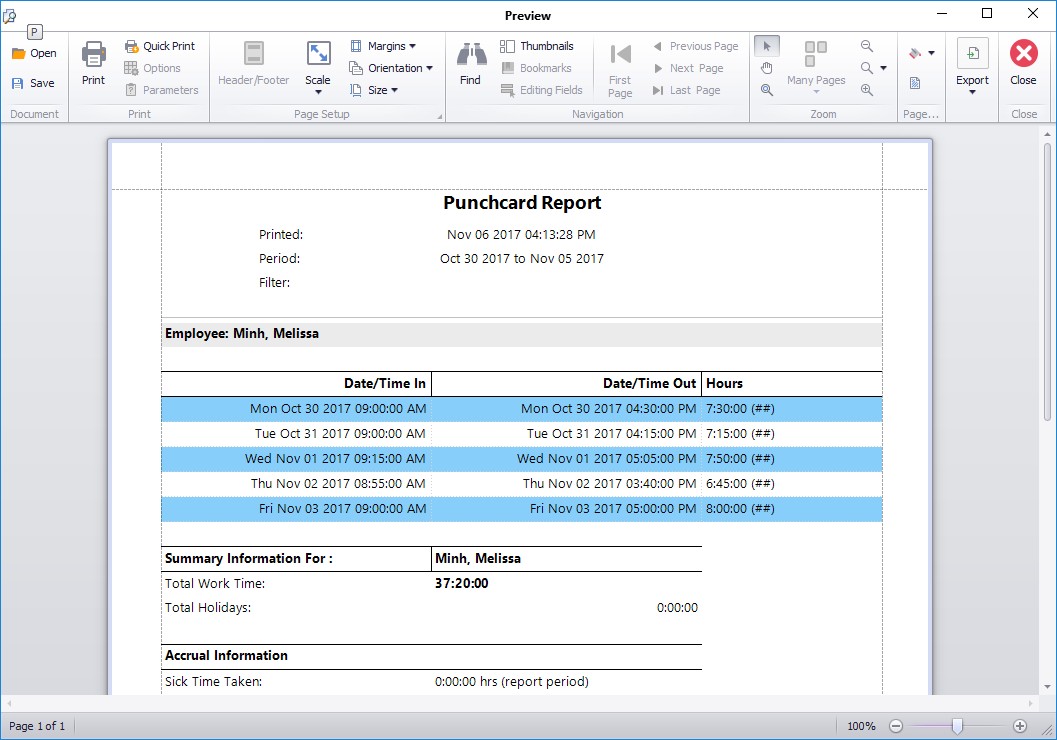
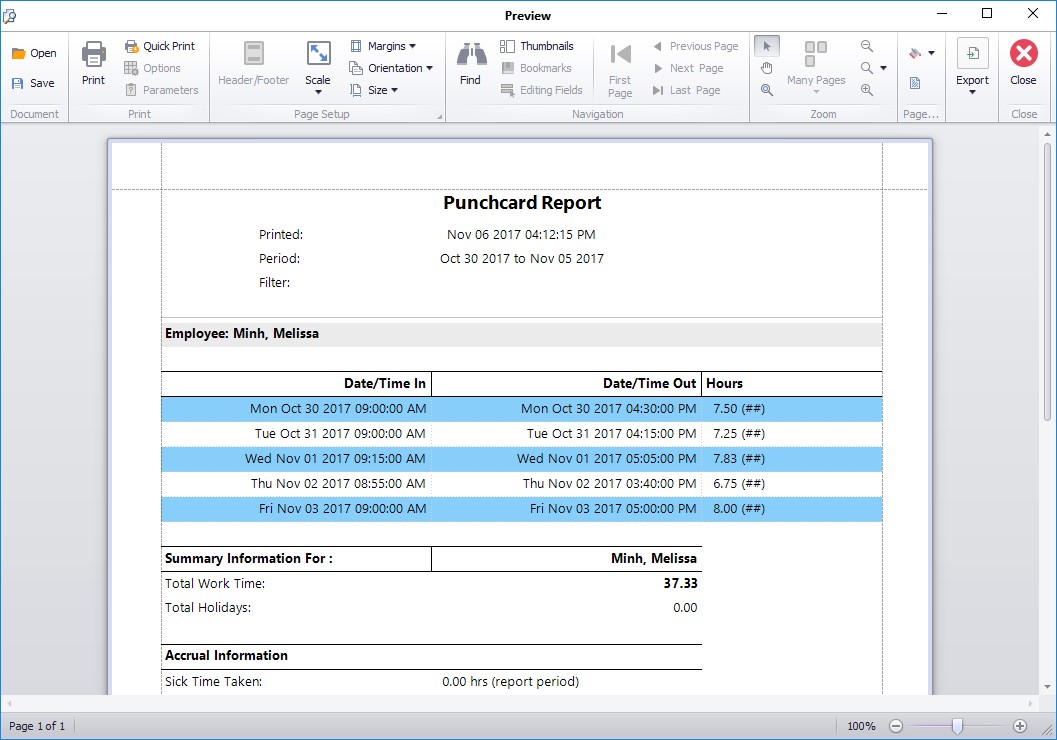
Below is a side-by-side comparison of the same time card displayed with hours and minutes (left) and decimal hours (right).
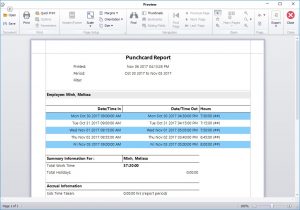
Hours and Minutes
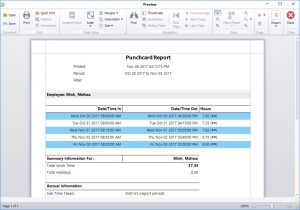
Decimal Hours
Some examples to note are the first time punch, recorded as 7 hours and 30 minutes on the left and as 7.50 hours on the right, and the second punch recorded as 7 hours and 15 minutes on the left and 7.25 hours on the right.
by Mark Nemtsas | Oct 28, 2017 | How To, Tips and Tricks
Here’s a question we got recently from a user:
I’m wondering how to setup our overtime rules. Our overtime is calculated based off a Sunday to Saturday work week. Any hours worked over 40 should be paid at overtime rate.
There’s two things to answer here, firstly, how to setup the work week, and second, how to setup the simple 40 hour weekly overtime. The first day of the work week can be configured from the Tools->Options->Payroll Settings screen, which is only accessible when you’re logged in as the time clock administrator. The Payroll Settings screen scan be seen below.
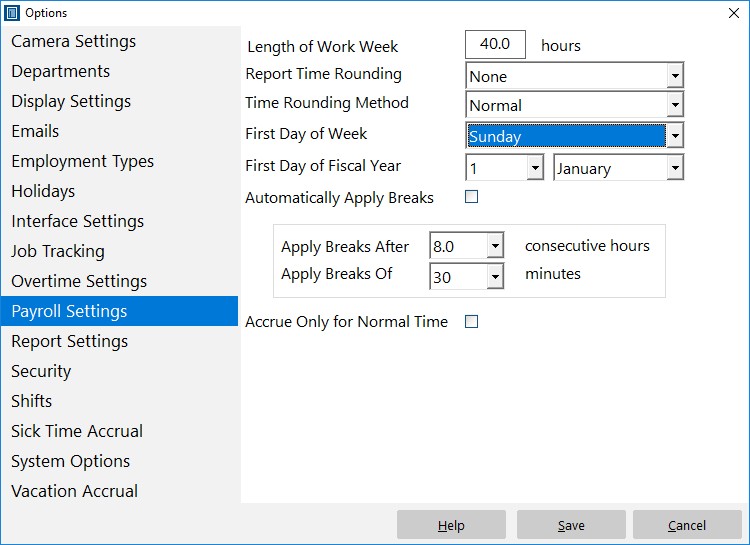
Simple Overtime – Payroll Settings
To change the First Day of the Week choose an option from the First Day of Week dropdown. In this case we’re going to choose Sunday. This means that overtime calculations will start on Sunday of each week. Next we need to adjust the overtime settings to suit, overtime settings are available on the Tools->Options->Overtime Settings screen (see below).
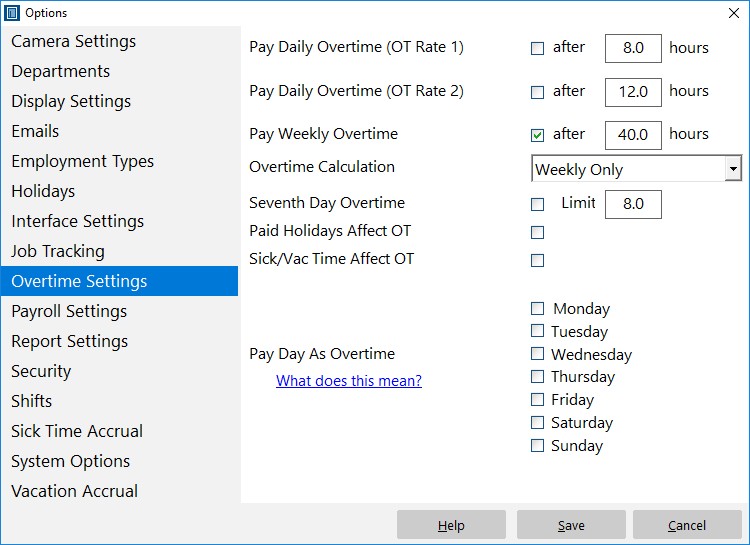
Simple Overtime – Overtime Settings
Setting up weekly overtime using this screen is quite simple. Make sure ALL boxes are unchecked except for the Pay Weekly Overtime box. Enter the Weekly Overtime Limit in the text box next to this checkbox, in this case 40 hours. The final step is to choose a Overtime Calculation method from the Overtime Calculation dropdown box. We’ll choose “Weekly Only” in this case. When you’re happy with settings click the Save button and you’re done!
by Mark Nemtsas | Jul 7, 2017 | How To, Tips and Tricks
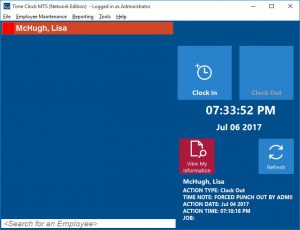
Deactivating employees in Time Clock MTS is a great way of preventing people from punching in and out or to temporarily mark an employee account as inactive. That can be useful if your workforce has a seasonal element and you do not want seasonal workers filling up your employee list when they are not actually working. Deactivated employees are hidden by default on the normal employee list to prevent access to those employees, but those same employees are visible when you’re logged in as the time clock administrator. However, there is a way of hiding them, this how-to-article explains that process.
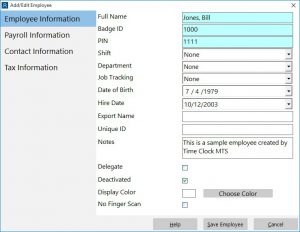
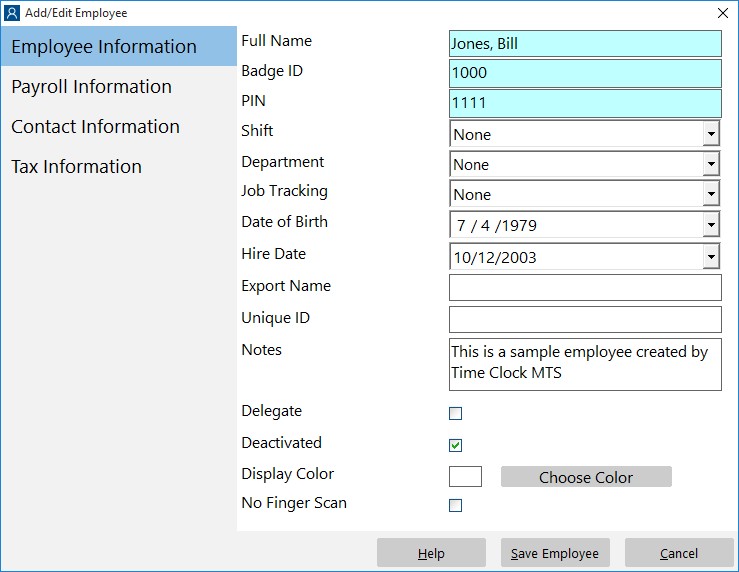
The Employee Information Screen
You’ll need to be signed in as the Time Clock administrator to perform these actions. Firstly, we’ll mark an employee as deactivated using the Employee Information screen (see above). Just check the Deactivated checkbox and then click the Save Employee button.
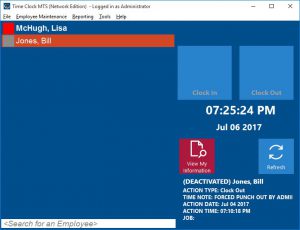
Deactivated Employee Visible
Now if you look at the Employee List you’ll see that the icon next to the employee has changed to gray indicating they are marked as deactivated.

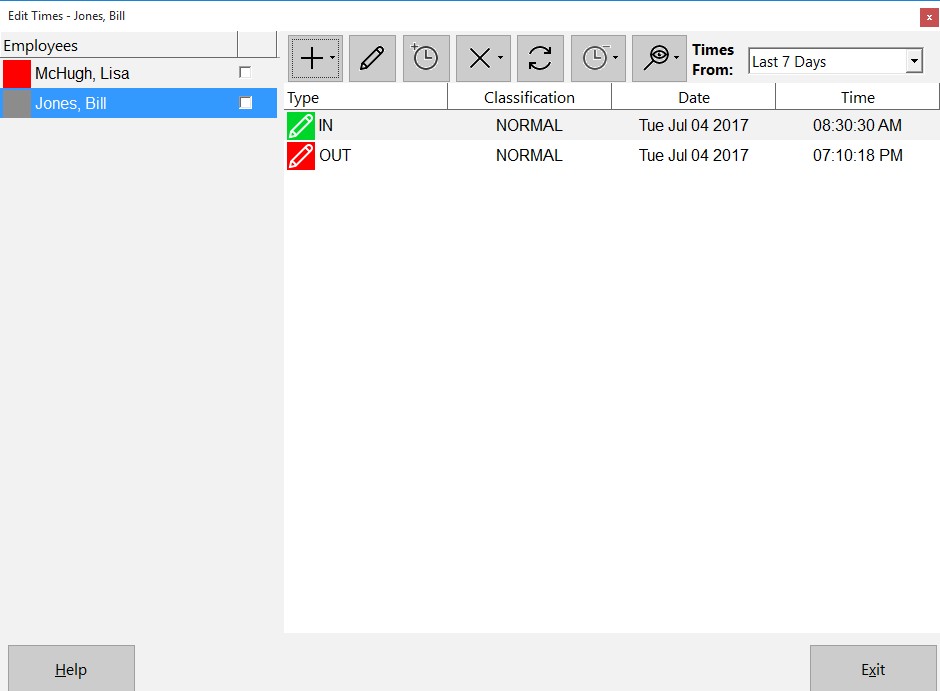
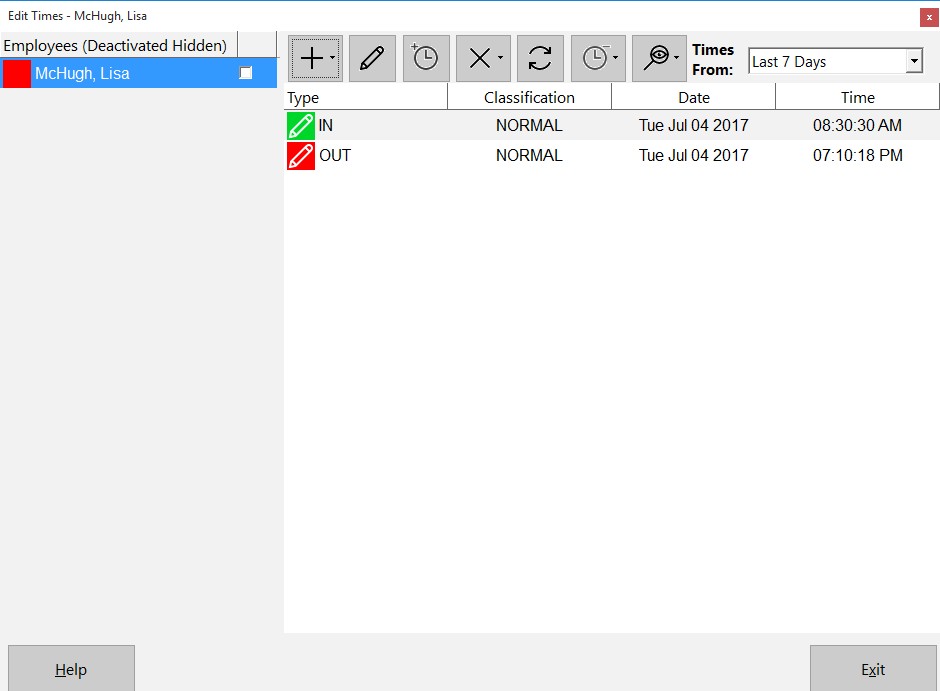
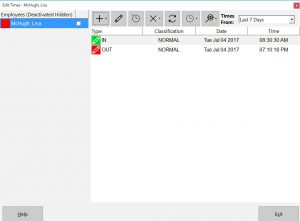
Also Visible on Edit Times Screen
If you head over to the Tools->Edit Time screen you’ll also note that the deactivated employee is also visible here.

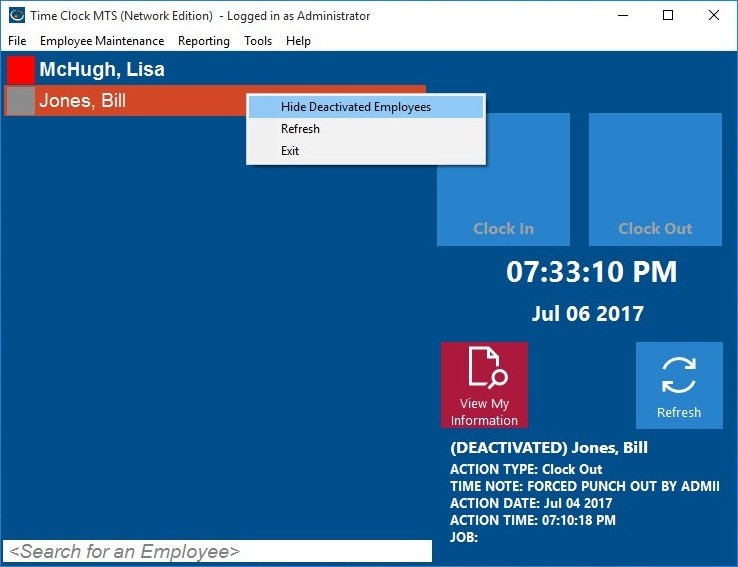
Hiding Deactivated Employees
So let’s hide the deactivated employee. Go back to the Employee List and click your right mouse button on the employee list and you’ll be shown the above popup menu. Choose the Hide Deactivated Employees. And……
Deactivated Employee Hidden
Presto chango! The deactivated employee is now hidden. Let’s take a look at the Edit Times screen again.
Also Hidden on Edit Times Screen
Note that they are hidden there too. And that’s all there is to it!
If you want to show the hidden deactivated employees again right click on the employee list and you’ll be shown a popup menu again, just select the Show Deactivated Employees option and they’ll appear again.
by Mark Nemtsas | Jul 5, 2017 | How To, Tips and Tricks
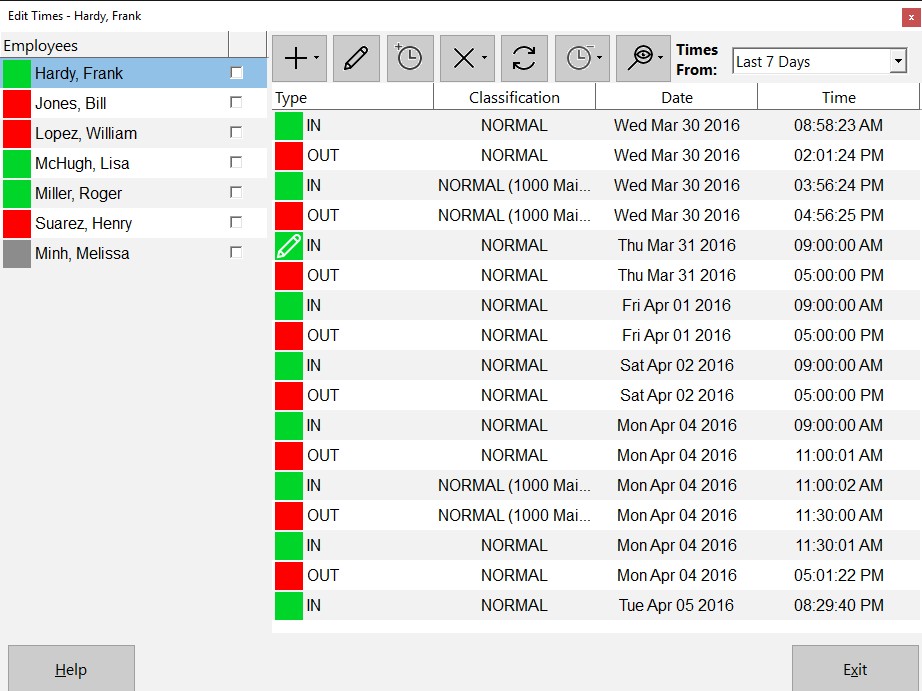
The Edit Times Screen
This Time Clock MTS How To Article covers how the Time Clock Administrator can quickly and easily select a group of employees and punch them in or out. This is of most use if a group of employees with the same start time or end time forget to punch in or out of Time Clock MTS when they start or stop work for the day.
To select a group of employees to punch in or out of Time Clock MTS follow the steps below.
- Firstly, you must log into Time Clock MTS as the administrator, this How To Article explains how to log in as the time clock administrator.
- Go to the Tools->Edit Times screen and you’ll be shown the screen above.
- Click the Punch In / Out
 button and you’ll be shown the drop-down menu below.

Selecting a Group of Employees
- The options are fairly self explanatory. The Selected Employee options affect only the employee you have selected on the Edit Times employee list. The Checked Employees options affect only the employees that have the checkbox next to their names ticked. Obviously, the ALL options affect all employees in the list.
- Choose the required option to affect the group of employees you need and you’ll be shown the screen below to set a Punch In or Punch Out time.
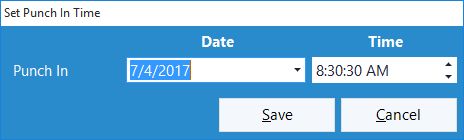
Setting the Punch In / Out Time
- Confirm that you want to Punch In / Out the selected group of employees.
- The required action will now be performed on the group of employees you’ve selected. It’s important to note that employees that are currently Punched In cannot be punched in again and vice versa. Those employees will remain unaffected by the action you try to perform on them.
If this article isn’t what you were looking for you might find the How to Punch In All Employees article or the How to Punch Out All Employees article useful.
by Mark Nemtsas | Jul 5, 2017 | How To, Tips and Tricks
The Edit Times Screen
This Time Clock MTS How To Article covers how the Time Clock Administrator can punch in all employees that are currently clocked out quickly and easily. This can be useful if a number of employees have forgotten to punch in when they arrived at work.
To punch in all employees that are currently punched out just follow the steps below.
- Log into Time Clock MTS as the administrator. Read this this How To Article to learn how to log in as the time clock administrator.
- Go to the Tools->Edit Times screen and you’ll be shown the screen above.
- Click the Punch In / Out button and choose the Punch In All Employees option from the menu that pops up.
- When Punching In a group of employees from the Edit Times screen you’ll be given a chance to set a Punch In time using the screen below.
Setting the Punch In Time
- Confirm that you want to Punch In all employees in the confirmation window that is then shown.
- All employees that are currently Punched Out will be Punched In to Time Clock MTS using the time you set.
If this article isn’t what you were looking for you might find the How to Punch Out All Employees article or how to Punch a Group of Employees In or Out article useful.
Page 1 of 1612345...10...»Last »