Installing Time Clock MTS Network PLUS Edition
MySQL
This support article gives detailed instructions on how to setup the Time Clock MTS Network PLUS Edition with MySQL. Note that a reasonable level of experience with MySQL is assumed and you must have MySQL installed before to following these instructions.
1. Install and Configure MySQL
Install and configure MySQL and create a database for Time Clock MTS to use. This is beyond the scope of this article, all you should need is available from the MySQL Website. Once you’ve got MySQL installed you’ll just need to create blank database for your Time Clock MTS data.
2. Create the Time Clock MTS MySQL Table Structure
If you’re using the trial version of Time Clock MTS or a licensed user who purchased the Network PLUS Edition then you can use the Database Exporter tool to setup MySQL to work with Time Clock MTS.
3. Preparing Computers to Connect to the MySQL Database
On most Microsoft Windows computers it is necessary to install some drivers to allow them to connect to and communicate with a MySQL Database. Here’s what you’ll need to do.
- Go to the MySQL Website and download the MySQL Connector / ODBC 5.1.13. Time Clock MTS can only work with the 32 bit ODBC Connector. If you’re using another version of the MySQL Connector (5.2 or 5.3) then you should read this support article.
- Install this driver on EVERY COMPUTER that you plan to use the Time Clock MTS administrator program or client program on.

The Time Clock MTS System Options screen
4. Connecting Time Clock MTS to the MySQL Database
The next step is to connect Time Clock MTS to your MySQL database. Initially this is done from the Time Clock MTS administrator program which you should have downloaded and installed already. Once you’ve done that follow the steps below.
- Log into Time Clock MTS as the administrator and go to the Tools->Options->System Options screen (shown above). If your screen doesn’t look like this then you’re logged into the Time Clock MTS client and you need to install the administrator software.
- Enter the name of your MySQL Server, the name of the MySQL database, and the name of a MySQL user and their password. Note that the MySQL user Time Clock MTS uses must have permissions to add, edit, and delete both data and database tables
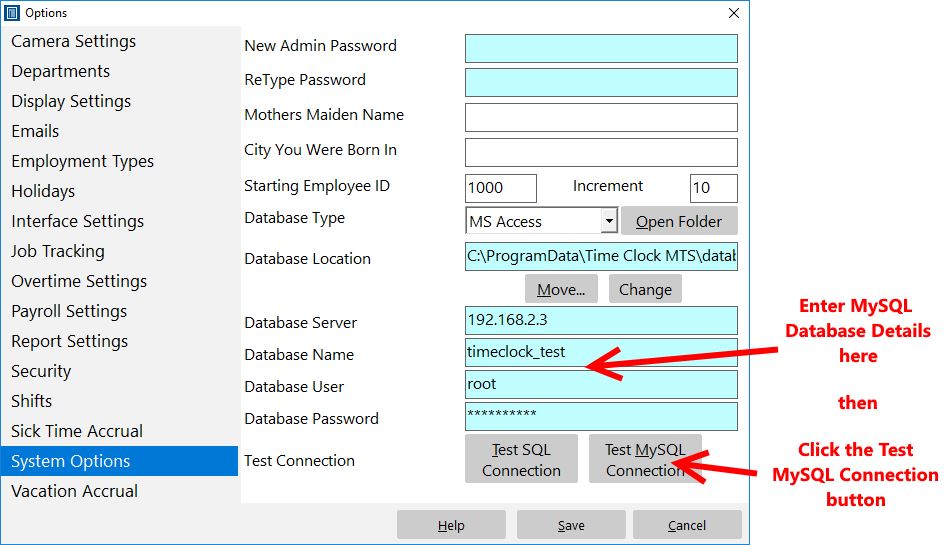
Entering MySQL Database Details and Testing the Connection
- Now you need to test that Time Clock MTS can connect to the MySQL database correctly and that the structure is correct. To do this click the Test MySQL Connection button. If the settings you entered are correct and you’ve set up your MySQL server correctly then you’ll get a Connection Successful! message.
- Once you’re sure Time Clock MTS can connect to MySQL without problems it’s time to select MySQL from the Database Type dropdown and click Save. Then you should get a message telling you that Time Clock MTS has connected to your database server.
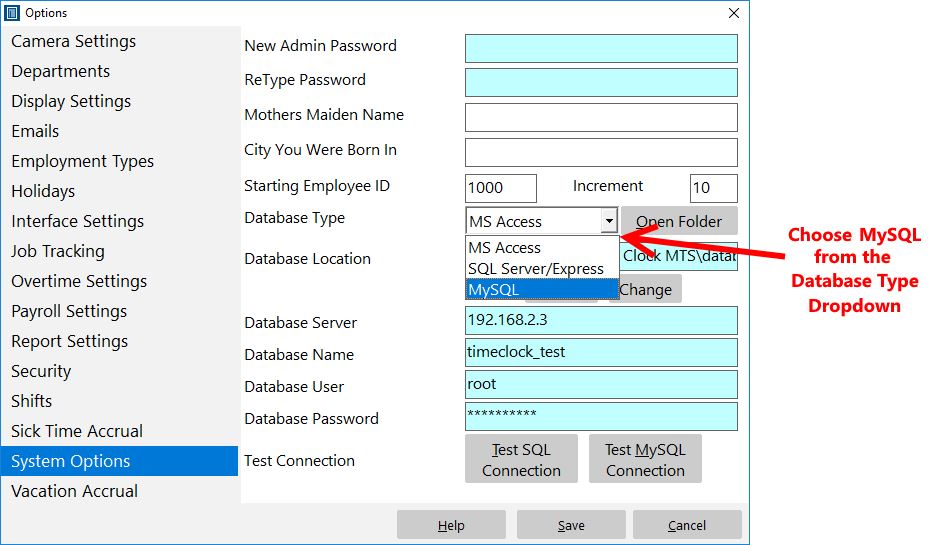
Choosing the Database Type
- Now you need to shut down Time Clock MTS and re-start it. Once you’ve done that you can verify that you’re connected to the MySQL database by going to the Help->About screen and look at the bottom of the screen, you’ll see that you’re now connected to the correct database (see above).
- The final step in the process is to install your Time Clock MTS clients and connect them to your MySQL Database. You’ll do that with the Database Connection Wizard when you first install and run the Time Clock MTS Client
3. Configuring the Time Clock MTS Client Program to Work with MySQL
If you’re still in your Time Clock MTS trial period or you have are using the Time Clock MTS Network PLUS Edition you’ll be able to connect the Time Clock MTS client to a MySQL database.
- Install and run the Time Clock MTS client software.
- The first time you run the Time Clock MTS client software you’ll be shown the Database Connection Wizard.
- Select the MySQL Database Type option and click the Next button.
- On the next screen enter all of the MySQL details into the fields provided. When you’re happy with the details click the Test Connection button to make sure you’ve entered the details correctly and that you can make a connection to the database. Remember that the MySQL user must have permissions to add, modify, and delete both data and tables.
- Click the Wizard finish button and when you’re done the Time Clock MTS client should be connected to your MySQL database.
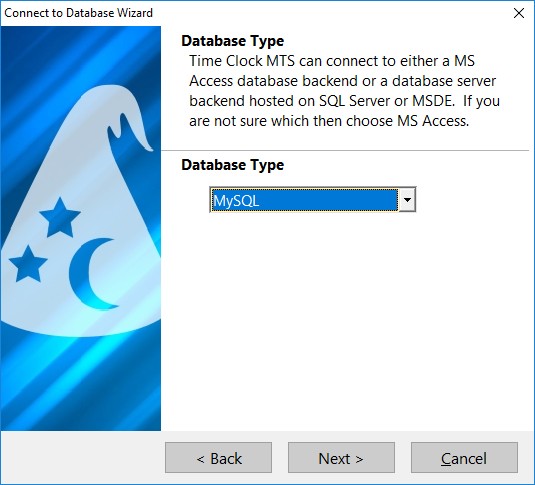
Choosing the Database Type

Entering the Database Details
Notes
- If when you go to the System Options screen the database server fields and so on are obscured by a text box informing you that you are not licensed to use MySQL (or SQL Server for that matter) as a backend for Time Clock MTS then it’s because….well… you’re not licensed to use them. You’ll need to Contact Us to talk about upgrade options.
- Time Clock MTS must be able to set the default value of DATETIME fields to zero. This means MySQL cannot be running in STRICT MODE.
Time Clock MTS
The Easy Time Recording System
Time Clock MTS
The easy to use time recording software with a fully functional 30 day trial.
Buy Time Clock MTS
Purchase a registration key from our online shop. Only buy once, no monthly fees.