by kathryn@timeclockmts.com | Jun 30, 2009 | New Releases, News
A new release of Time Clock MTS today that adds a new report and a new report printing setting.
- The new report setting can be found on the Tools->Options->Report Settings screen. Called New Employee Page Break when set reports will print out with a single page per employee. When not set reports will be printed continuously with no page breaks.
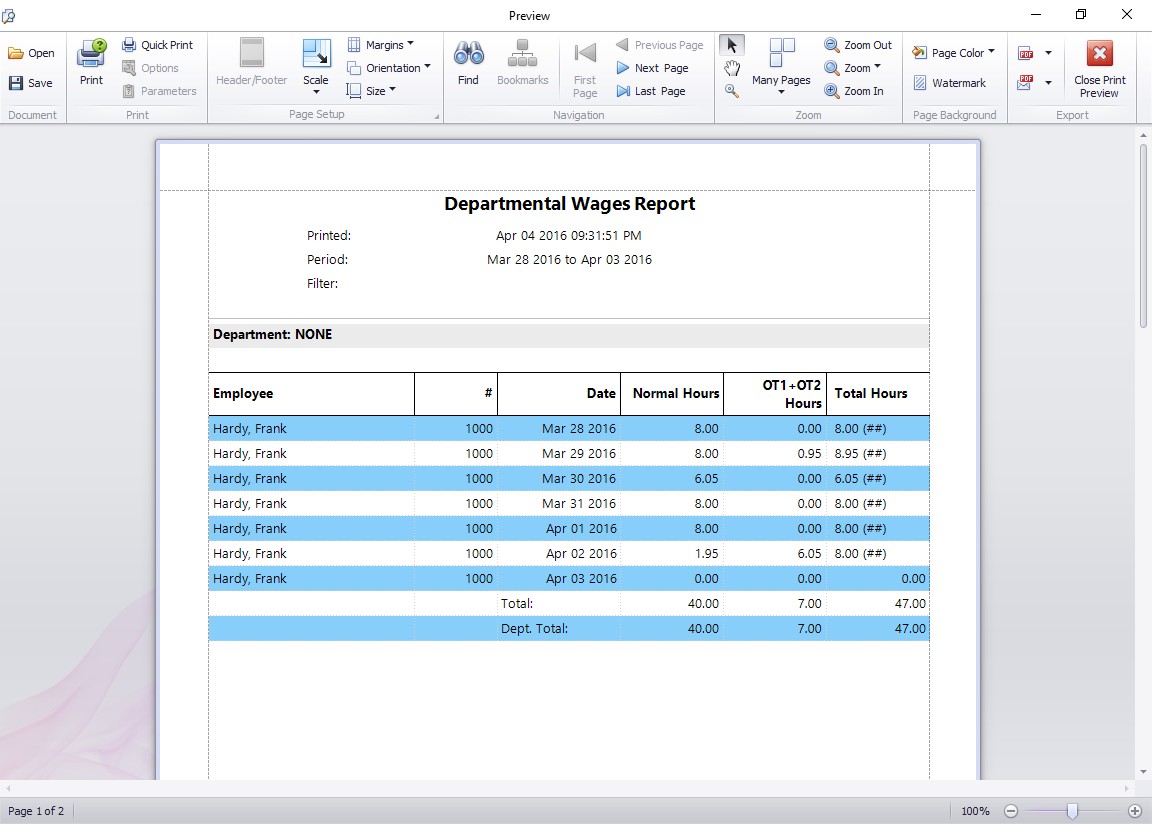
This report breaks down hours worked by employee and department.
- The new report is called the Departmental Wages Report and is shown above. This report shows a simple break down of hours worked by employee, employees are sorted into departments and a departmental subtotal of hours worked is shown for each department. As usual you can access this report from the Tools->Payroll Reports menu.
by kathryn@timeclockmts.com | Jun 15, 2009 | New Releases, News
A minor release today fixing up two small bugs and adding an extra screen to catch database file permissions errors. Changes are detailed below.
- Fixed up a situation where the ‘Generate MySQL Script’ menu item would be hidden despite the software being licensed for enhanced database support.
- Fixed up a problem with automatic employee ID incrementing. This only occurred when the
Copy Selected Employee’ menu item was used.
- Added some new checks on startup to determine if database connection failure is due to insufficient file or folder permissions. If this is determined to be the case a new explanatory pop up window is displayed rather than the (not very helpful) ‘Cannot Connect to Database’ message.
by Mark Nemtsas | Jun 15, 2009 | How To
From time to time it may be necessary to delete an employees’ Time Clock MTS account. Most likely this would be be because the employee has left the company and you no longer have any need for their time and attendance records to be reported on in Time Clock MTS. This Time Clock MTS How To Article covers how to delete a Time Clock MTS employee.
To delete an employee in Time Clock MTS just follow the steps shown below.
- Log into Time Clock MTS as the administrator. How you log in as the administrator was covered in this Time Clock MTS How To Article.
- Click on the employee in the employee list that you want to delete.
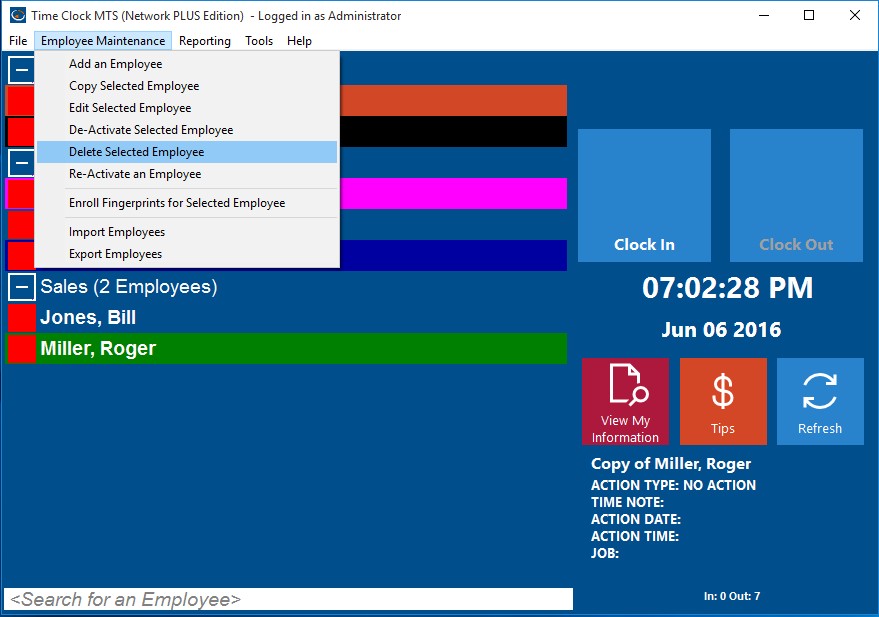
Deleting a Time Clock MTS Employee
- Once you’ve selected the employee go to the Employee Maintenance->Delete Selected Employee menu. This is shown in the image above.
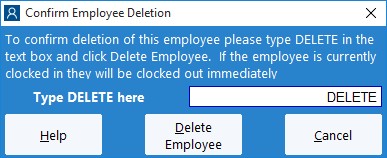
Confirm Employee Deletion
- You’ll now be shown the Delete Employee screen. Deletion of an employee can only be reversed by our support staff so a confirmation procedure is required to delete an employee. On this screen to confirm the deletion of the employee just type DELETE into the text are in capitals.
- Once you’ve entered the confirming DELETE into the text box just click the Delete Employee button to delete the selected employee.
Once deleted an employee will not be able to clock in or out. Their time records will no longer be available for reporting purposes and the employees name will no longer appear on any lists within the software. Note that an employee can be un-deleted by Time Clock MTS support staff, just contact us for more information.
by Mark Nemtsas | Jun 11, 2009 | How To
For an employee to be able to clock in and out of Time Clock MTS you must create an employee account that they can use. This Time Clock MTS How To Article very briefly covers how to create a Time Clock MTS employee.
To create a new employee in Time Clock MTS just follow the steps show below.
- Log into Time Clock MTS as the administrator. How you log in as the administrator was covered in this Time Clock MTS How To Article.
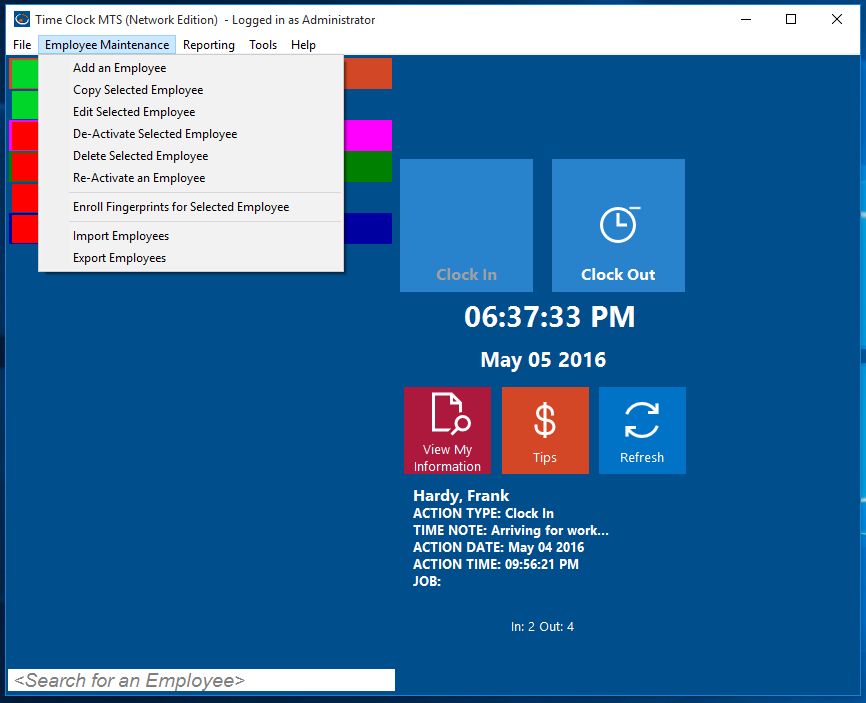
Adding an Employee
- Once you’re logged in go to the Employee Maintenance->Add an Employee menu. This is shown in the image above.
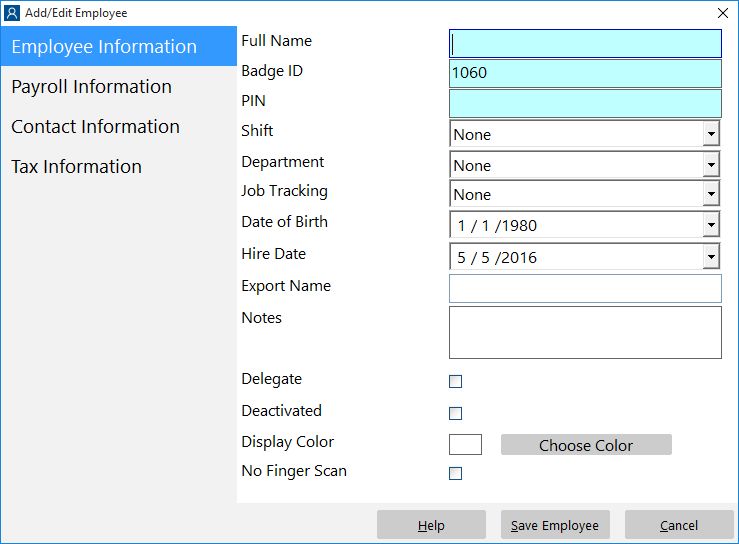
The New Employee
- You’ll now be shown the Add Employee screen. This screen is split into 4 sub pages, the Employee Information page, the Payroll Information page, the Contact Information page, and the Tax Information page. The only things you must enter to create a new employee is the employee’s full name, a unique badge ID, and a PIN (or password) for the new employee.
- Once you’ve setup the employee to your satisfaction just click the Save Employee button to create the new employee record.
That’s all there is to it. To get more detailed help on what each field on each employee sub page does consult the online help file or click on the links show in Step 3 above.
by Mark Nemtsas | Jun 11, 2009 | How To
Typically in most companies there will be groups of employees for whom the same payroll and overtime rules apply. To speed up the creation of such employees in Time Clock MTS it is possible to copy an existing employee record to easily create a new one. This Time Clock MTS How To Article covers how to copy a Time Clock MTS employee.
To create a new employee by copying an existing employee just follow the steps below.
- Log into Time Clock MTS as the administrator. How you log in as the administrator was covered in this Time Clock MTS How To Article.
- Click on the employee in the employee list that you want to copy.
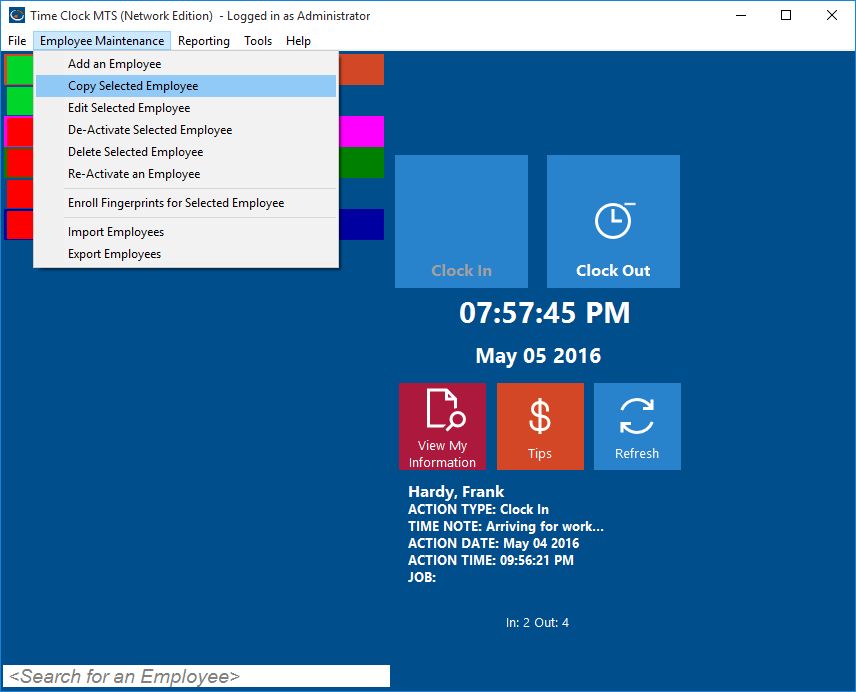
Copying an Employee
- Once you’ve selected the employee you want to copy go to the Employee Maintenance->Copy Selected Employee menu. This is shown in the image above.
The Copied Employee
- You’ll now be shown the Add Employee screen with all the details from the copied employee filled in already. The only differences will be the name and the employee ID / badge number. All you need to do is set the name to the correct name for the employee and assign them a PIN.
- Once you’ve done these couple of things to your satisfaction just click the Save Employee button to create the new employee record.
That’s all there is to it. To get more detailed help on what each field on each employee sub page does consult the online help file.