Installing Time Clock MTS Network PLUS Edition
SQL Server
This support article gives detailed instructions on how to setup the Time Clock MTS Network PLUS Edition with Microsoft SQL Server. Note that a reasonable level of experience with SQL Server is assumed and you must have SQL Server installed prior to following these instructions.
1. Creating the SQL Server Database
The first step in setting up Time Clock MTS to work with SQL Server is to create a database using the standard time clock data file (MS Access) as a template. To accomplish this you must have the Time Clock MTS Administrator or Stand-Alone Edition software installed, you must have an accessible installation of SQL Server (or SQL Express) and you must have Microsoft SQL Server Management Studio (SSMS) installed.
Once you’ve made sure you’ve done all of that you can then use our Time Clock MTS Database Exporter tool to export your time clock data directly to SQL Server.
2. Configuring the Time Clock MTS Administrator Program to Work with SQL Server
If you’re running the 30 day trial of Time Clock MTS or you’re a licensed user who purchased the Network PLUS Edition then you’ll be able to connect Time Clock MTS to a SQL Server database.
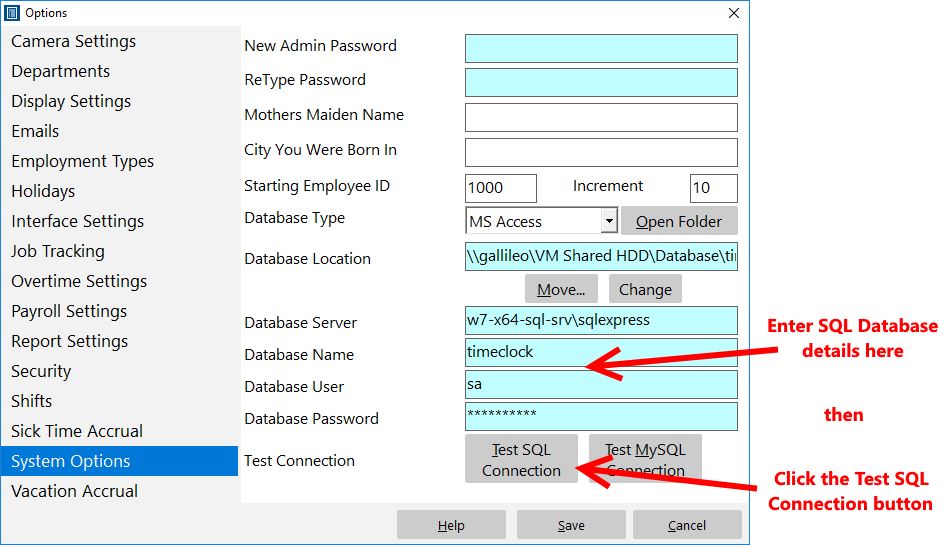
- Run Time Clock MTS and log in as the administrator and go to the Tools->Options->System Options screen.
- Configure the SQL Server details on this screen. You’ll need to know your server name (or IP address), your database name and your SQL Server login details. Note that the SQL Server user must be a SQL AUTH user and must have permissions to add, modify, and delete both data and tables.
- When you’re happy with the server details click the Test SQL Connection button and check that a connection can be made to the database.
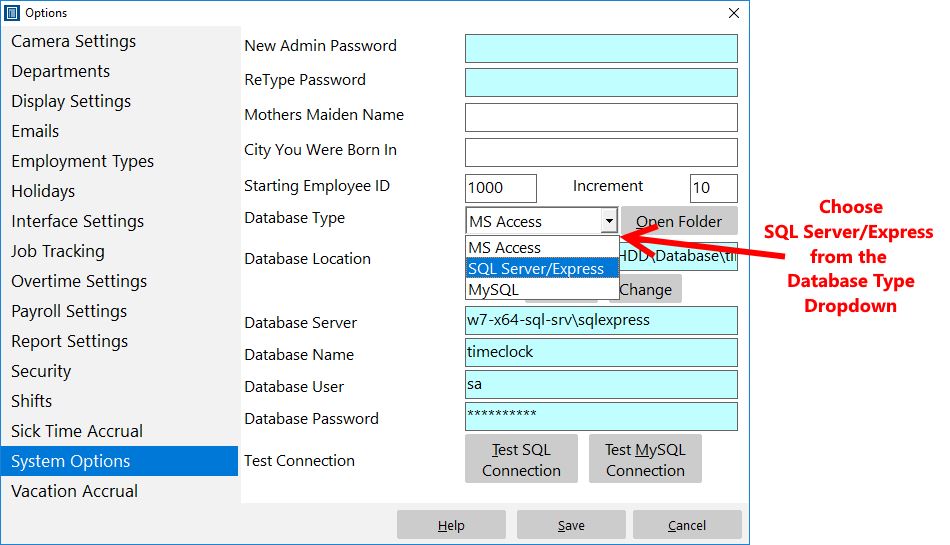
- Select “SQL Server” from the Database Type drop down and then click the Save button to save the changes.
Entering SQL Database Details and Testing the Connection
Choosing the Database Type
Warnings: If there’s a red box covering the server detail fields then you’re you don’t have a license for the Network PLUS Edition. You should Contact Us for help.
3. Configuring the Time Clock MTS Client Program to Work with SQL Server
If you’re still in your Time Clock MTS trial period or you have are using the Time Clock MTS Network PLUS Edition you’ll be able to connect the Time Clock MTS client to a SQL Server database.
- Install and run the Time Clock MTS client software.
- The first time you run the Time Clock MTS client software you’ll be shown the Database Connection Wizard.
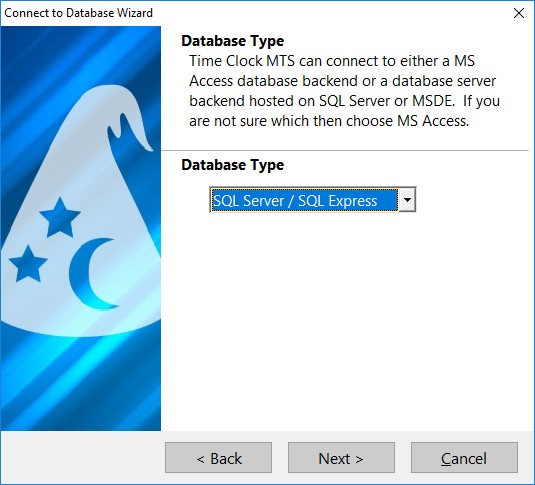
- Select the SQL Server/Express Database Type option and click the Next button.

Choosing the Database Type
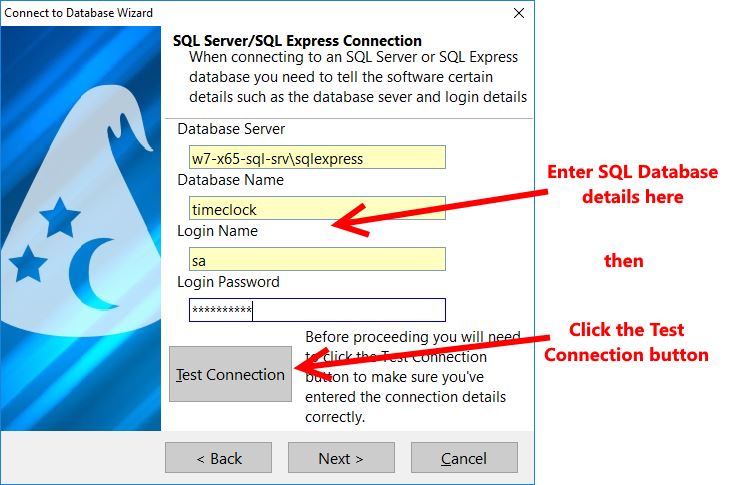
- On the next screen enter all of the SQL Server details into the fields provided. When you’re happy with the details click the Test Connection button to make sure you’ve entered the details correctly and that you can make a connection to the database. Remember that the SQL Server user must be a SQL AUTH user and must have permissions to add, modify, and delete both data and tables.
- Click the Wizard finish button and when you’re done the Time Clock MTS client should be connected to your SQL Server database.
Entering the Database Details
Time Clock MTS
The Easy Time Recording System
Time Clock MTS
The easy to use time recording software with a fully functional 30 day trial.
Buy Time Clock MTS
Purchase a registration key from our online shop. Only buy once, no monthly fees.