by Mark Nemtsas | Jul 4, 2017 | How To, Tips and Tricks
At the bottom of the Display Settings screen is a checkbox labelled Kiosk Mode. This innocuous checkbox allows you to transform a windows computer into a dedicated employee time clock. To turn on Kiosk Mode check the box and click the Save button. Log out of the administrator account and Time Clock MTS will enter Kiosk Mode. Kiosk Mode has the following features:
- Time Clock MTS will fill all the available screen space.
- Time Clock MTS will be the top-most Windows app and even sit on top of the Windows task bar.
- The window size cannot be changed, the window cannot be moved, and the window cannot be minimized.
- Users cannot exit the software without entering the time clock administrator password.
- Kiosk mode features do not take effect while you are logged in as the time clock administrator.
Essentially this means if your time clock computer is running with the software in kiosk mode and is being used with a touchscreen or without a keyboard that Time Clock MTS will be the only app that is accessible to users. Of course if there is a keyboard then users can still use certain windows keyboard shortcuts to get around these restrictions so you should strongly consider removing access to the keyboard on your dedicated time clock computers.
Kiosk Mode on Specific Computers
Kiosk mode will always effect computers running the Time Clock MTS Administrator or Stand-Alone Edition software if you’ve got the setting turned on globally. However, if you’ve got the Time Clock MTS Network Edition or the Network PLUS Edition you can turn Kiosk Mode on (or off) on a specific computer overriding the global setting. On a computer with the Time Clock MTS Client software on it log in as the time clock admin and go to the Tools->Options->System Options screen (see image below).
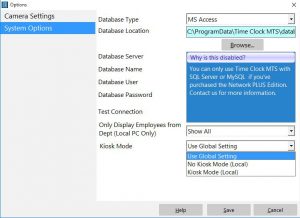
Client Kiosk Mode Setting
At the bottom of the screen there is a client specific Kiosk Mode setting. You can see there are three options available, Use Global Setting, No Kiosk Mode (Local)Kiosk Mode (Local). The first setting just uses the global Kiosk Mode setting, the other two override that setting locally. It’s probably easier to understand how the global (and local) settings work by considering some usage scenarios.
- Kiosk Mode on ALL Time Clock Computers – Turn on the global Kiosk Mode setting from the Time Clock MTS Admin software.
- Kiosk Mode on ALL Time Clock Computers and NOT the admin computer – Turn on the Kiosk Mode (Local) setting on all Client computers.
- Kiosk Mode on ONE Time Clock Client Computer ONLY – Turn on the Kiosk Mode (Local) setting on the selected Client computer.
- Kiosk Mode on SELECTED Time Clock Client Computers ONLY – On each Client computer turn on the Kiosk Mode (Local) setting.
- Kiosk Mode on ALL Time Clock Computers EXCEPT for selected Client Computers – Turn on the global Kiosk Mode setting from the Time Clock MTS Admin software and then on selected Client computers turn on the No Kiosk Mode (Local) setting.
Conclusions
If you need to dedicate a computer to being used solely as a time clock computer and want to prevent employees from accessing other apps on the computer then Kiosk Mode is exactly what you’re looking for. The ability to override the global setting for specific time clock clients means you’re not forced to use the Kiosk Mode on every time clock computer.
by Mark Nemtsas | Jun 30, 2017 | How To, Tips and Tricks
This How-To Article explains how the time clock administrator can force Time Clock MTS to run the database update routine against the time clock data file. Typically Time Clock MTS performs this routine when you install a new version of the software. This should happen automatically but under certain circumstances it can be useful to force the process. To force Time Clock MTS to run the database update routine follow the steps below:
-
- This process can only be performed using the Time Clock MTS Stand Alone Edition or the Time Clock MTS Administrator software (if you're using the Network or Network PLUS Editions). It also cannot be used in versions of the software prior to Version 6.1.1.
- Once Time Clock MTS is running Log in as the Administrator.
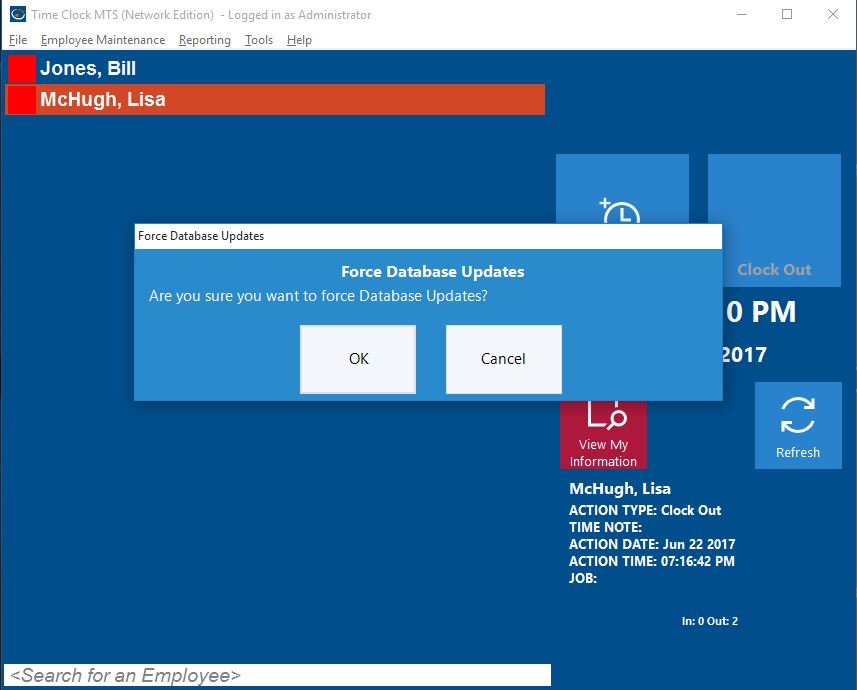
- Hold down the ALT and the U key on your keyboard. You'll then be shown the screen below:
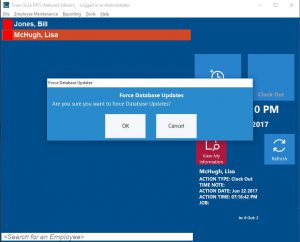
Forcing Time Clock Database Updates
- Click the OK button and Time Clock MTS will then perform the required updates.
by Mark Nemtsas | Apr 11, 2017 | How To, Tips and Tricks
Time Clock MTS has a useful feature that can be used in the event of an emergency evacuation or fire. The time clock administrator can immediately print out an employee status report which can then be used to determine who should (or should not) be present after an evacuation. Here’s how to print the report:
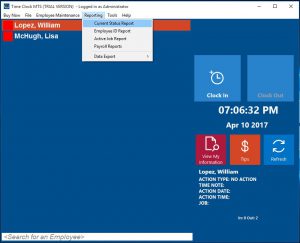
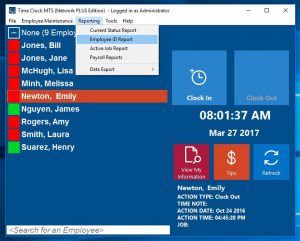
The Current Status Report Menu
- When using the Time Clock MTS Administrator Software or the Client software with the Reports User enabled go to the Reporting->Current Status Report Menu (see image above).
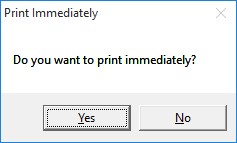
Printing Immediately
- You’ll be asked if you want to print the report immediately (see above). Choose the Yes option and you’ll be given the chance to select a printer (see image below) on which your report should appear shortly.
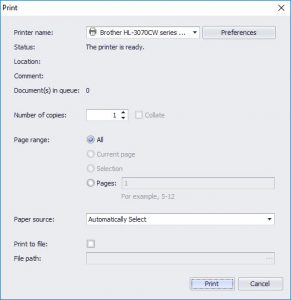
Choosing a Printer
That’s all there is to it. You might be wondering why users need to log in before being able to print this report? The answer is that when it was available without logging in first we had many (many), oh so many reports of employees printing the report accidentally (or perhaps deliberately) in their day to day use of Time Clock MTS. Hence, it’s now only available when logged in.
This guide is just one of many you can find over at our Tips, Tricks, and How-To Guides page
by Mark Nemtsas | Mar 27, 2017 | How To, Tips and Tricks
Running the Employee ID Report
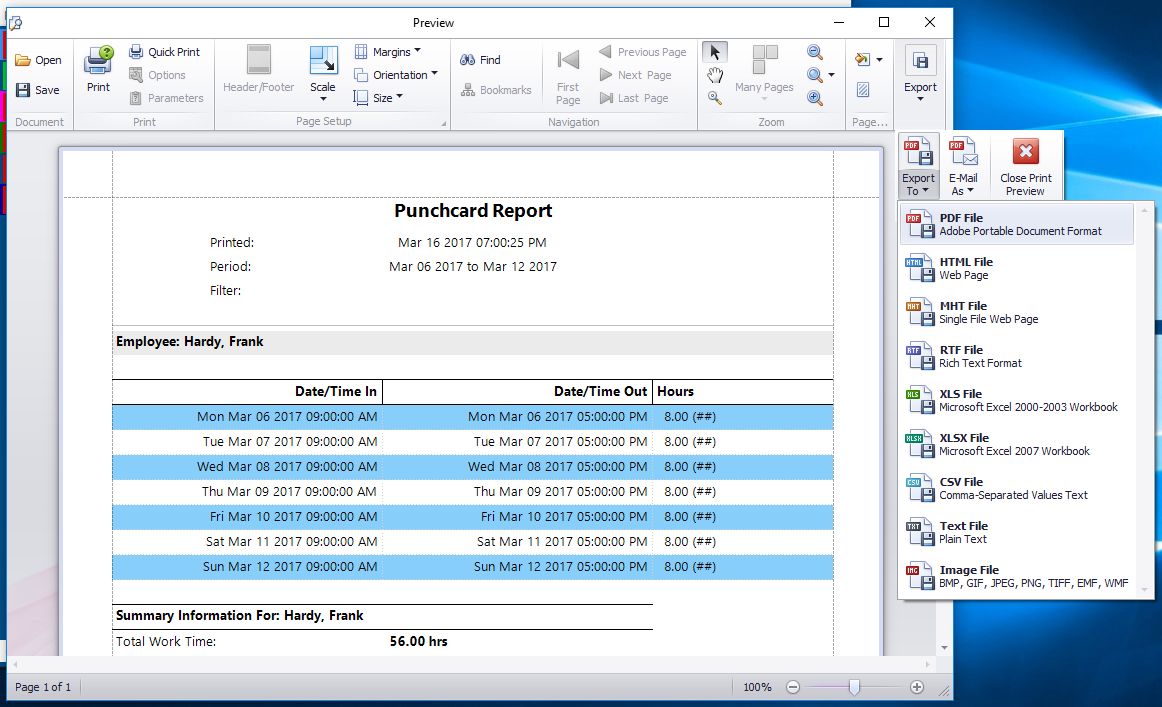
This Time Clock MTS How-To article explains how to email payroll reports using Time Clock MTS Version 6 and later. Note that this will only work if you’re NOT using web-based email. So you’ll need to be using desktop email software like Outlook or Thunderbird or The Bat!. If you’re using web-based email like GMail or Hotmail then you’ll have to export your time clock reports to one of the many available formats and attach them to an email manually. If you’re using a desktop email program like Thunderbird that allows you to send email using a Hotmail or GMail account then YOU CAN EMAIL TIME CLOCK REPORTS using Time Clock MTS.
Time Clock MTS can create payroll reports and attach them directly to an email in many different file formats including PDF, HTML, Rich Text (RTF), Excel (XLS and XLSX), comma separated (CSV), plain text, and various direct image formats such as bitmaps, JPEG, and PNG.
Here’s how to email a Time Clock MTS Payroll Report:
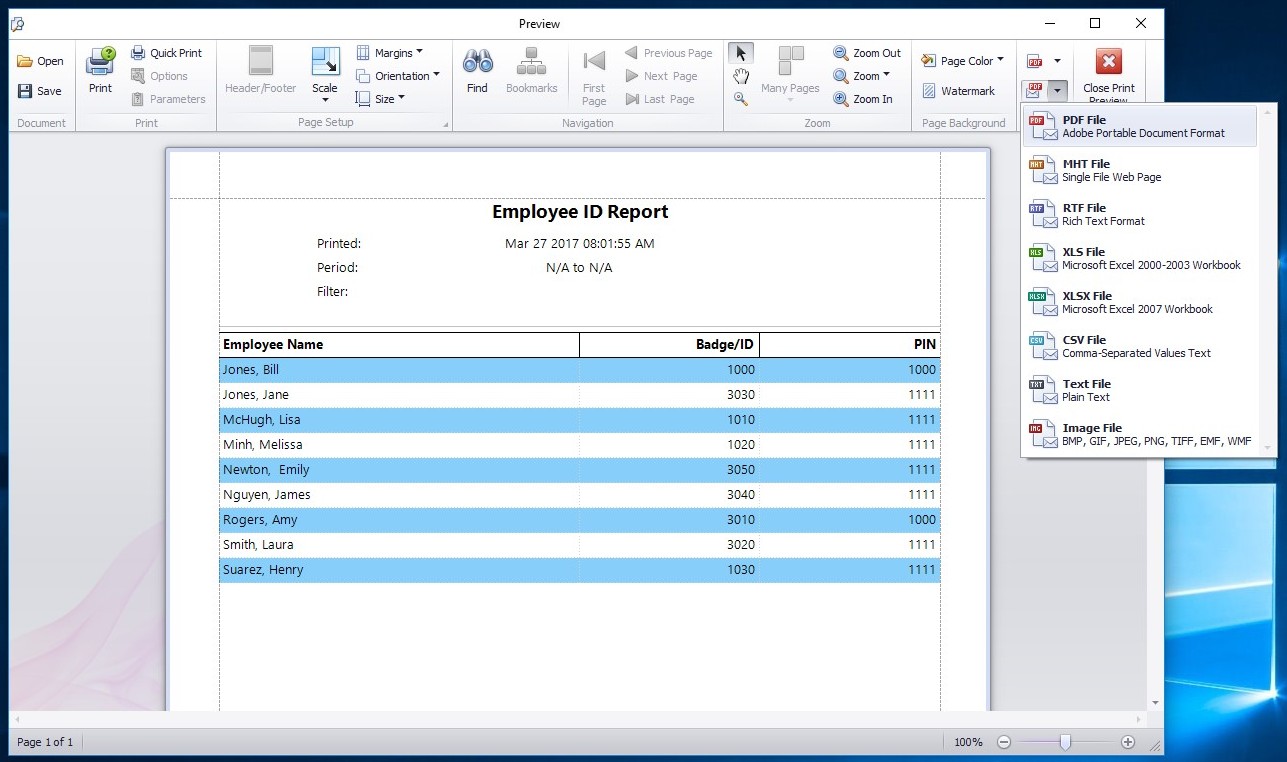
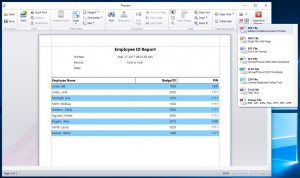
- Log into Time Clock MTS as the administrator or as the reports user and run a payroll report. In this example we’re going to run the Employee ID Report (see image at the top of this article).
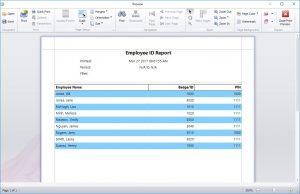
The Employee ID Report
- When the report is generated it’ll be shown to you in the reporting window (see above). Look for the Email Report button on the far right of the toolbar and click it. When clicked a drop down will appear showing you the various file formats the report can be emailed in (see image below).
Emailing the Report as PDF File
- Choose the format you want to email (we’re choosing PDF here) and Time Clock MTS will prompt you for a file name for the report (see image below).
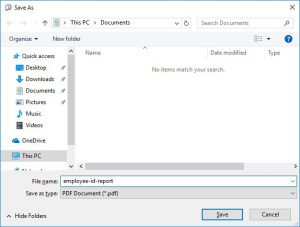
Choosing a File Name
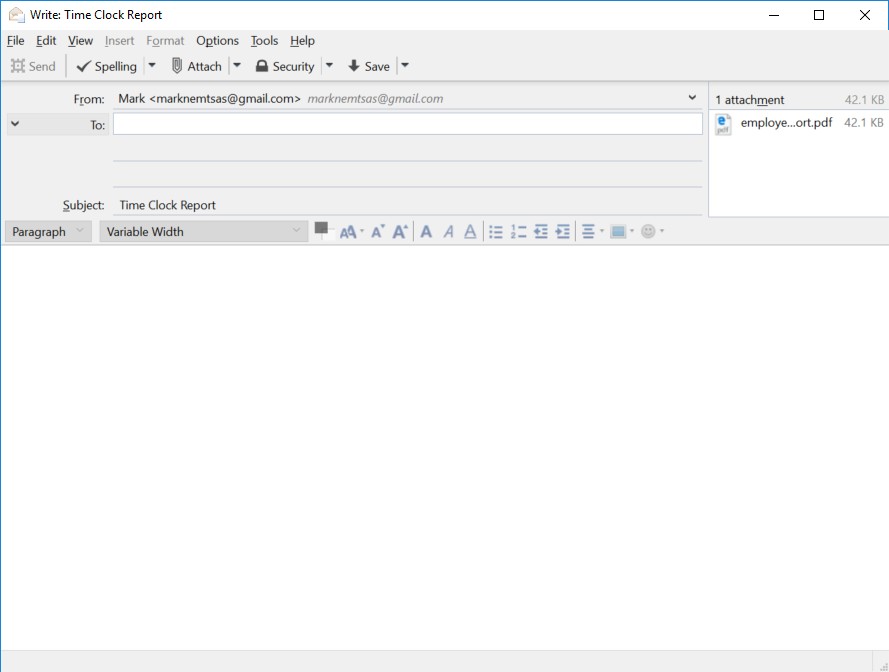
- Give the report file a name, click the SAVE button and in a second or two your email client will pop up a new email message with the report file attached to it (See below).
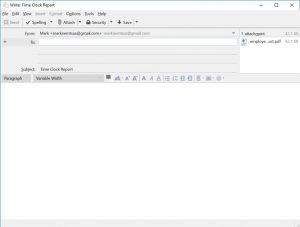
Ready to Email!
- Now you’re ready to add some text to the email and send it!
by Mark Nemtsas | Mar 17, 2017 | How To
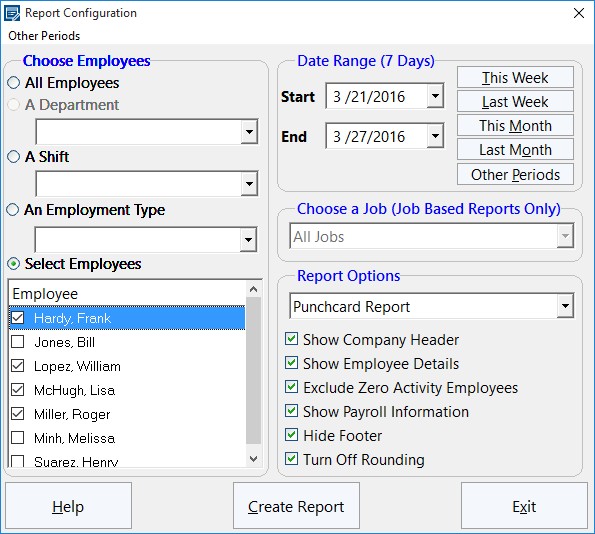
The Payroll Reports Configuration Screen
This Time Clock MTS How-To article explains how to export payroll reports for Time Clock MTS Version 6 and later. For earlier versions of the software read this article.
It is a common requirement that payroll reports from any employee attendance or time clock tool can be exported to other programs for further data processing or distribution about the company or to external service providers. Time Clock MTS is able to export all reports to a range of different formats including PDF, HTML, Rich Text (RTF), Excel (XLS and XLSX), comma separated (CSV), plain text, and various direct image formats such as bitmaps, JPEG, and PNG.
Here’s how to export a Time Clock MTS Payroll Report:
- Log into Time Clock MTS as the administrator or as the reports user and navigate to the Reporting->Payroll Reports menu.
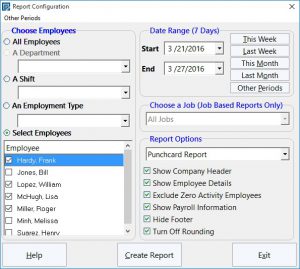
- You’ll then be shown the Payroll Reports Configuration screen (see image at top of this page). Choose your report criteria (employees, departments, shifts, date range or job number) and one of the many payroll reports available in Time Clock MTS.
- Once you’re happy with the report selections click the Create Report button. Your report will be created and you’ll see a report something like that shown below:
A Payroll Report
- On the far right of the toolbar at the top of the report is the Export button. Click that and you’ll be given the chance to select what format you want to export your payroll report to. See the image below.
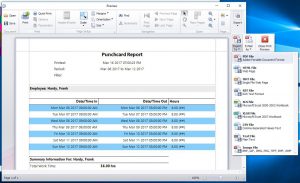
Payroll Report Export Options
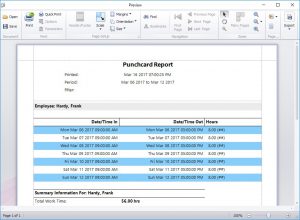
- You’ll see there are a number of export options. It’s simply a matter of choosing one of the options and your report will be exported to the chosen format and you’ll be given the opportunity to view your exported file once the process is complete. In this example we chose to export our report to the Adobe PDF format and we were able to view the exported file as shown below:
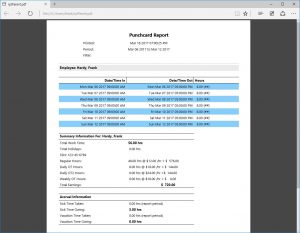
The Exported Payroll Report in PDF Format
Full List of Export Formats Available
All Time Clock MTS Reports can be exported to the following formats:
- Adobe Portable Document Format(PDF)
- Web Page File (HTML)
- Single File Web Page (MHT)
- Rich Text (RTF)
- Excel Spreadsheet (XLS and XLSX)
- Comma Separated Text (CSV)
- Plain Text (TXT)
- Image format (BMP, GIF, JPEG, PNG, TIFF, EMF, WMF)
Time Clock MTS also includes a system for creating your own text based export formats for use in external payroll systems such as Quickbooks, Sure Payroll and Union Bank Payroll. For more information on creating your own export formats read the Data Export help topic.
by Mark Nemtsas | Sep 8, 2016 | How To
This post details the first way that the Employee List Interface of Time Clock MTS can be used with some sort of data reader (such as a barcode scanner, magnetic card reader, or RFID reader). This method relies on badges, bar codes, or RFID fobs being encoded with the employee name and a couple of other characters.
Badge Format
You must be able to print your barcodes, or encode your magnetic cards or RFID badges to a standard format for them to function with Time Clock MTS while it is operating with the Employee List Interface. The required format begins with the standard = character, is followed by each letter of the employee’s full name set on the Employee Information screen, and then concluded with the + character.
Thus, an employee with the name Hardy, Frank would need to be encoded as:
=Hardy, Frank+
While an employee with the full name Bob Jones would need to be encoded as:
=Bob Jones+
Clocking In and Out
Clocking in and out is simply a matter of encoding your barcode, magnetic cards, or RFID fob or badges as described above for each employee in Time Clock MTS. Once you’ve done that, plug the device into your computer and ensure it’s working correctly. You’ll need to make sure it’s either plugged into the keyboard port on the PC or in the case of a USB device make sure your “software wedge” is installed. To test if things are working correctly start up Windows Notepad and make sure it is the active Windows application. Scan your properly encoded employee barcode, card, or RFID badge and some text should appear in Windows Notepad that looks something like what we talked about earlier, =Bob Jones+ where Bob Jones is the Time Clock MTS employee name.
Once you’ve verified that the badges are working correctly start up Time Clock MTS and make sure it’s the active Windows application. Scan one of the employee badges and you should see that employee either clocked in or out. The software will clock someone in who is clocked out, and vice versa for someone who is clocked out.
Page 2 of 16«12345...10...»Last »